


 |
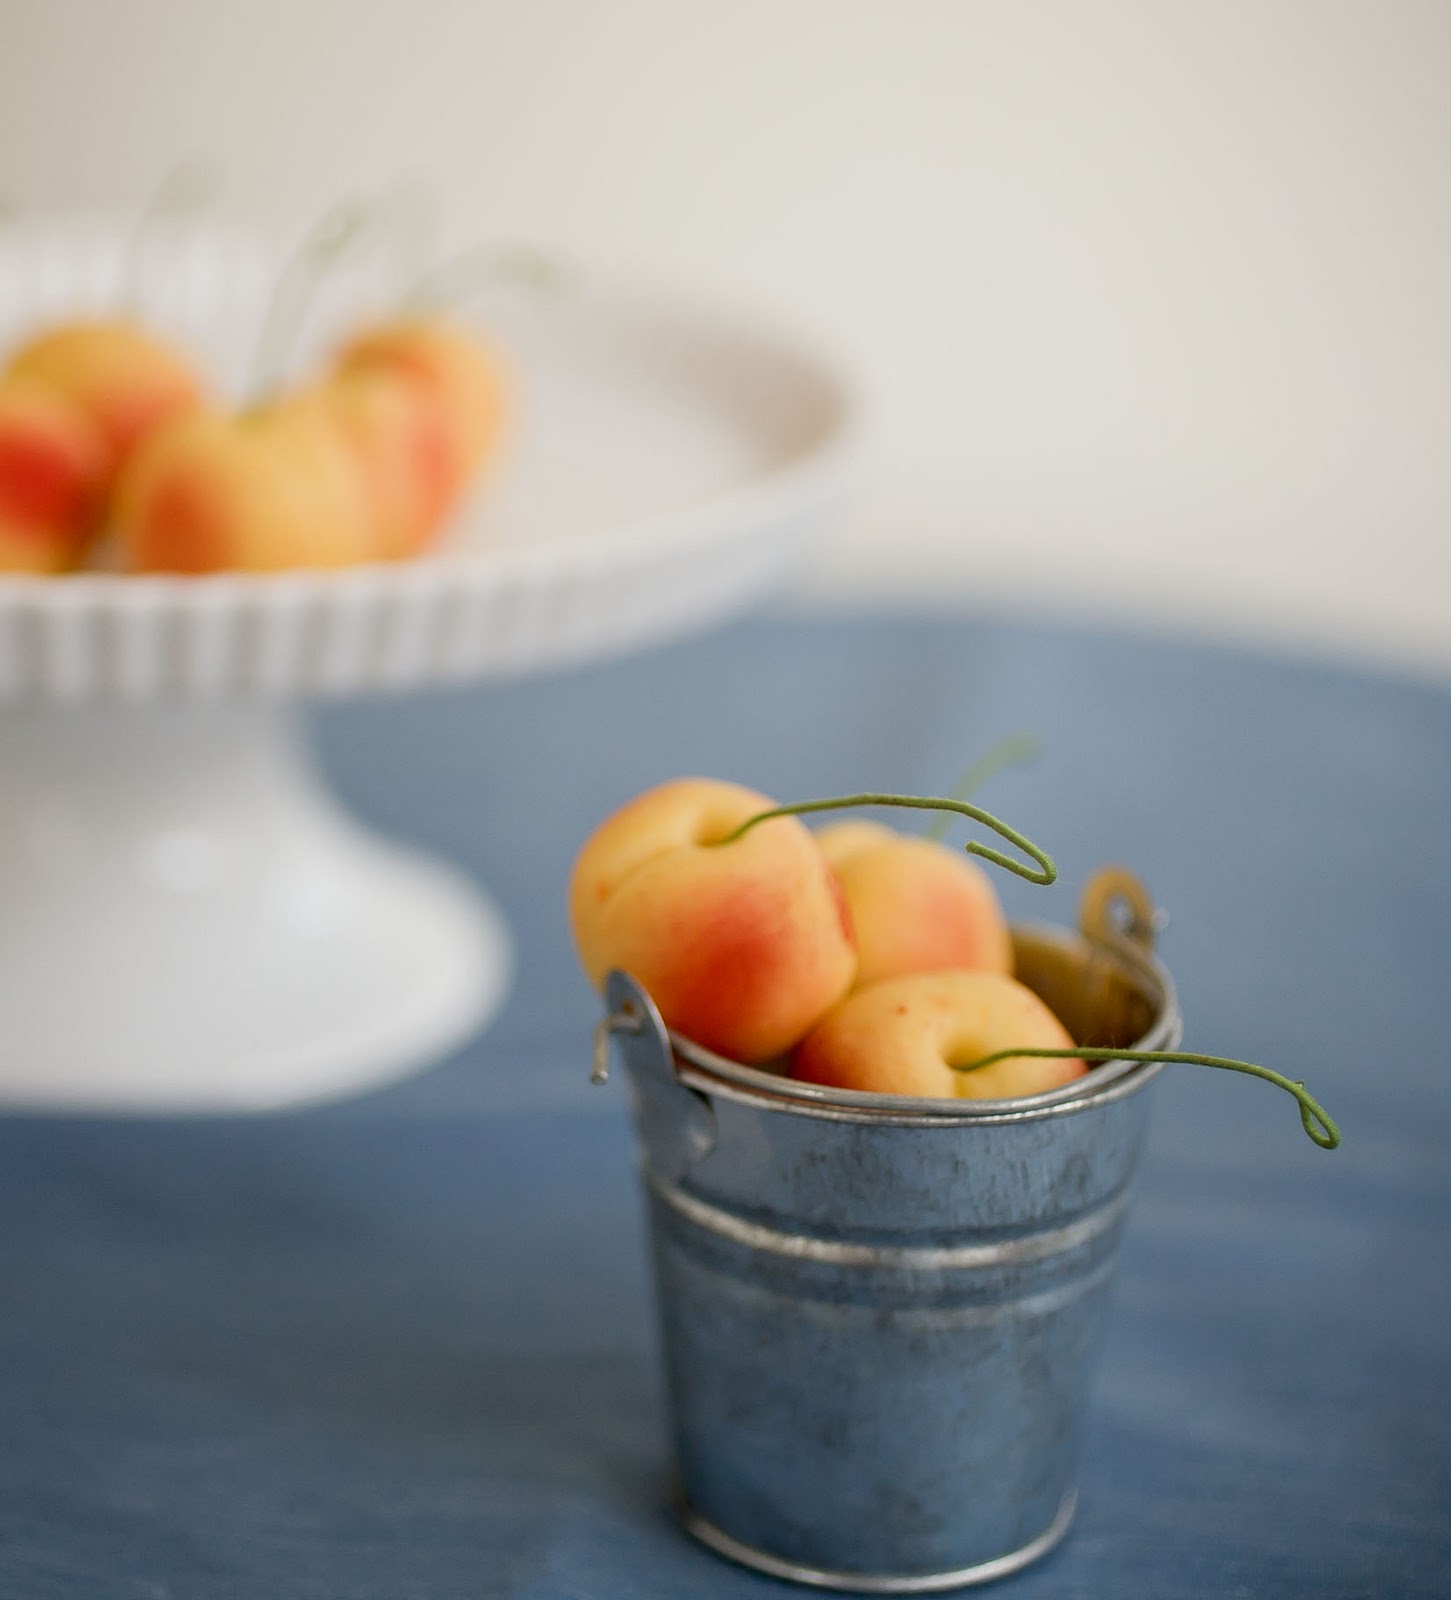
| Marzipan Cherries
The tradition of modeling marzipan (almond paste candy) for the holidays is an old one and if found in many different cultures. The Italians make it and so do many Northern European countries-Germany, Sweden etc. Hand made marzipan is an art that has sadly waned. Most that you see these days is machine made and with a low quality of almond paste. The colors are sprayed on and for the most part they are just ghastly.Hand making marzipan is not difficult to do and a fantastic thing to make with kids as it doesn’t require a stove or oven- and mistakes can just be nibbled out of sight.
Years ago I had a marzipan business with a woman named Kim Jurado that we called Bella Dulce. We made gorgeous marzipan that we put into small rustic wire baskets from artisans in Mexico, or tiny wooden crates to look like imported fruits. One of my favorites was to build the marzipan into topiaries that brides would use as centerpieces. Stephen Spielberg had us make tall gorgeous topiary cones for his movie Armistad and our beauties also made it into Dean and Deluca and Williams Sonoma catalogs. In those days we had a legion of workers hand making marzipan. All day long hands were rolling, shaping and dusting lumps of almond paste into rows and rows of beautiful bright almond candies. It was an artisanal business before it was vogue.
Marzipan is made from blanched almonds and sugar into a dough. It’s possible to make it from scratch, but to be honest, I don’t find it time or cost effective. I’ve tested a lot of marzipan over the years, and by far the best is made by American Almond (see Holiday Resource page). A lot of marzipan out there has a high sugar content, leaving it super sweet and lean on good almondy flavor. American Almond has the highest almond to sugar ratio which makes it heavenly. Marzipan does not come cheap but most fruits are about a half to one ounce each, so a pound goes a long way.
 There are simple tools needed to shape the dough, but mostly you can get by with what you have around the house. Toothpicks, a knife and a dowel stick work well- or you can purchase modeling tools that are typically used for clay. What you will need to get is powdered food coloring and gel food coloring, paint brushes, cloth covered wire and paper leaves- all of these things can be purchased at NY Cake and Baking Supply.
 Marzipan is such a great medium that you can do many other things with it. The fruits are classic, but little Santa hats are awesome, or Xmas light bulbs. It’s great for making leaves and mushrooms for Buche de Noel or reindeer antlers for cupcakes.
Unused marzipan can be saved for future use if stored properly. Wrapped tightly and put into an airtight container it will keep it for several weeks. For longer keeping it can go in the fridge.
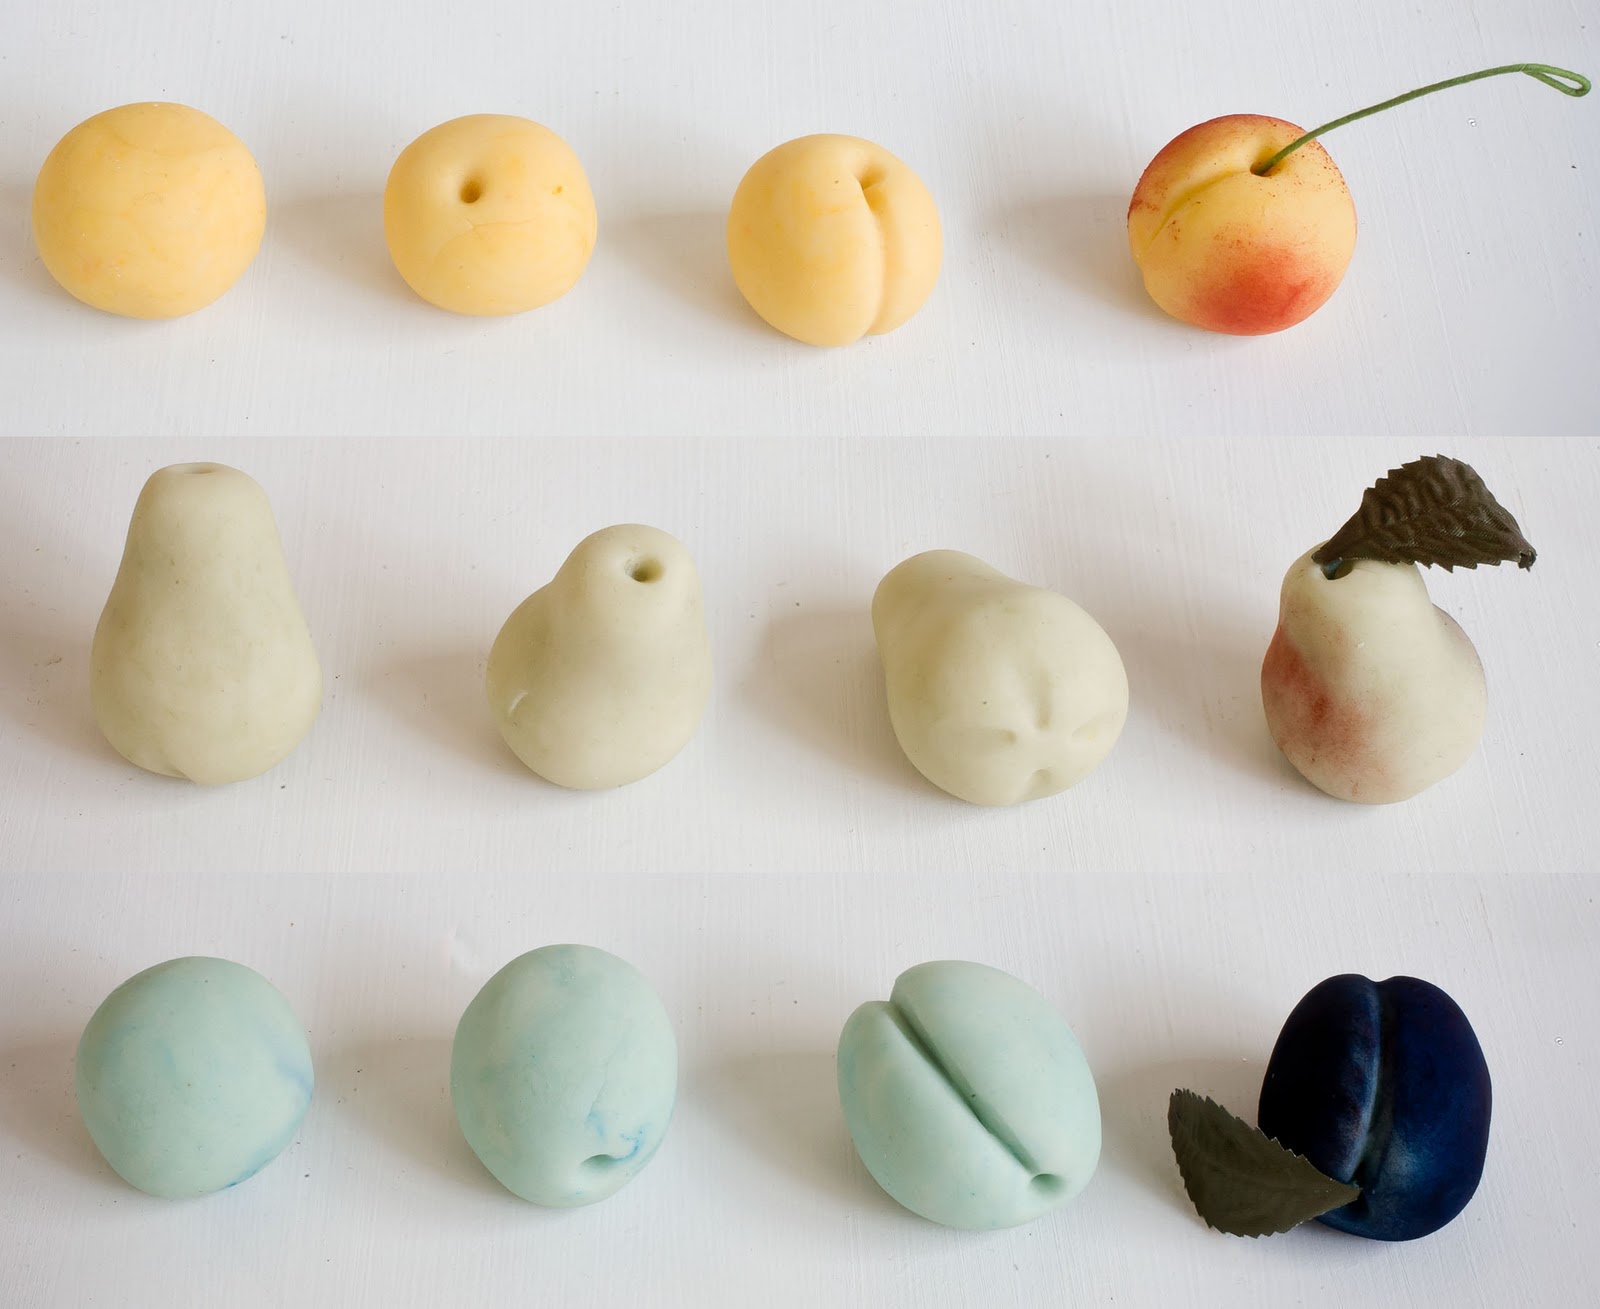
 How to Make Marzipan Cherry, Pear and Plums
yields 20-30 fruits depending on size
1# American Almond Marzipan
juniper green food paste
golden yellow food paste
royal blue food paste
red powdered food coloring
purple or burgundy powdered food coloring
soft paint brush-like a blush brush
cone tool (or rounded toothpick)
veining tool (or butter knife)
green florist wire 24 gage
small paper rose leaves
Queen Anne Cherry
Paste food coloring is very intense, so start out with tiny dots and add on from there. You can always add more. Use a toothpick dipped into the color pot and dot the marzipan then knead through.
The cherries should have a soft golden yellow color.
Next follow the grid above. Pinch off a small chunk and roll between your palms to make a ball, then using the cone tool make an indentation on the top- or use a toothpick to ream in a dent. Then with the veining tool or the back side of the butter knife, draw down from the hole and make the crease of a cherry cheek.
To color tap out a small amount of red powder color onto a plate. Using just a small amount dab the brush into the color, just as you would if you were applying powdered blusher. With a circular motion paint on the “cheeks” of the cherries.
Finish off with a 3″ length of wire. Fold down one end to make a knob and then curve the stem into a natural shape. Tuck into the hole in the top.
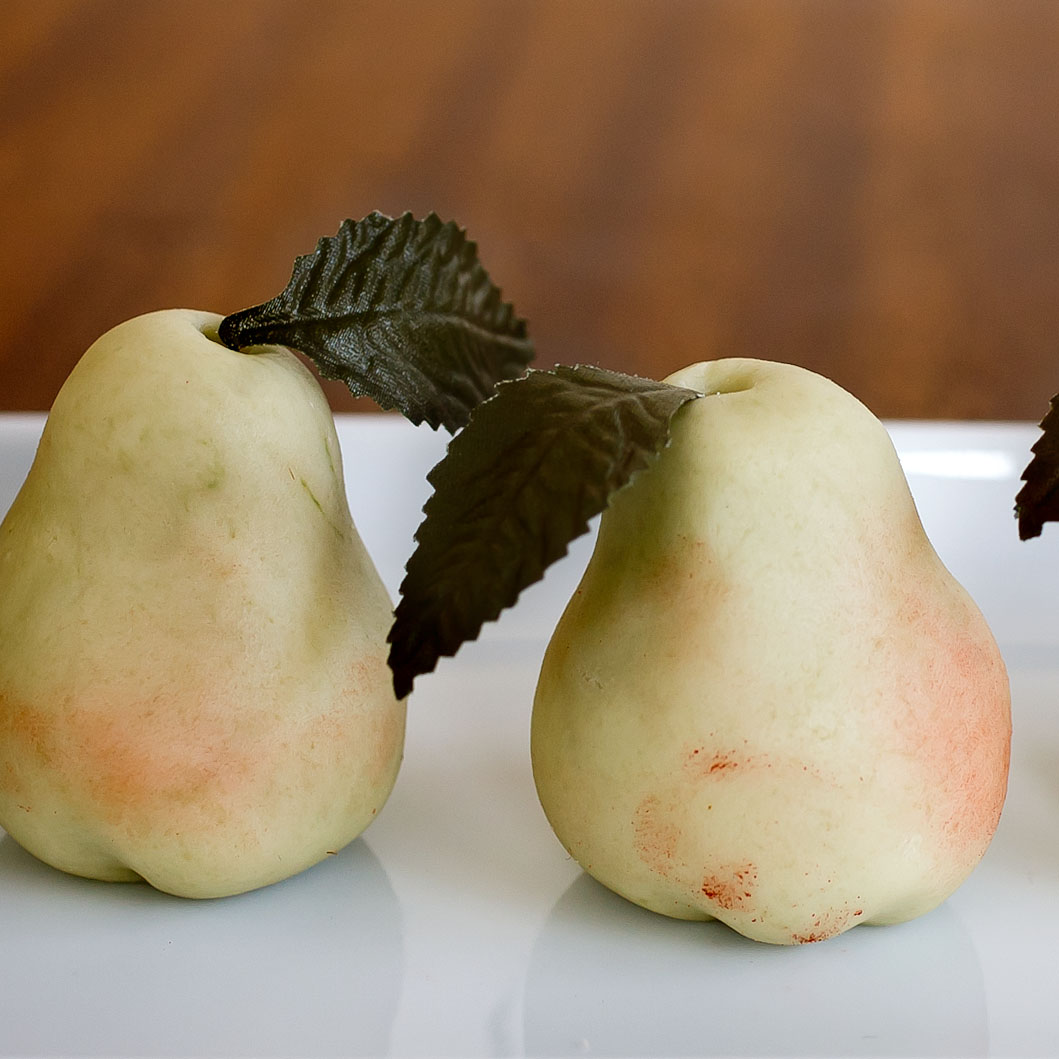
Pear
I used the juniper green for the paste color. Follow the directions above to tint the marzipan.
To make the pear shape first roll a knob of dough into a ball. Then, using your fingers coax one end into the neck of the pear. Then give a little tap on the bottom to square it off just a little bit.
Pierce the top of the pear to make the stem dent. Then on the bottom of the pear create four dents which create that round bottom look a pear has.
Dust just a liiiiiiitle bit of red onto the sides of the pears and finish off the top with a paper leaf.
Plums
Plums have an ashy blue grey line in the crease which I personally love. Color the marzipan a soft blue using the royal blue paste.
Then roll the marzipan into a ball and then into an oblong ball.
As with the cherry make a dent at the top and crease down the length of the plum. Plums have deeper creases though. I make a fairly keep crease and then soften the cut edge with my fingers. I then pinch the seam closed a little to give that cheeky look.
Dust the plums with the color and for these it takes a lot, avoiding getting color into the crease. Finish off with a paper leaf.
********************
Once made the marzipan can be left out to dry a little. Left out indefinitely they will turn to stone. If you intend for them to be eaten, or given as gifts, keep them under plastic or present in a clear plastic box or cello bag. Both of these can be purchased at Glerup.
*see resource page for links to Glerup, NY Cake and American Almond*
|
GF
{Day 2} Candied Fruits For Sweet and Savory Treats
The Winter fruits can become jewels under the right conditions. There is magic in the glistening, translucence that comes from the candying process. As the days grow gray and the light turns to darkness sooner and sooner I love the deep vibrant colors that sparkle on the plate.
The real miracle is it’s so easy to do and delightful to give.
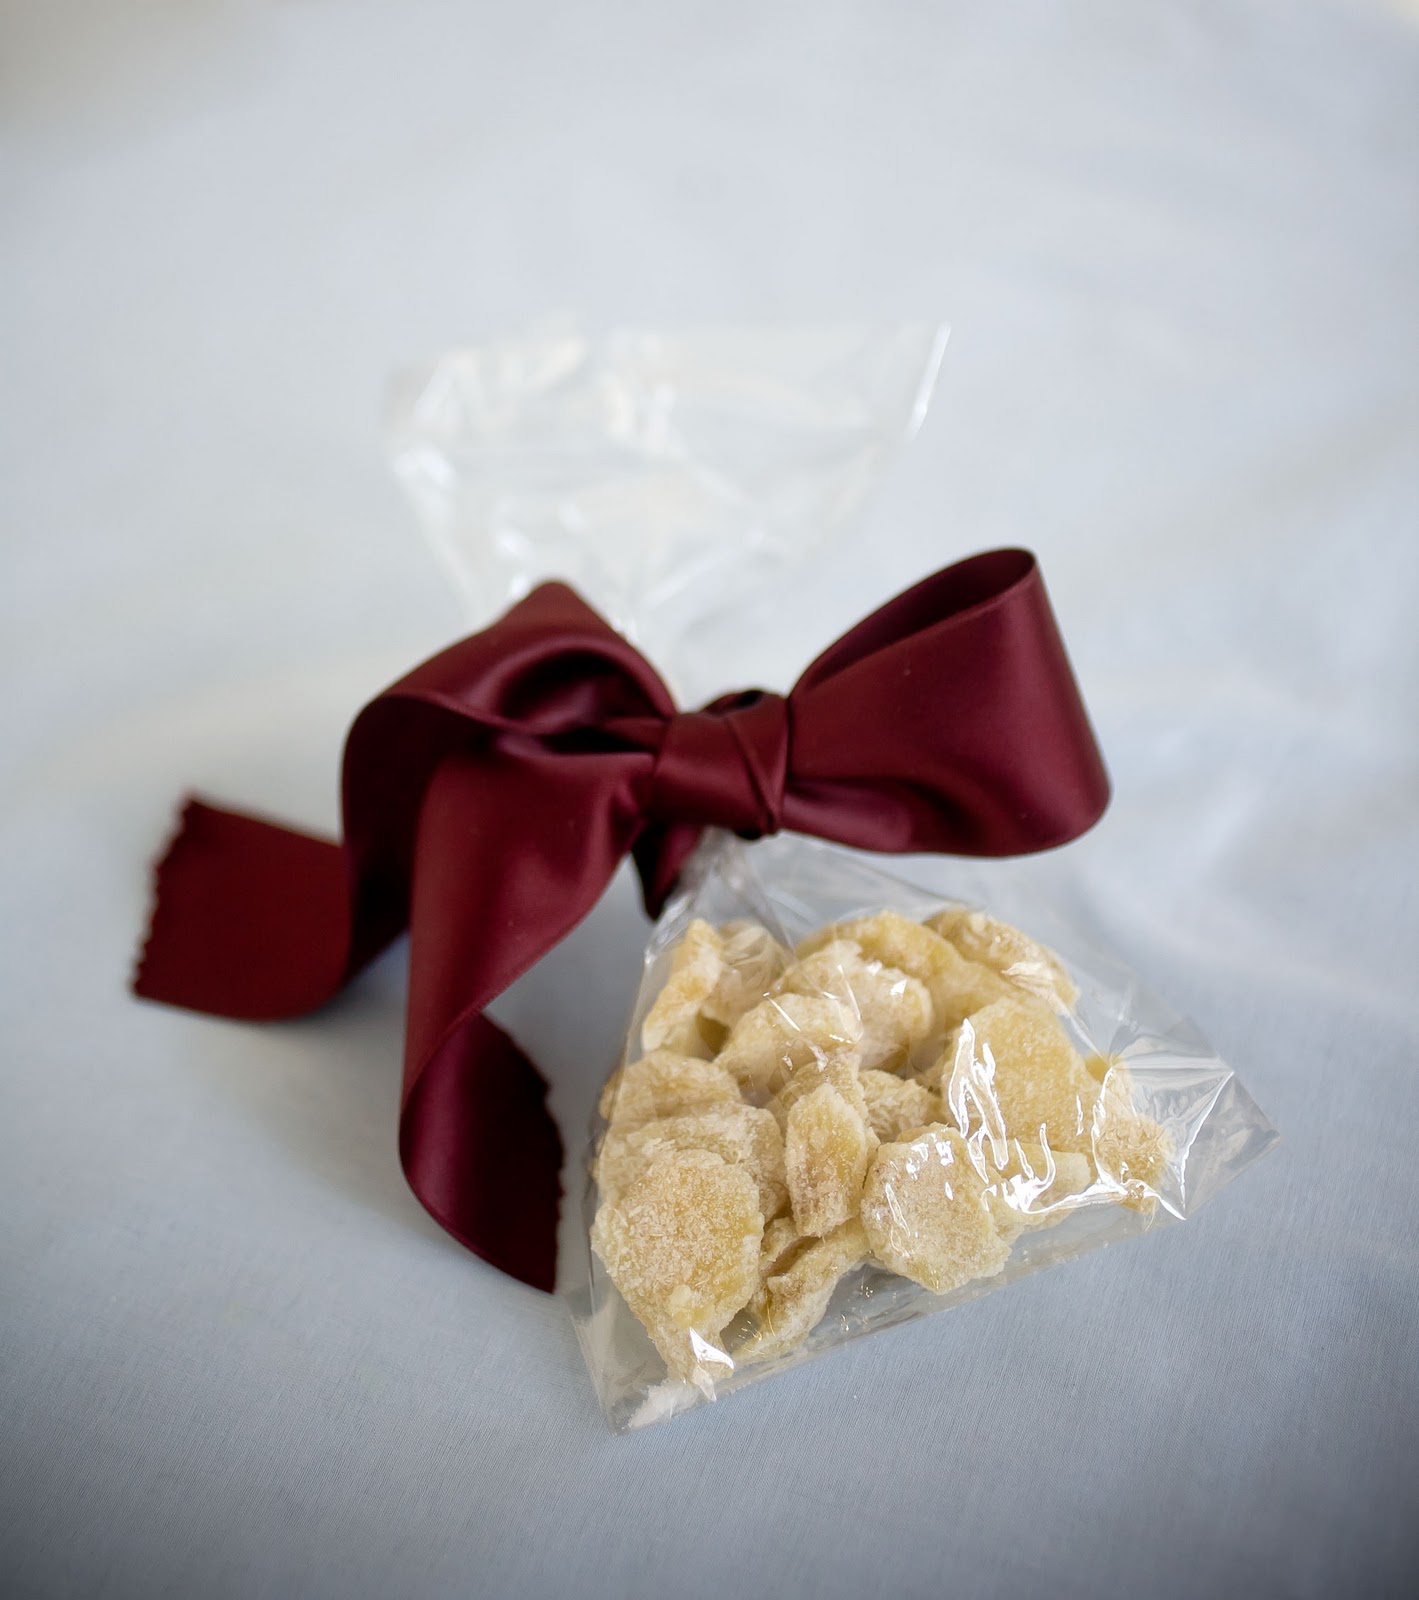
I’ve come up with three different candied fruits. Pear Slices, Spicy Tangerine Sauce and Candied Ginger. Yeah, I know, the ginger is nothing really new- but the resulting leftover syrup you get from the process is going to be used for a future post for something I promise you will adore- so don’t discount the ginger.
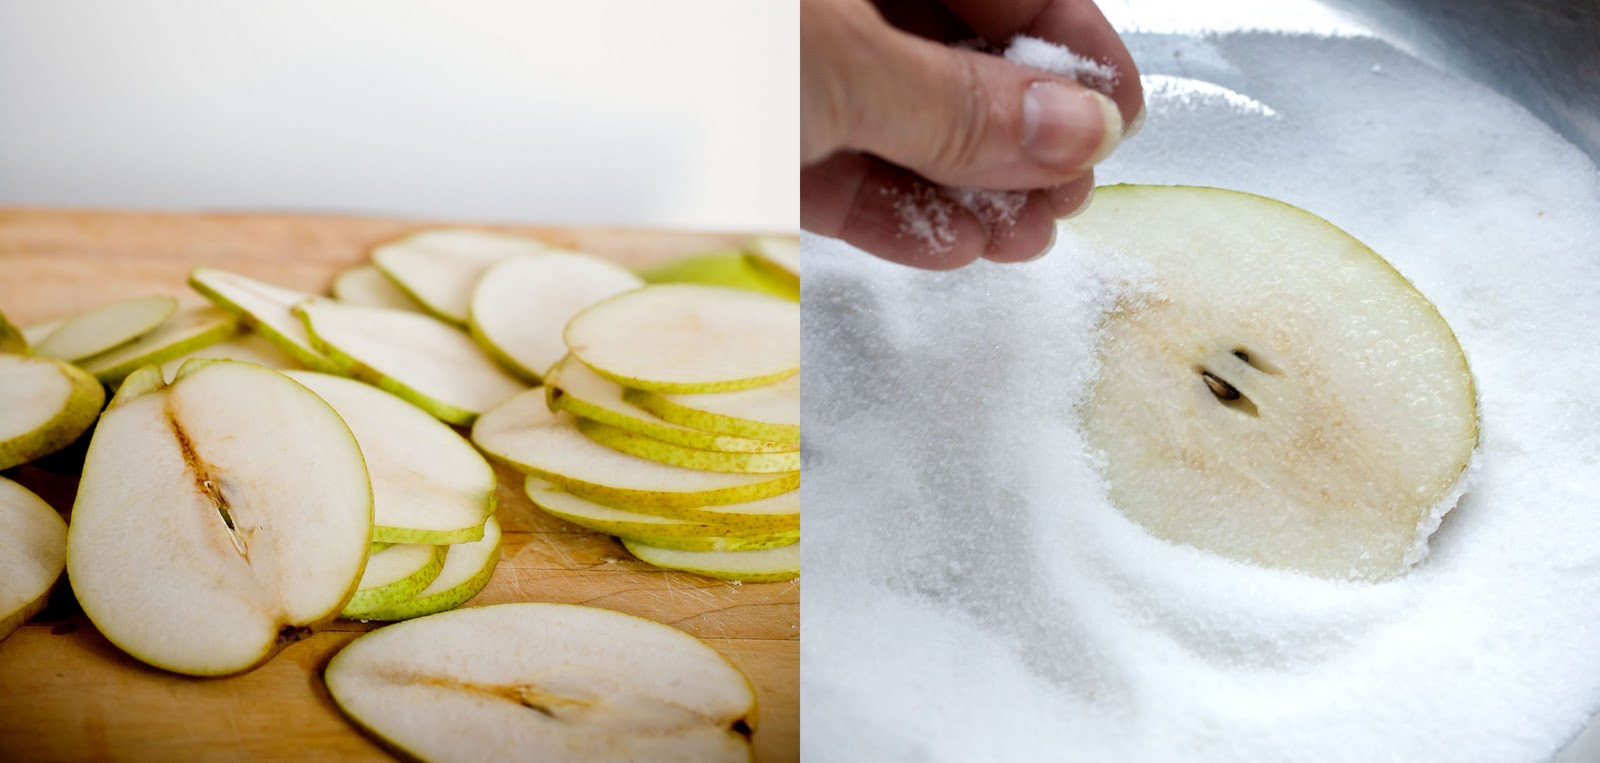
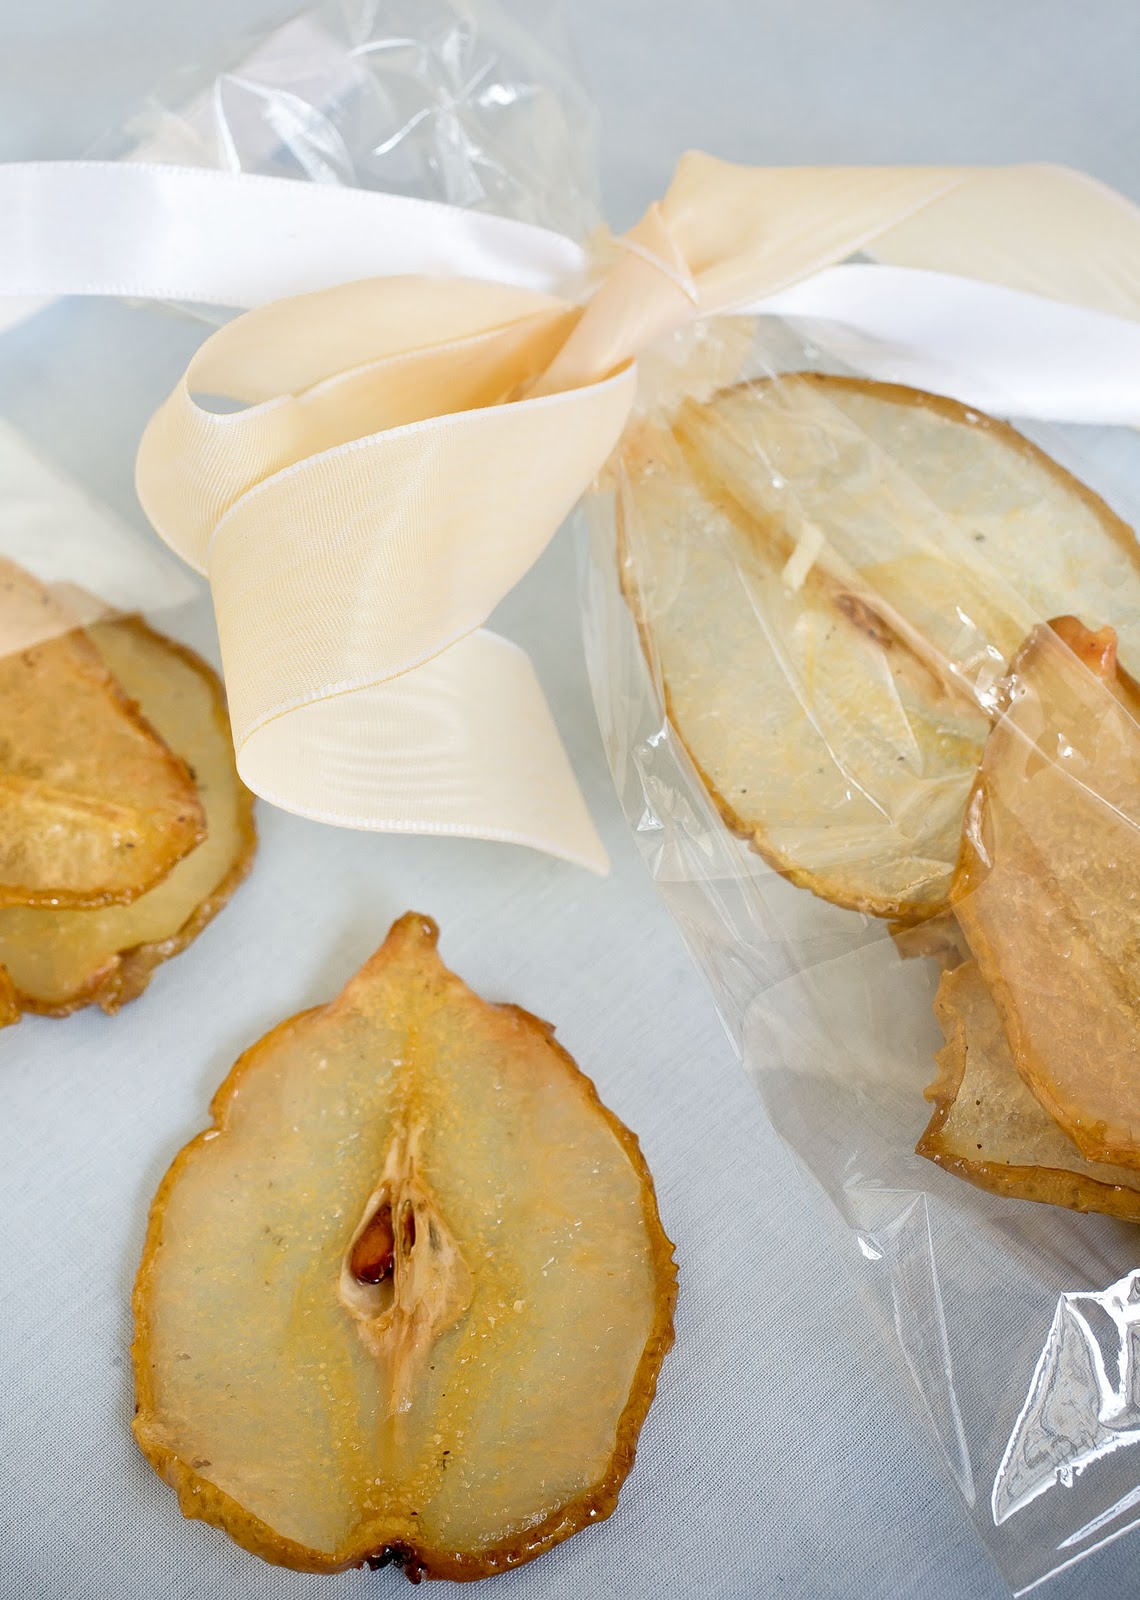
Making jewels by candying fruit is basically a two step process. First the fruit is combined with sugar, either directly in the case of the pears, or in a syrup. Next comes the heat. The pears are baked for a short while and then flipped, and the ginger and tangerines simmered in the syrup until it reaches it’s translucency.
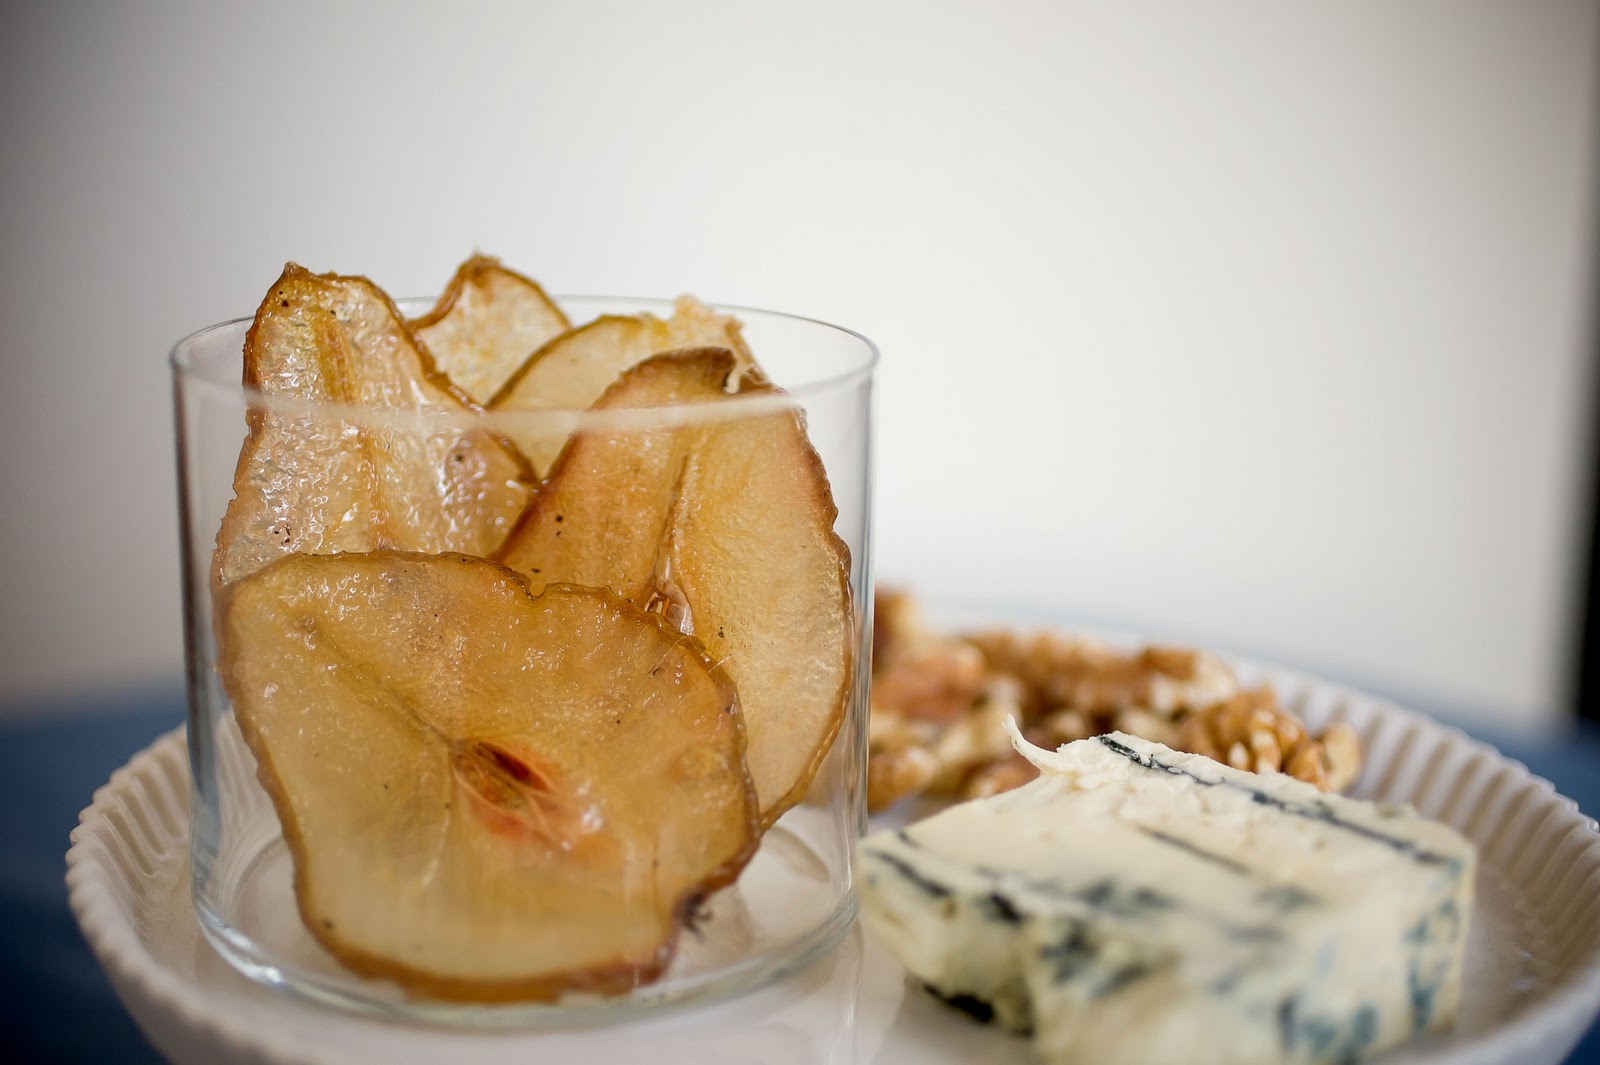
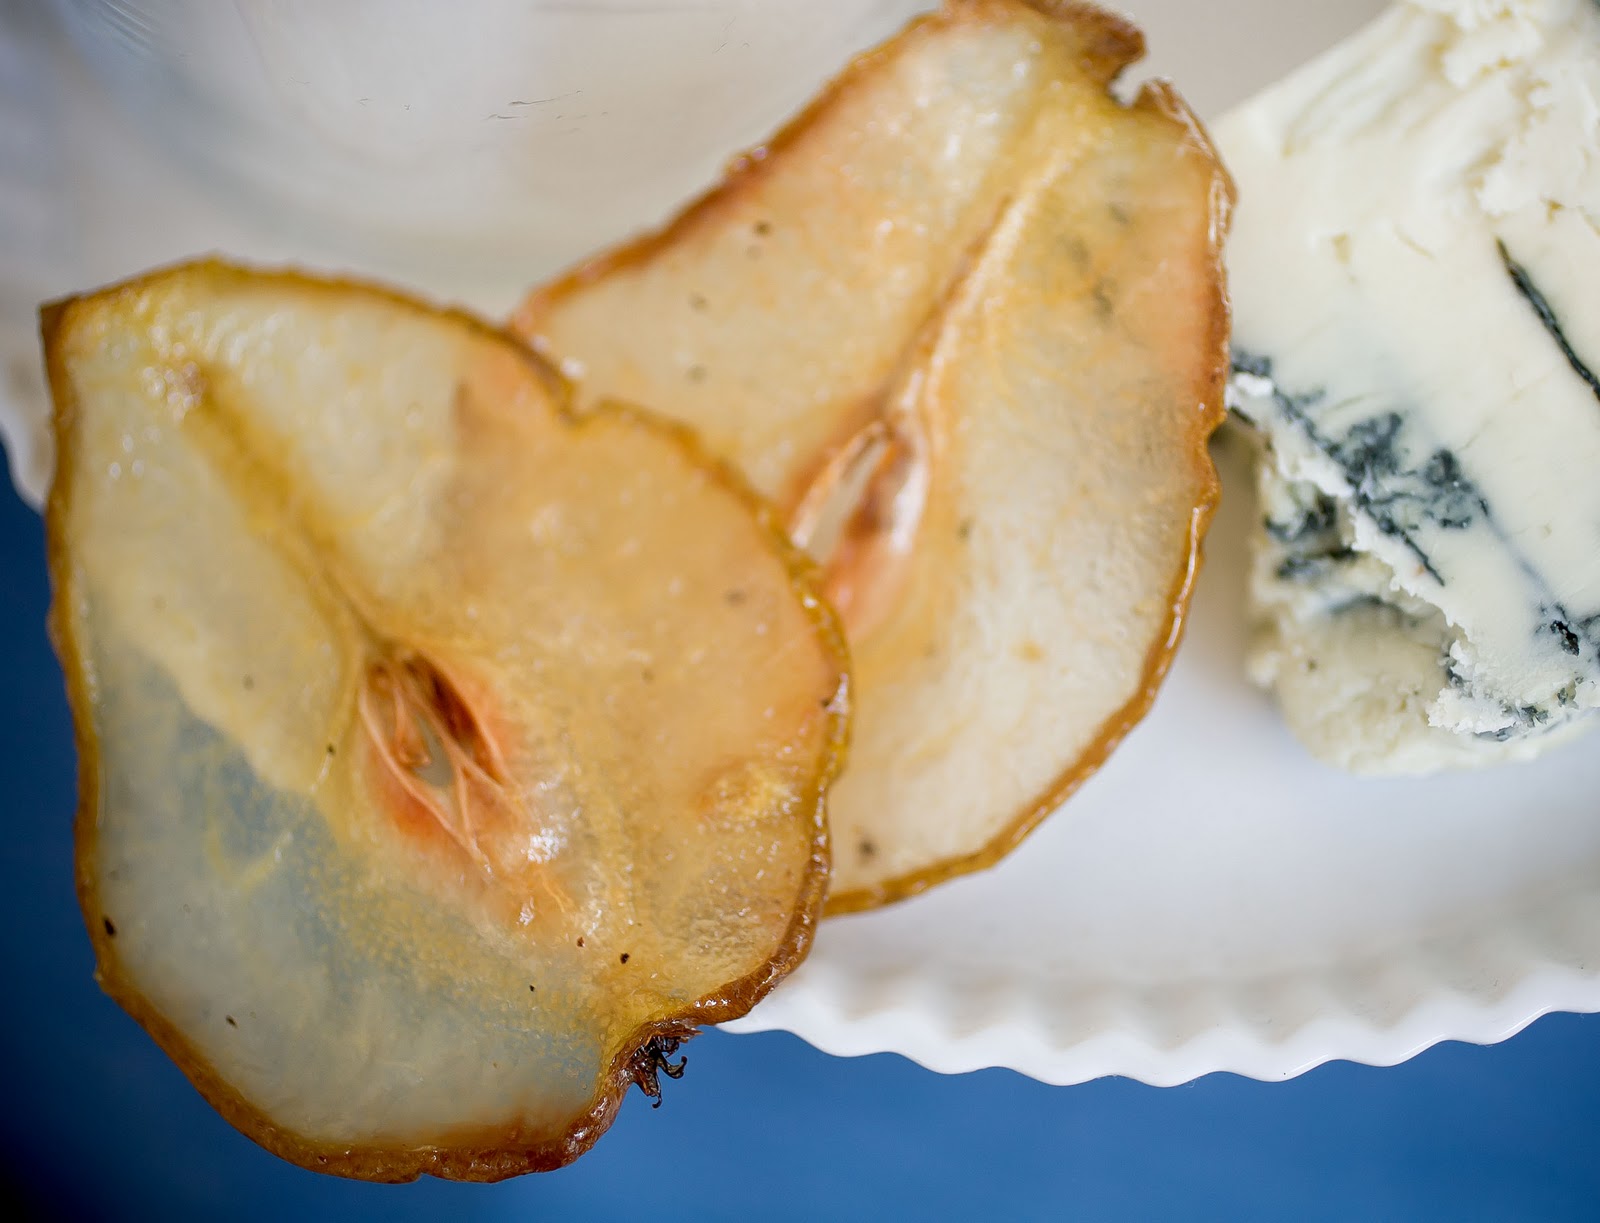
I’ve paired the pears here with some blue artisinal bleu cheese and toasted walnuts. A lovely gift is to put the trio into a package. But the pears are also great along with a chunk of high quality chocolate for a dessert plate. My friend Priscilla Martell, a cookbook writer, chef and all around exceptional person- shared with me a link to an artisanal cheese maker in Connecticut for Cato Corner Farm. She says, “One of those little local success stories.” If Priscilla recommend them I suggest you might give them a look see.
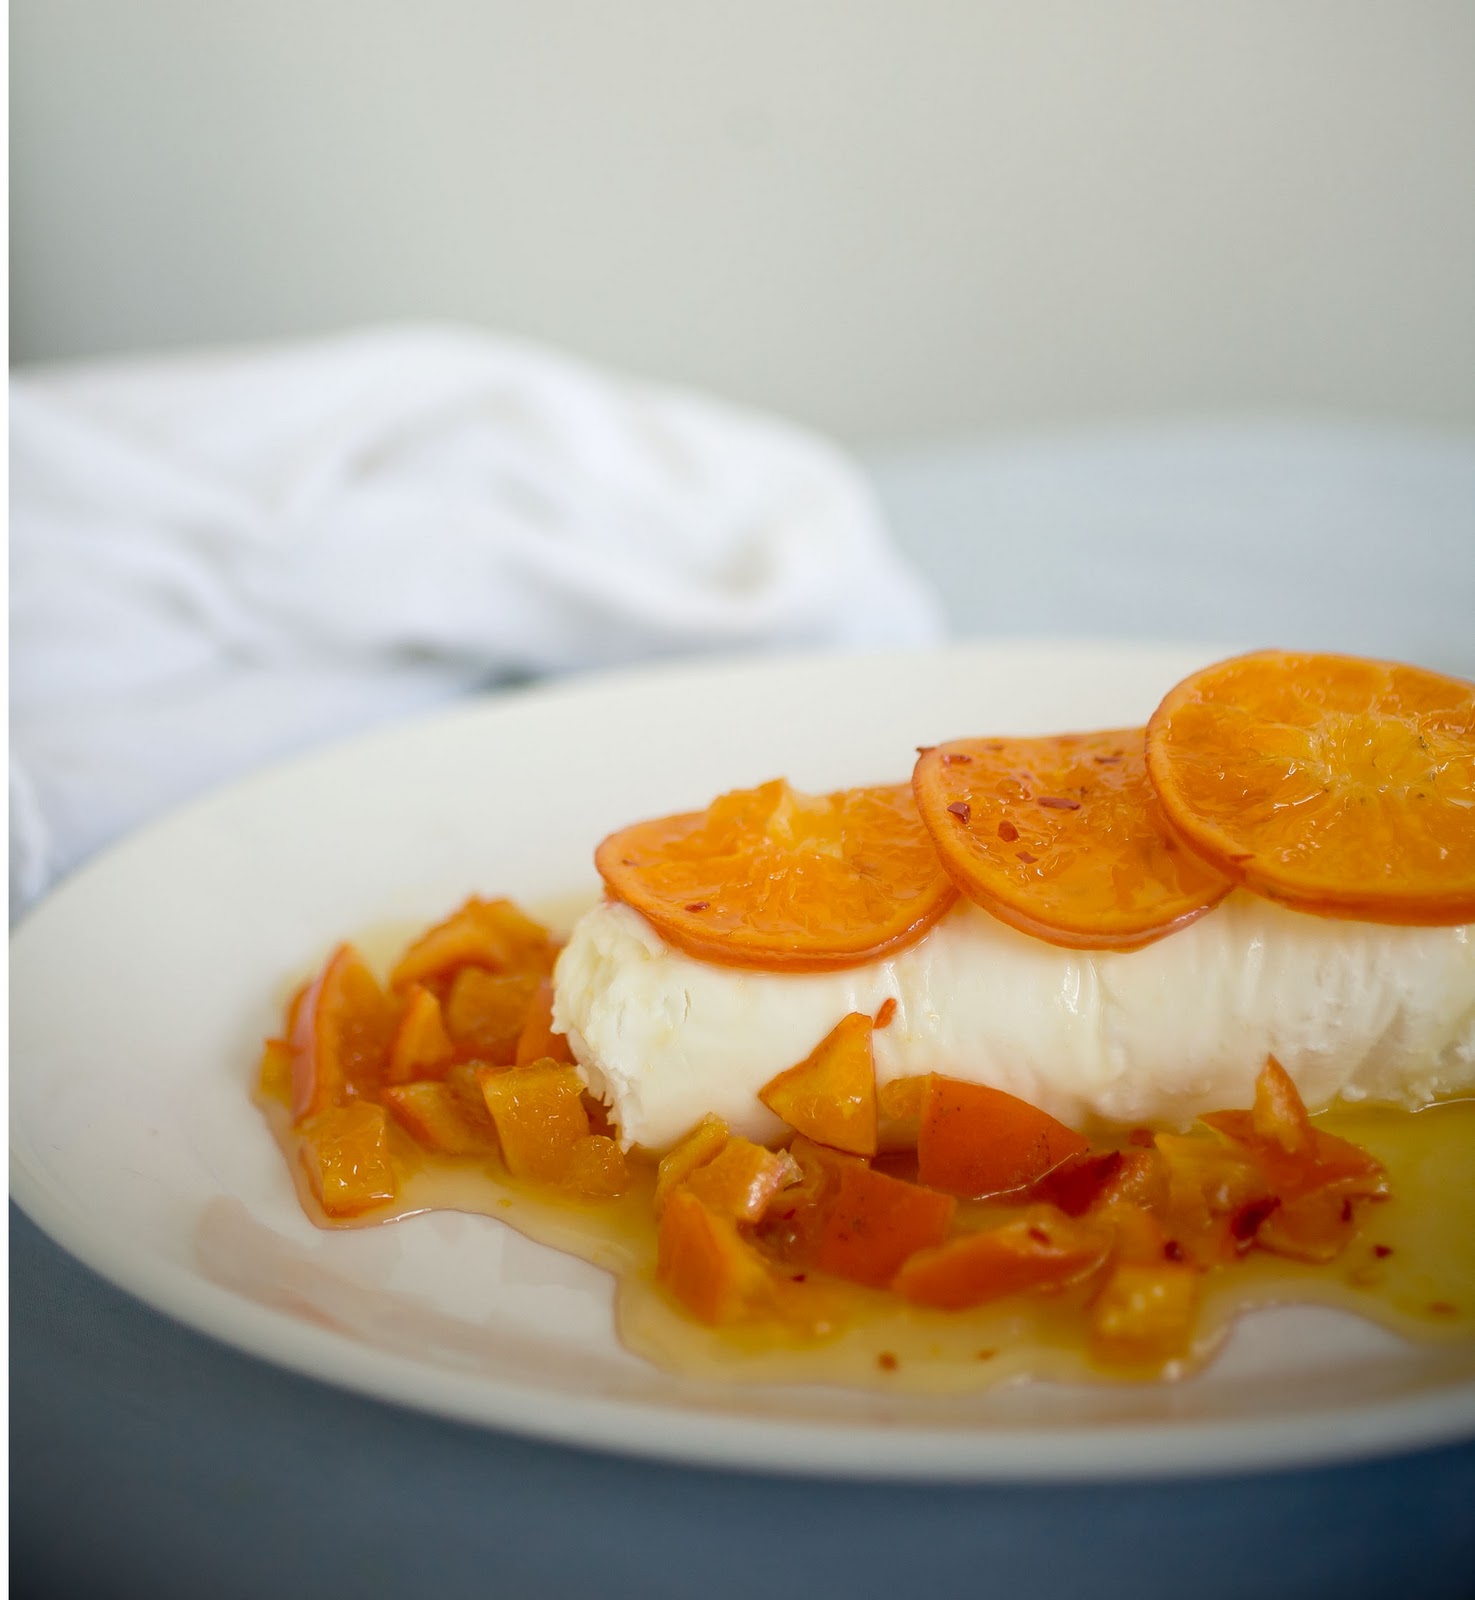
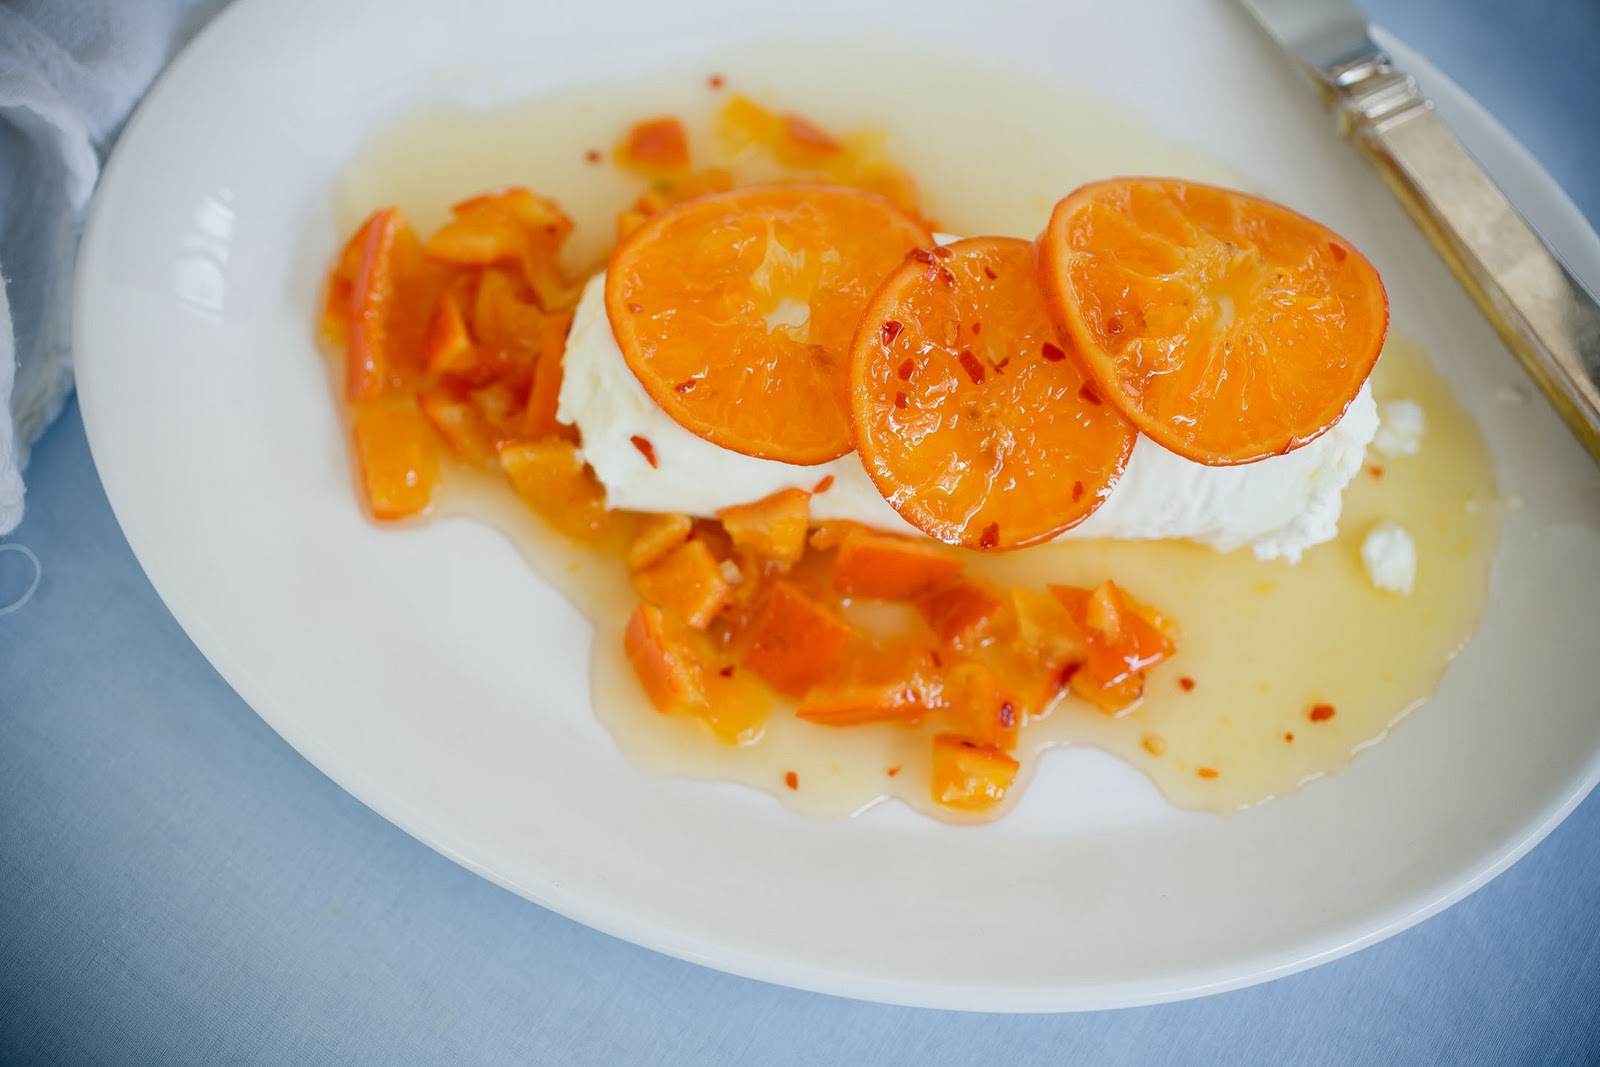
The tangerines are remarkable. I cannot begin to tell you how delectable they are. The sweet tangy orange is made bright with a hit of chili flakes. Shown here drizzled over a goat cheese log- but can I tell you? Set this up with some ice cream and your friends will get down on their knees and praise you.
I recommend packing the Tangerines in a jar with the slices ringing the outside of the jar and then fill the middle with the chunky syrup. The presentation is show stopping.
Packaging is always where it’s at and can transport the mundane into a delight. If you plan to put the pears into a bag I recommend using cellophane. This will prevent them from getting sticky, which is what happens when placed in plastic.
The same with the ginger. Though the ginger would be excellent in a jar as well.
*Check the Holiday Resource page to find links to find bags, bows and jars*
Pear Slices
recipe taken from Donna Hay Magazine
Slice pears on a mandoline or in even 1/8 inch slices.
Press each side into sugar and place onto a parchment lined baking sheet
Bake at 350˚ for 15 minutes~then flip the pears and bake another 15. Take care doing this since hot sugar can cause nasty burns
Once out of the oven carefully transfer the pears to a drying rack and allow the pears to fully dry. If you live in a humid place placing the rack in a turned off oven with a pilot light will do the trick.
Spicy Tangerine Sauce
a Gail Watson recipe
This recipe is in ratio, so you can make as little or great as you would like. I used 3 tangerines for the recipe shown
Slice top and bottom off of the tangerines and reserve. Make 1/8″ thin slices of half of the fruit and rough top the other half, including the tops and bottoms.
Measure out the volume of fruit and place into a sauce pan.
Next add equal amounts of sugar and water to the pot-
2c tangerines:2cups sugar:2cups water
Add a generous pinch of chili flakes and 3 star anise cloves to every 3 tangerines.
Bring all to a boil and then reduce to a low simmer.
Simmer the fruit for 30 mins or until the rinds are soft and the slices are translucent.
Can properly into jars, or jar and keep in the fridge for 3 weeks.
Warm sauce over cheese is amazing.
Candied Ginger
This is another ratio recipe. Purchase ginger that is firm and thin skinned- which is spicier in the end. Older ginger is fine if that is all you can find, but nothing dried out and shriveled. The ginger shrinks as you cook it, so get triple the volume you will need.
Scrape the skins off the ginger using a teaspoon. This works remarkably well and preserves the most flesh. It’s also so much easier to work around the knobs and ends.
Slice the ginger into 1//8-1/4″ slices. I made coins, but you can do long strips etc.
As above, into a pan measure 1:1:1 ratio of ginger to water to sugar.
Simmer in pan on the stove until the ginger is tender. Mine took a good 30 minutes, but it will just depend on the thickness of your slices.
Strain the slices and RESERVE the syrup (I’ve got an great use of it in a future post)
Lay the slices on a drying rack and allow to dry to a tacky state. This is important. If you rush the sugaring process you can end up with a gooey mess, so be patient.
Once dry enough toss the ginger in some sugar and you’re good to go!
{btw-I used this gingered sugar for the pears- can’t say it really added anything, but it couldn’t hurt}
Keep the ginger in an airtight container so it doesn’t dry out. It will keep for 3 months if stored well.
Dulce de Leche for Breakfast makes me think of Alberto
 |
| Not Valorie’s table- but a taste of heaven in my home. |
In celebration of my recent birthday my dearest Pam and I trucked on down to New Orleans for the weekend. It was our first road trip with our new Mazda Miata- and let me tell you- two girls traveling in a car with a trunk the size of a Barbie suitcase has it’s challenges, but not without laughs and good times.
After a few days on our own enjoying a romantically fantastic and culinary time, we toddled over to my dear friends Valorie and Alberto’s house in the Irish Channel. Val and I go way back to our early years in the wedding business. She was an exceptional floral and event designer and we made instant friends when we met during a set up for a wedding in a big NYC loft.
She is now an even more exceptional interior designer in NoLa and you may know her as The Visual Vamp. Her blog is chocked with great thoughts, ideas, Val’s great writing and her sense of joy and life living. When you have a minute it is a must read. You may also know she and Alberto, her Argentine husband, as US National Tango champions and instructors. And let me tell you darlings- this is only a small scratch into Val’s fabulousness.
The last time we visited we woke to one of Val’s beautifully set breakfast tables. A small table tucked into the kitchen was covered in a beautiful linen cloth. Stack of china, silver, pots and plates of goodness and “objets” covered the table and made it too beautiful to think about making a crumb amongst. However Val’s tinkling laugh, ease and grace made this fantasy feel like we’ve always belonged here. So with napkins on laps and Cholo, their King Charles Spaniel, at our feet- we dove right in.
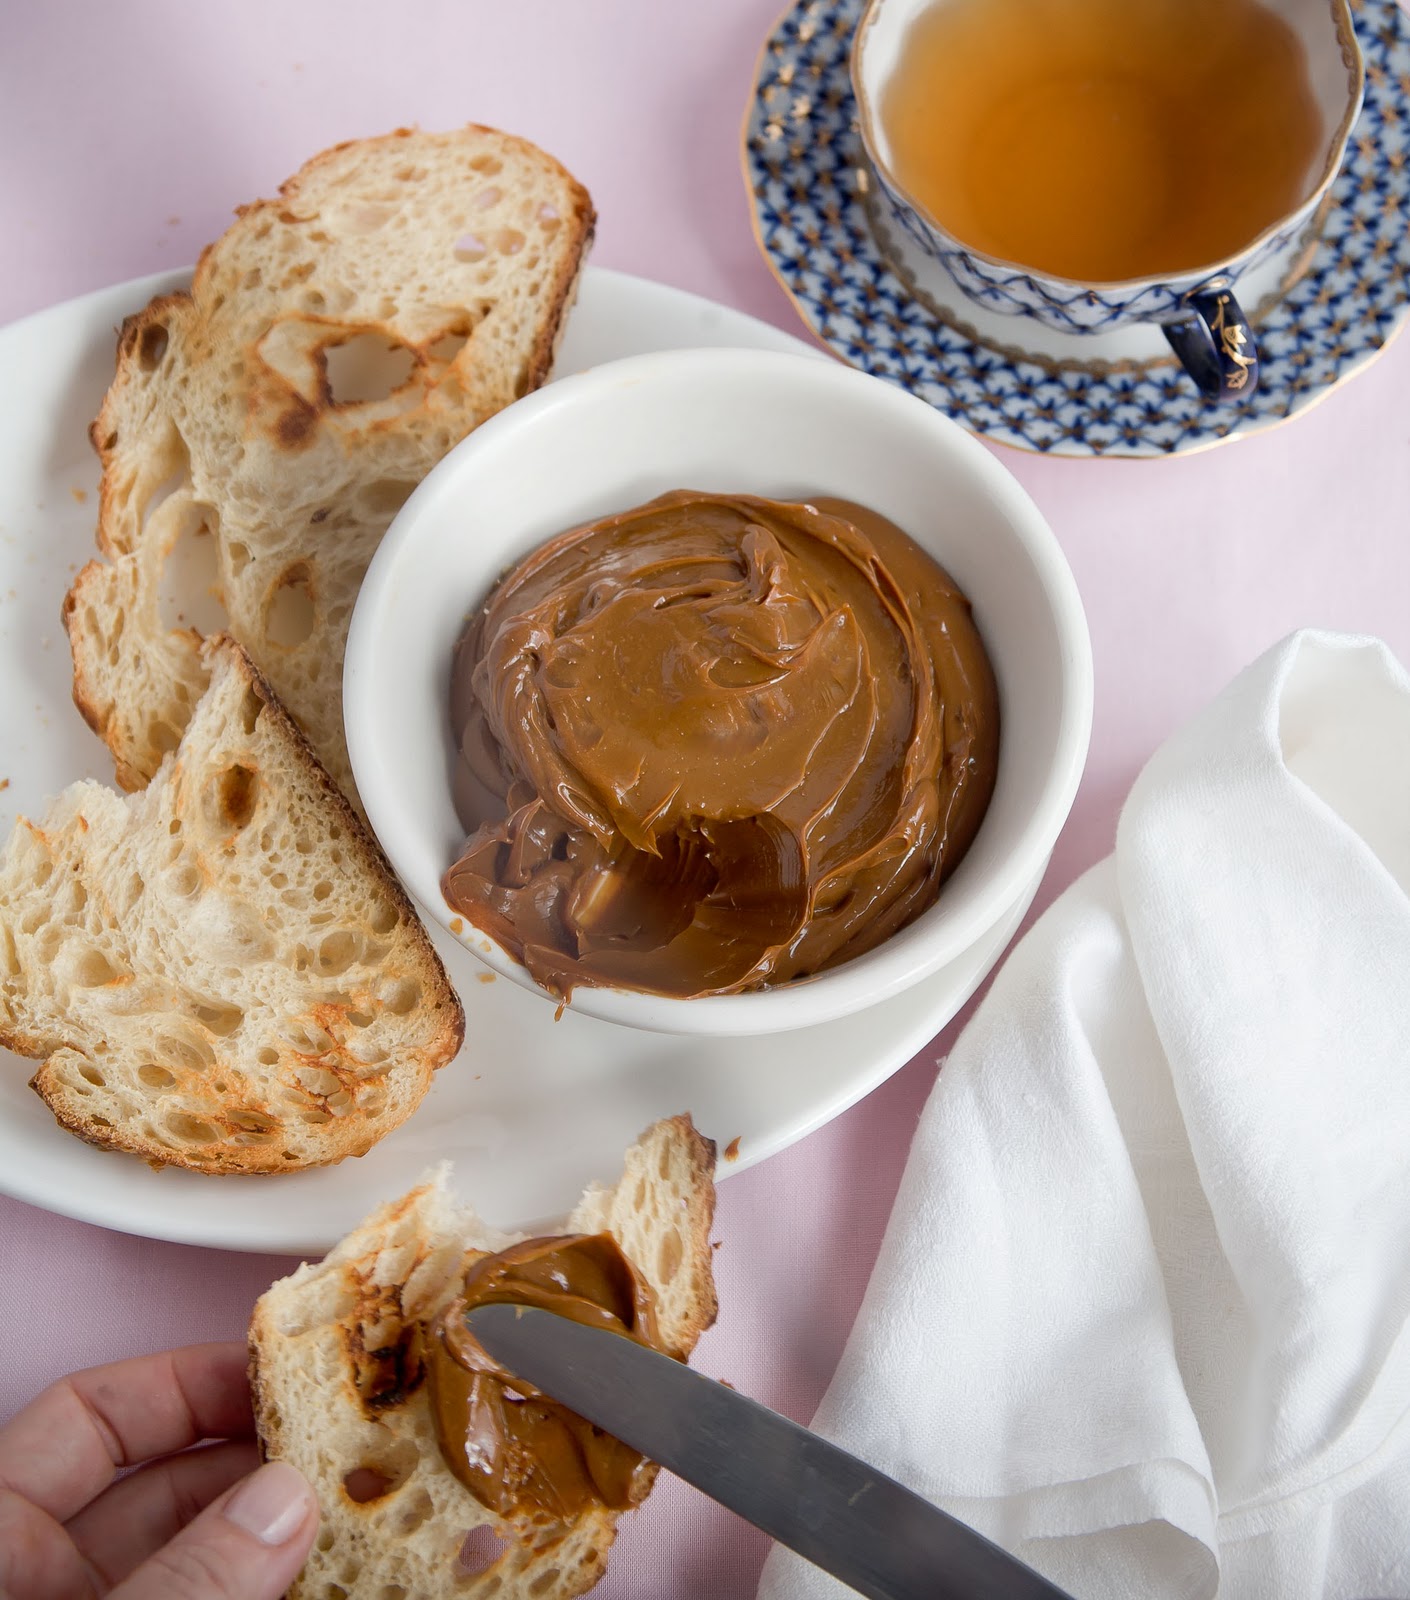
Amongst the delights was a luscious bowl of dulce de leche that had come from Alberto’s Argentina from their last trip there to Tango. Val toasted up some chewy sourdough bread and with the dulce de leche on top it was divine….. Sweet and creamy on top of crunchy chewy and the tang of the sourdough made it heaven. Such a simple thing elevated- such is the magic that is always Valorie.
Homemade Dulce de Leche
makes approx 1c
I dusted off my crockpot for this. The slow low temp cooking is perfect and no need to keep an eye on it.
Take 1 can of sweetened condensed milk and remove the label.
Submerge the can in water in your crockpot and set on low.
Leave to work it’s magic for 8 hrs. Cool before serving.
No fears about bursting cans but if it concerns you alternatively you can empty the contents of the can into a small heatproof bowl and cover with foil. Add water up the edge of the bowl and proceed as above.
If you don’t own a crockpot you can use the alternative method in a pan and place into a low oven- as low as it can go for 5-7 hrs.