• Skip to content
  • Skip to primary sidebar

A Stack of Dishes

Something good is cooking...

  • Home
  • About
  • Recipe Index
    • Bakery
    • Dessert
    • Chocolate
    • Appetizers
    • Healthy Recipes
    • Main Course
    • Small Meals
    • Breakfast
    • Gluten Free
    • Side Dishes
    • Cocktails
    • Condiments
    • Gifts
  • Delicious Links

GF

Ginger Poached Chicken Broth Soup

November 18, 2011 by Gail Watson

As the holidays season descends upon us and the days get short and compact, it’s a lovely thing to come home to a warm brothy soup that only takes a short while to assemble and prepare.
This soup is a standby for me and it lends itself to creativity depending on what’s on hand in the cupboard or vegetable drawer. You need just a few basics, such as garlic, ginger, chicken broth and chicken, but from there on- you can “McGuyver” this dish anyway you would like. Leftover noodles or rice can find their way into the pot, or left over veg and the odd ends of this and that- mushrooms, carrots, cauliflower, spinach, etc.
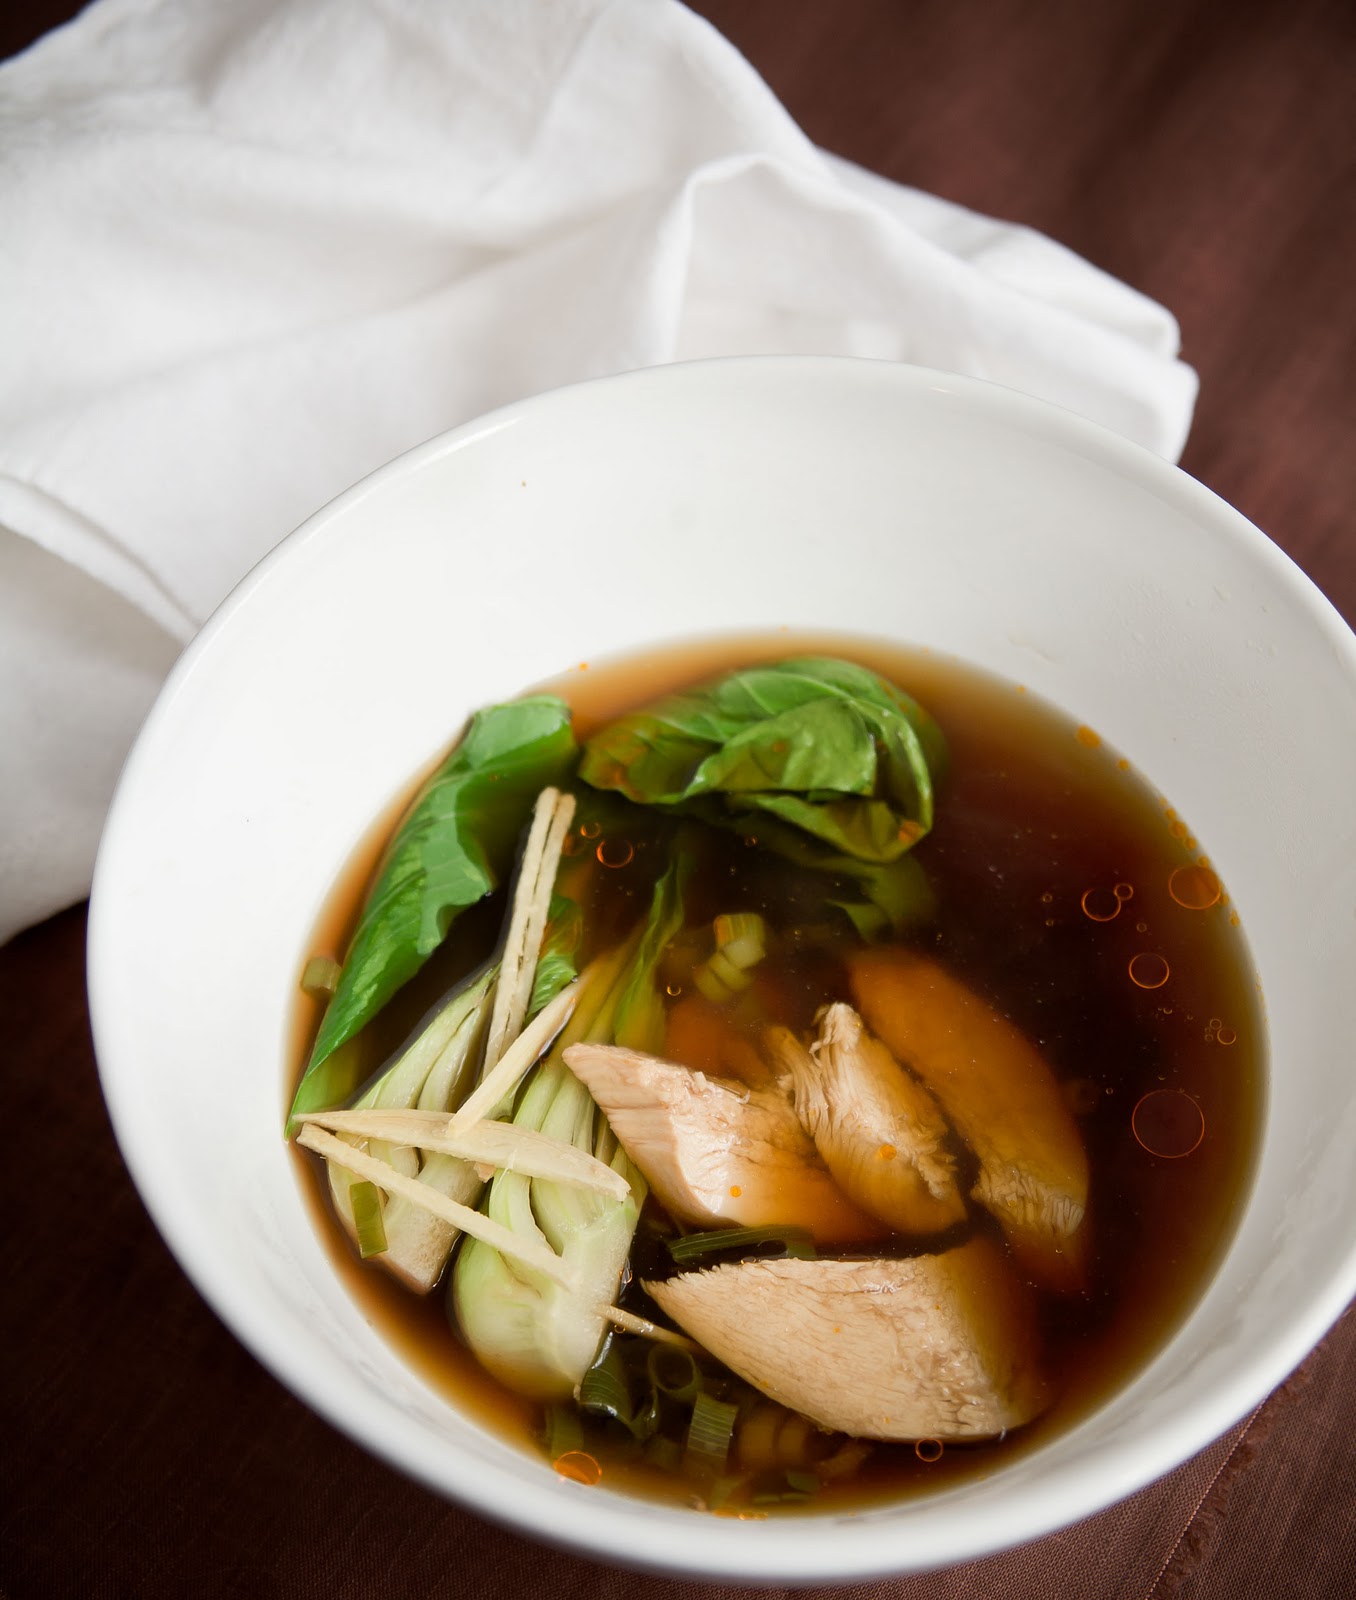
I’ve set the stage for the classic here- but I’ll leave the rest to your interpretation. The primary thing is to make a warm flavorful broth and keep it healthy and light. The perfect revival to a day of dashing.
 
Ginger Poached Chicken Broth Soup
 
serves 2 generously
 
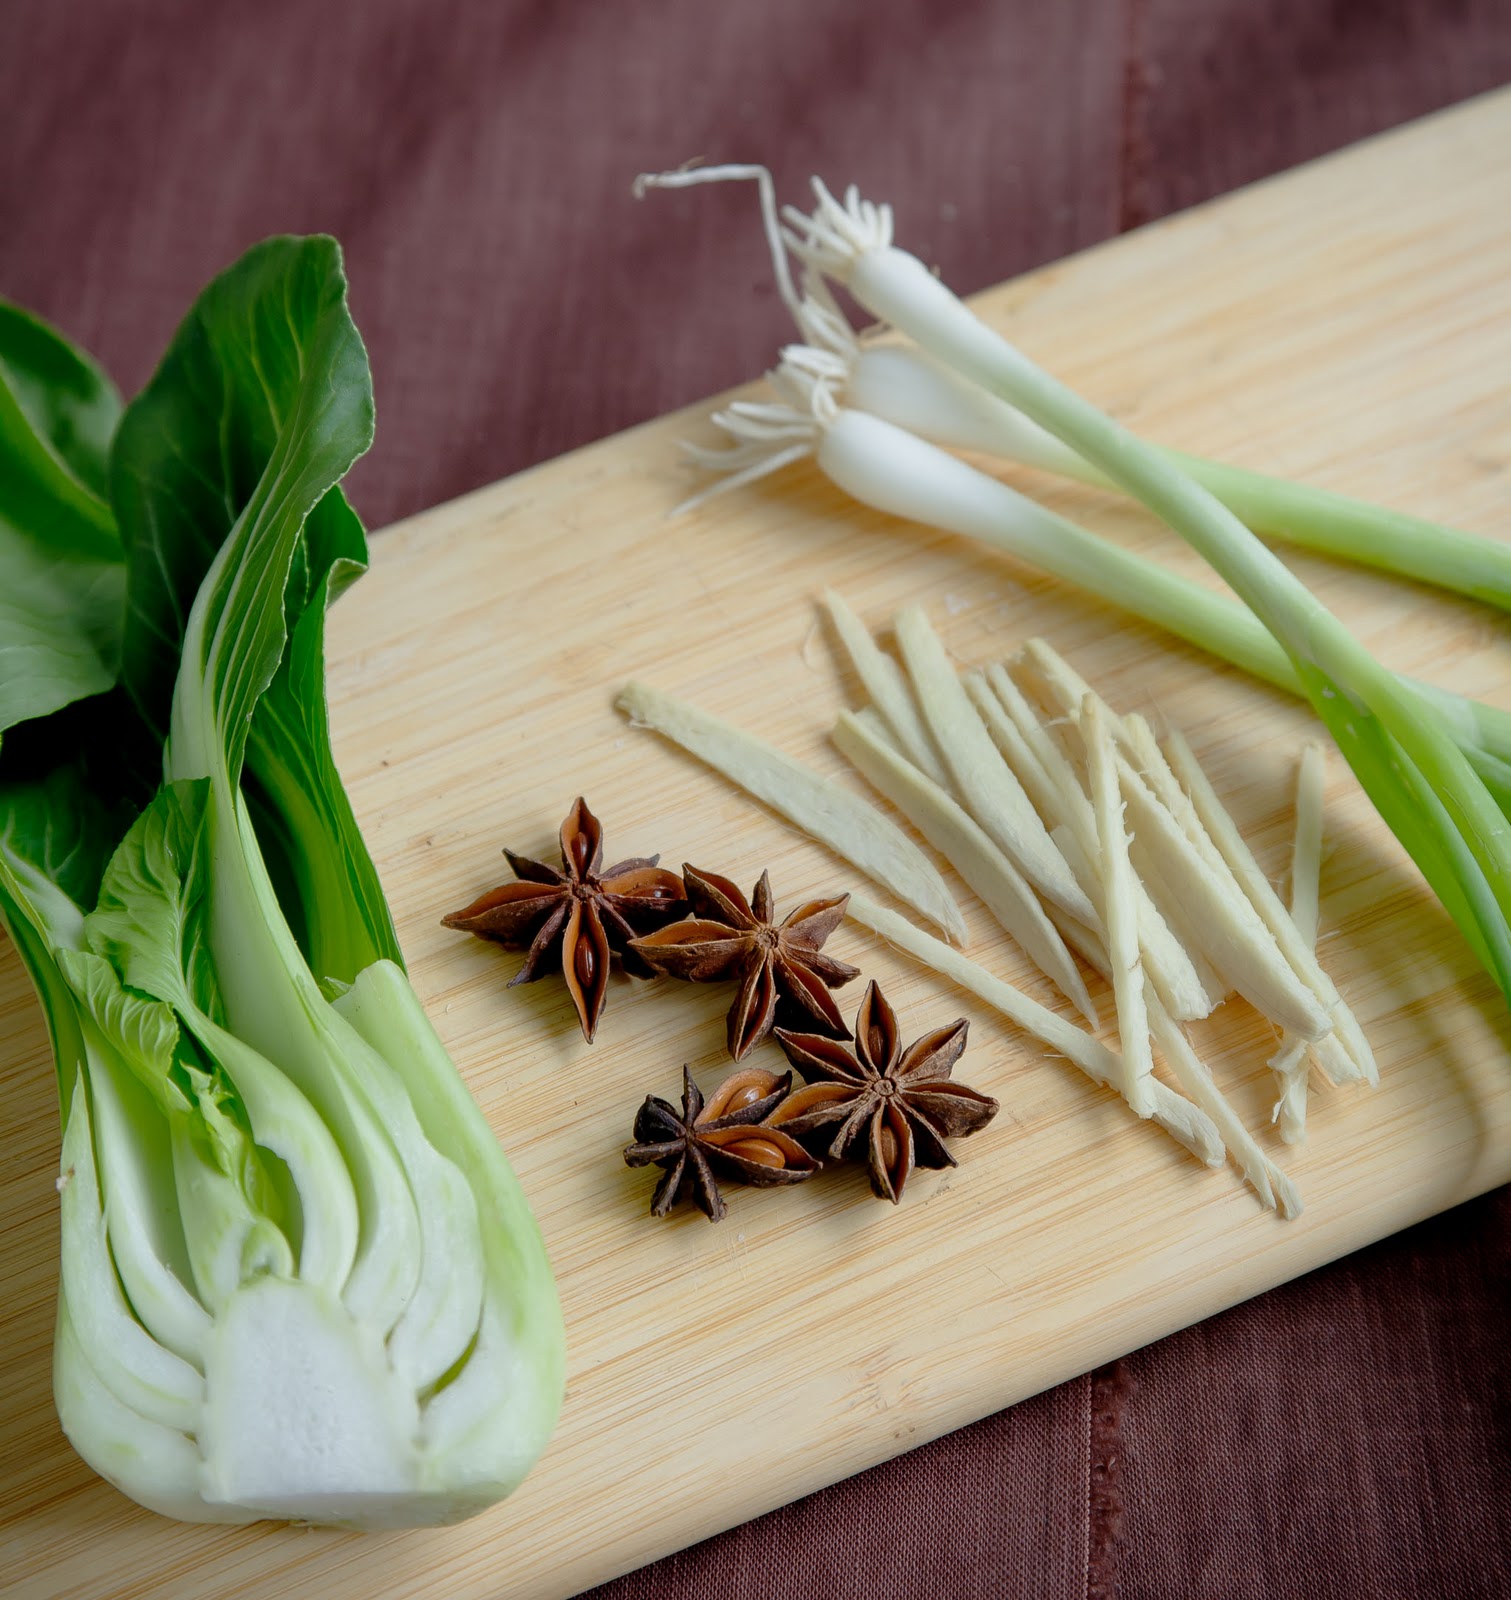
3T of fresh ginger peeled and sliced into matchsticks
2cloves garlic smashed and rough chopped
1T vegetable oil
2-3 star anise pods
48oz box of your best low sodium chicken broth
soy sauce to taste- start with 2T
1 large chicken breast or leftover cold chicken cooked
1 bunch scallions, sliced into rings including whites and greens
1 baby bok choy, quartered and washed
drizzle of hot chili sesame oil
 
In a large pot warm the oil over medium heat, gently cook the garlic to release the oils. Do not toast.
 
Add the ginger and the star anise and then pour in the broth and soy sauce. More can be added right before serving to adjust for taste. 
 
Allow to come up to a boil and then slip in the uncooked chicken. Gently simmer until cooked through. Time will vary based on the thickness of the breast, but allow 20 mins or so. If using precooked chicken allow the broth to simmer for 15 minutes to develop the flavors and then add the chicken to warm through.
 
Right before serving add the bok choy and allow to gently cook to a tender/crunchy stage- just a minute or so.
 
Top off with scallion and a drizzle of hot chili oil right before serving and add more soy sauce if needed to taste.

Share this:

  • Click to share on Pinterest (Opens in new window)
  • Click to share on Twitter (Opens in new window)
  • Click to email a link to a friend (Opens in new window)
  • Click to share on Facebook (Opens in new window)
  • Click to print (Opens in new window)
  • Click to share on Tumblr (Opens in new window)

Filed Under: appetizer, GF, gluten free, Healthy Recipes, main, main course Tagged With: appetizer, gluten free, healthy, main course, small meal

The BEST Turkey Burger and Polenta Fries with Kick-A Ketchup

October 31, 2011 by Gail Watson

I love a good burger especially when they are juicy. Unfortunately for the Turkey Burger it has always had its shortcomings. I appreciate the healthier version of the American Classic, but just cause there’s hot meat on a bun it does not a “burger” make.
A few years ago when I was marathon training I looked for ways to add lean meats to my diet and still maintain my love of food. This recipe adds onions and Feta cheese which not only gives the bland turkey a flavor boost, but also bumps up the juice factor. It’s amazing how two little additions can make such a tremendous difference.
Another trick is I cover my pan when cooking. Unlike beef burgers you want to get the turkey cooked thoroughly. Covering the pan will allow you to create an oven effect that will allow you to heat the burger evenly without drying out the outer edges of the meat. I have a large frying pan lid, but if you don’t have one, use a baking sheet or the lid from any ol’ large pot you have. You can even flip an other pan on top. Also please, do not cook on low heat. This produces a dull, flat, hockey puck of a burger that is a waste of good protein.
If you, or you have mouths to feed that are not onion or feta cheese crazy, try mincing them as finely as you can get. Honestly, the flavors are not strong here and it’s worth the yumminess factor to give it a try.
The polenta fries are not altogether on the healthy side at all- except for the added fiber the corn adds as opposed to a potato. But a greasy crunch is all part of the burger experience for me, so I indulge when appropriate and try not to overdo it. It’s all about balance and the secret to delicious food and a healthy life. Just take time to enjoy what you have when you have it- it’s more satisfying that way.
I pumped up the ketchup with a small dollop of hot sauce and a splash of vinegar. If you are a spice fiend like I am you will love this- otherwise traditional ketchup is super OK.
Feta Turkey Burger
 
serves 6
 
1.5# ground turkey
.5 red onion minced
3 cloves garlic minced
1c feta cheese crumbled
6 sourdough rolls
lettuce, tomato etc
 
Combine first 5 ingredients into a bowl and gently mix. I “fold” the ingredients in to get an even consistency without overworking the meat.
 
Divide the mixture into 6 even portions and pat into the shape and size of your roll- make slightly larger as burgers will shrink just a tad when cooking and personally I like to bite into meat, not too much roll.
 
Heat medium-large frying pan over medium high heat. Add a touch of either oil, or cooking spray. Place burgers into pan and let sear for 2 mins and then cover. Turn heat down to medium. Flip after 5 mins and cover again until done.
 
Cooking time will depend on how thick your burgers are. I test mine by the poke method. If the center of the burger is springy and soft they are not done. There should be some resistance with a gentle give. If there is no resistance you’ve gone too far.
 
Enjoy right away with your rolls and extras.
 
 
Polenta Fries and Kick-A Ketchup
 
serves a generous 6
 
Instant polenta
generous pinch of salt
oil for frying
store bought ketchup
hot sauce or any kind
splash of white or wine vinegar
 
 
Prepare the polenta according to package directions adding the salt. I make mine in my rice cooker, which not only prevents the polenta from scorching, it also makes for easier clean up.
 
Pour cooked polenta onto greased baking sheet. With spoon or spatula spread the polenta out as evenly as possible.
 
Pop into fridge to cool and stiffen.
 
Once cold and set you can slice the fries into any shape you would like. Heat oil to 375˚ The polenta does not have to cook like when frying potatoes. Fry until crisp and golden on the edges. Drain on paper towels and toss some coarse salt on them immediately.
 
I used about a half cup of ketchup to a T of hot sauce and a scant teaspoon of vinegar. This is all totally subject to your personal taste, so get creative here. Lemon juice is also fantastic here.


Share this:

  • Click to share on Pinterest (Opens in new window)
  • Click to share on Twitter (Opens in new window)
  • Click to email a link to a friend (Opens in new window)
  • Click to share on Facebook (Opens in new window)
  • Click to print (Opens in new window)
  • Click to share on Tumblr (Opens in new window)

Filed Under: GF, main, sides Tagged With: healthy recipe, polenta, polenta fries, turkey burger

Crisp Apple Salad with Candied Walnuts and Bleu Cheese

October 25, 2011 by Gail Watson

This is a tremendously simple salad to make with a complexity of texture and tastes. Crisp juicy Granny Smith apples are thinly sliced and tossed with a lemony vinaigrette and garnished with chunks of strong bleu cheese and candied walnuts.

We get so busy with our lives that there are times when it’s important to make the simplest thing sublime. It takes just a few extra seconds to pull out the mandolin, make a salad dressing from scratch, and arranging a plate to look like a waiter has placed this dish before you as opposed to tossing things together next to the sink.

Preparing the nuts is the most time consuming part of this dish, but worth the effort. If it’s all too much you can just toss on toasted nuts. Though really, they are super easy to make as long as you keep and eye on the sugar so as not to scorch it. The batch yields a good 3 cups of candied walnuts- which are also a fantastic addition to any frozen treat bowl you got going on, as well as a terrific accompaniment to a cheese platter. Just store in an airtight container and dole out as needed for up to 6 months.

The vinaigrette recipe is absolutely my favorite. It uses lemon juice as the acid with the added touch of grated rind. Whenever I serve this dressing inevitably someone asks me for the recipe. You will love it and find it one of those “go to” recipes from here on out.

The crisp tart apples, with the earthy cheese, the sharp snap of the onion with the spicy vinaigrette and arugula is topped off with the sweet crunchy nuts. Heavenly…

Candied Walnuts
 
.25 c of white sugar
2T water
.5 c walnuts, either whole or pieces
 
Prepare a baking tray by greasing with butter. A silpat mat also works well.
 
In heavy small saucepan combine the water and sugar and put on medium high heat.
 
Cook the sugar slurry until it boils and turns golden brown. This can take 10 mins or so. Once the color starts to turn it will come up quickly. If you have hot spots in your pan as evidenced by one area turning darker before another, swirl pan to even out the heat.
 
The sugar will continue to deepen after it has been removed from the heat, so pull the pan off the flame when it is one step BEFORE the color you want.
 
Off the flame toss in the nuts. With a wooden spoon stir the nuts to evenly coat. Then pour mixture onto prepared sheet pan and spread out.
 
DO NOT be tempted to touch the nuts until they are COMPLETELY cooled. I know you’re going to want to, they’re beautiful, smell great and look innocent- but they can seriously burn you, so please-please, give it a good 10 mins to cool if not longer. 
 
Once cool you can break up the nuts into pieces. Store unused portion in an airtight container in a dark, dry, cool place. Not in the fridge.
 
 
Lemon Vinaigrette “Watson”
 
1-2 lemons
grated zest from one lemon
spoonful of Dijon mustard
1clove crushed and finely minced garlic
good quality olive oil
salt
 
The reason for the vague ingredient amounts is I base my proportions on the amount of juice that comes out of the lemon(s). 
 
Into a small bowl first grate the zest of one lemon. Then juice the lemon into the bowl. You will want at least 3T of juice, so if the first lemon is short, go ahead and juice the second lemon in it’s entirety. It’s ok to have more than you need.
 
Then add into the bowl one teaspoon of dijon for every 3T of lemon juice. It’s ok to eyeball this. Use more dijon if you like your dressing on the spicy side.
 
Next add garlic and stir all together just a bit to break up and combine the mustard. Err on the side of lesser garlic as this dressing will get stronger as it sits.
 
Either using a fork or a small whisk, slowly dribble in the olive oil while continuously stirring the lemon mixture. The ratio is 1:3 juice to oil approx. You will notice as you are mixing that the dressing will begin to emulsify.
 
I taste test my dressing as I go along. If I need more oil I add it. It’s done when you can sense a balance on your tongue. Add the salt.
 
It has also happened that I will go back and taste the dressing one more time before I use it and balance it again.
 
Store unused dressing in a tight lidded container in the fridge for a week.
 
 
Apple Salad
 
serves 2
 
2 medium granny smith apples
~.25c red onion
1c baby arugula leaves
1oz high quality bleu cheese
small handful of candied walnuts
lemon vinaigrette to taste
S & P to taste
 
Using a mandoline or slicing tool if you have one, slice apples very thinly. Alternatively use a very sharp knife. First take a small slice out of the apple and lay that side down on the cutting board for stability. They very carefully slice the apples as thinly as possible.
 
Toss the apples with a small amount of dressing.
 
Slice the onions the same as the apples.
 
On a serving plate arrange the apples in an attractive stack. Atop the apples add some of the sliced onion and then some arugula. More arugula can be place on the plate alongside.
 
Sprinkle the stack with the nuts and cheese. Then drizzle more dressing over the top to taste.
 
Add a crusty bread and a glass of Verdiccio and you’ve got a lovely first course.
 

Share this:

  • Click to share on Pinterest (Opens in new window)
  • Click to share on Twitter (Opens in new window)
  • Click to email a link to a friend (Opens in new window)
  • Click to share on Facebook (Opens in new window)
  • Click to print (Opens in new window)
  • Click to share on Tumblr (Opens in new window)

Filed Under: GF, gluten free, sides Tagged With: gluten free, salad, salads, walnuts

« Previous Page
Next Page »

Primary Sidebar

Thank you so much for your LIKES!

Thank you so much for your LIKES!
The Inner Circle
Join the Inner Circle For Exclusive Content
No Worries. This is just between us.

Top Posts & Pages

The {Famous} NY Times- No Knead Bread
Country Pate {Pate de Campagne}
Chocolate Mousse {No Cream}
Roasted Lamb With Balsamic Vinegar and Red Wine Jus
Power Packed Oat Scones: One healthy, the other healthier
Warm Chocolate Pudding Cake with Caramel Creme Anglaise, Day 4: Irene's Beans
my healthy aperture gallery
Certified Yummly Recipes on Yummly.com
Homemade Hot Sauce Link~ HuffingtonPost

Copyright © 2026 · Genesis Framework · WordPress · Log in