• Skip to content
  • Skip to primary sidebar

A Stack of Dishes

Something good is cooking...

  • Home
  • About
  • Recipe Index
    • Bakery
    • Dessert
    • Chocolate
    • Appetizers
    • Healthy Recipes
    • Main Course
    • Small Meals
    • Breakfast
    • Gluten Free
    • Side Dishes
    • Cocktails
    • Condiments
    • Gifts
  • Delicious Links

gifts

{Day 2} Candied Fruits For Sweet and Savory Treats

December 3, 2011 by Gail Watson

The Winter fruits can become jewels under the right conditions. There is magic in the glistening, translucence that comes from the candying process. As the days grow gray and the light turns to darkness sooner and sooner I love the deep vibrant colors that sparkle on the plate.

The real miracle is it’s so easy to do and delightful to give.

I’ve come up with three different candied fruits. Pear Slices, Spicy Tangerine Sauce and Candied Ginger. Yeah, I know, the ginger is nothing really new- but the resulting leftover syrup you get from the process is going to be used for a future post for something I promise you will adore- so don’t discount the ginger.

Making jewels by candying fruit is basically a two step process. First the fruit is combined with sugar, either directly in the case of the pears, or in a syrup. Next comes the heat. The pears are baked for a short while and then flipped, and the ginger and tangerines simmered in the syrup until it reaches it’s translucency.
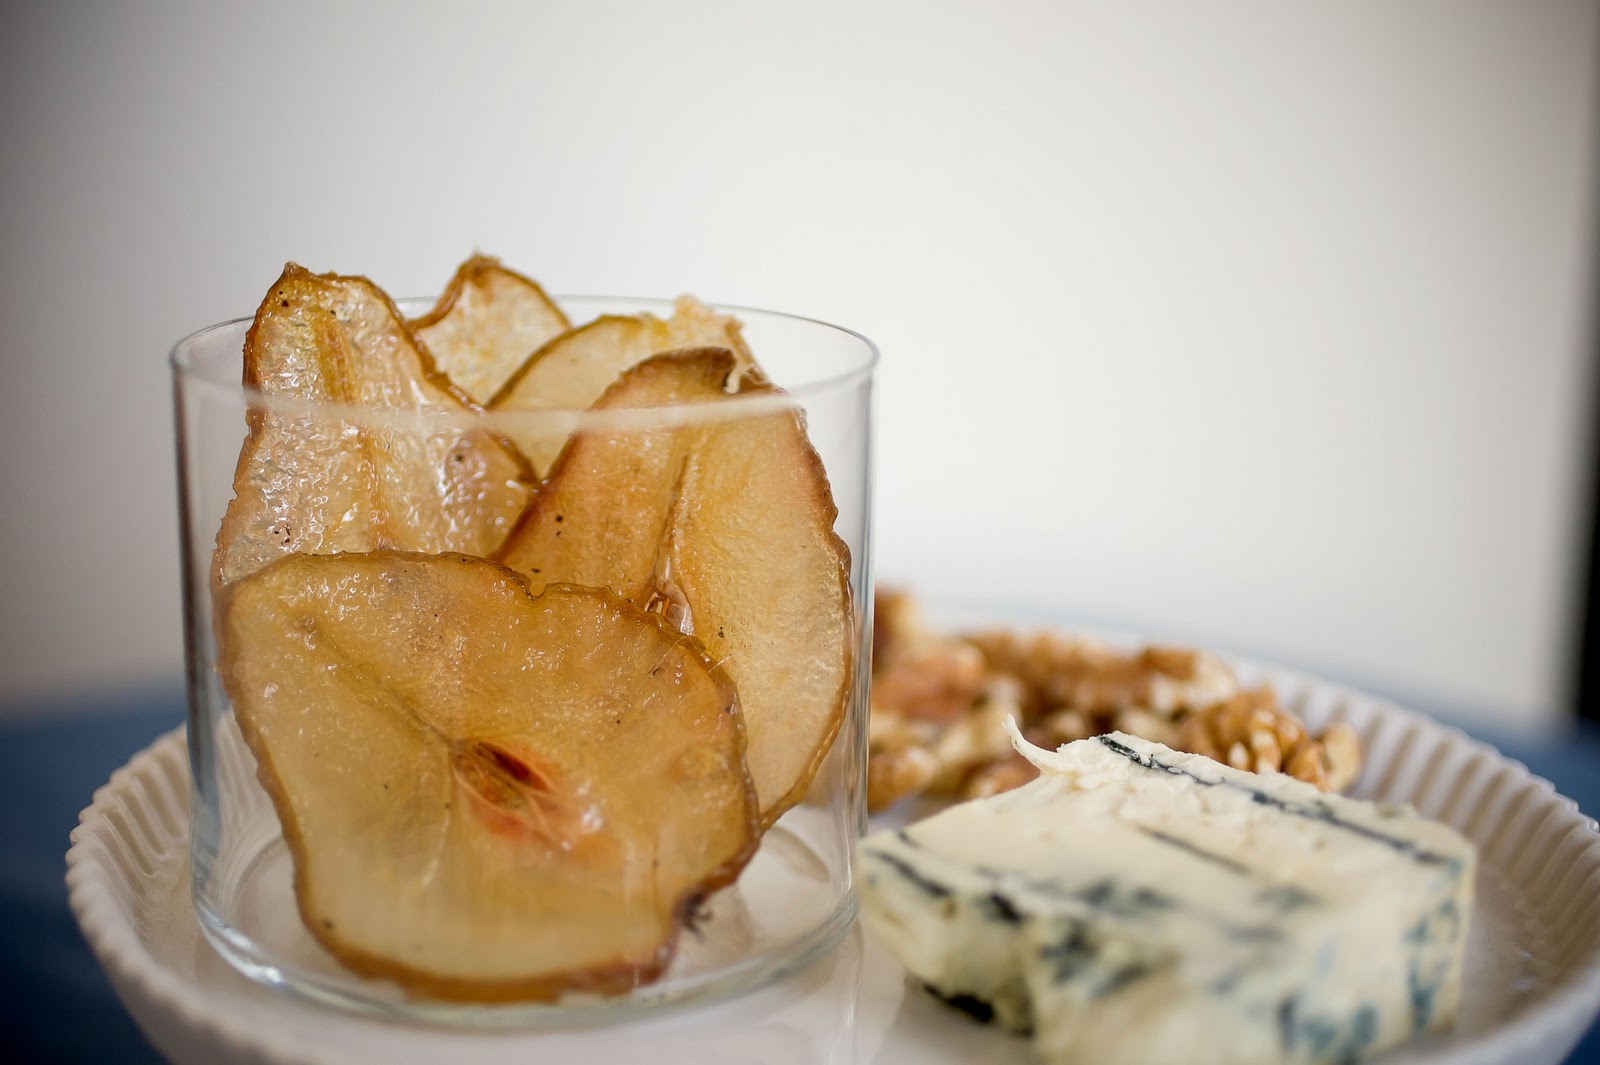
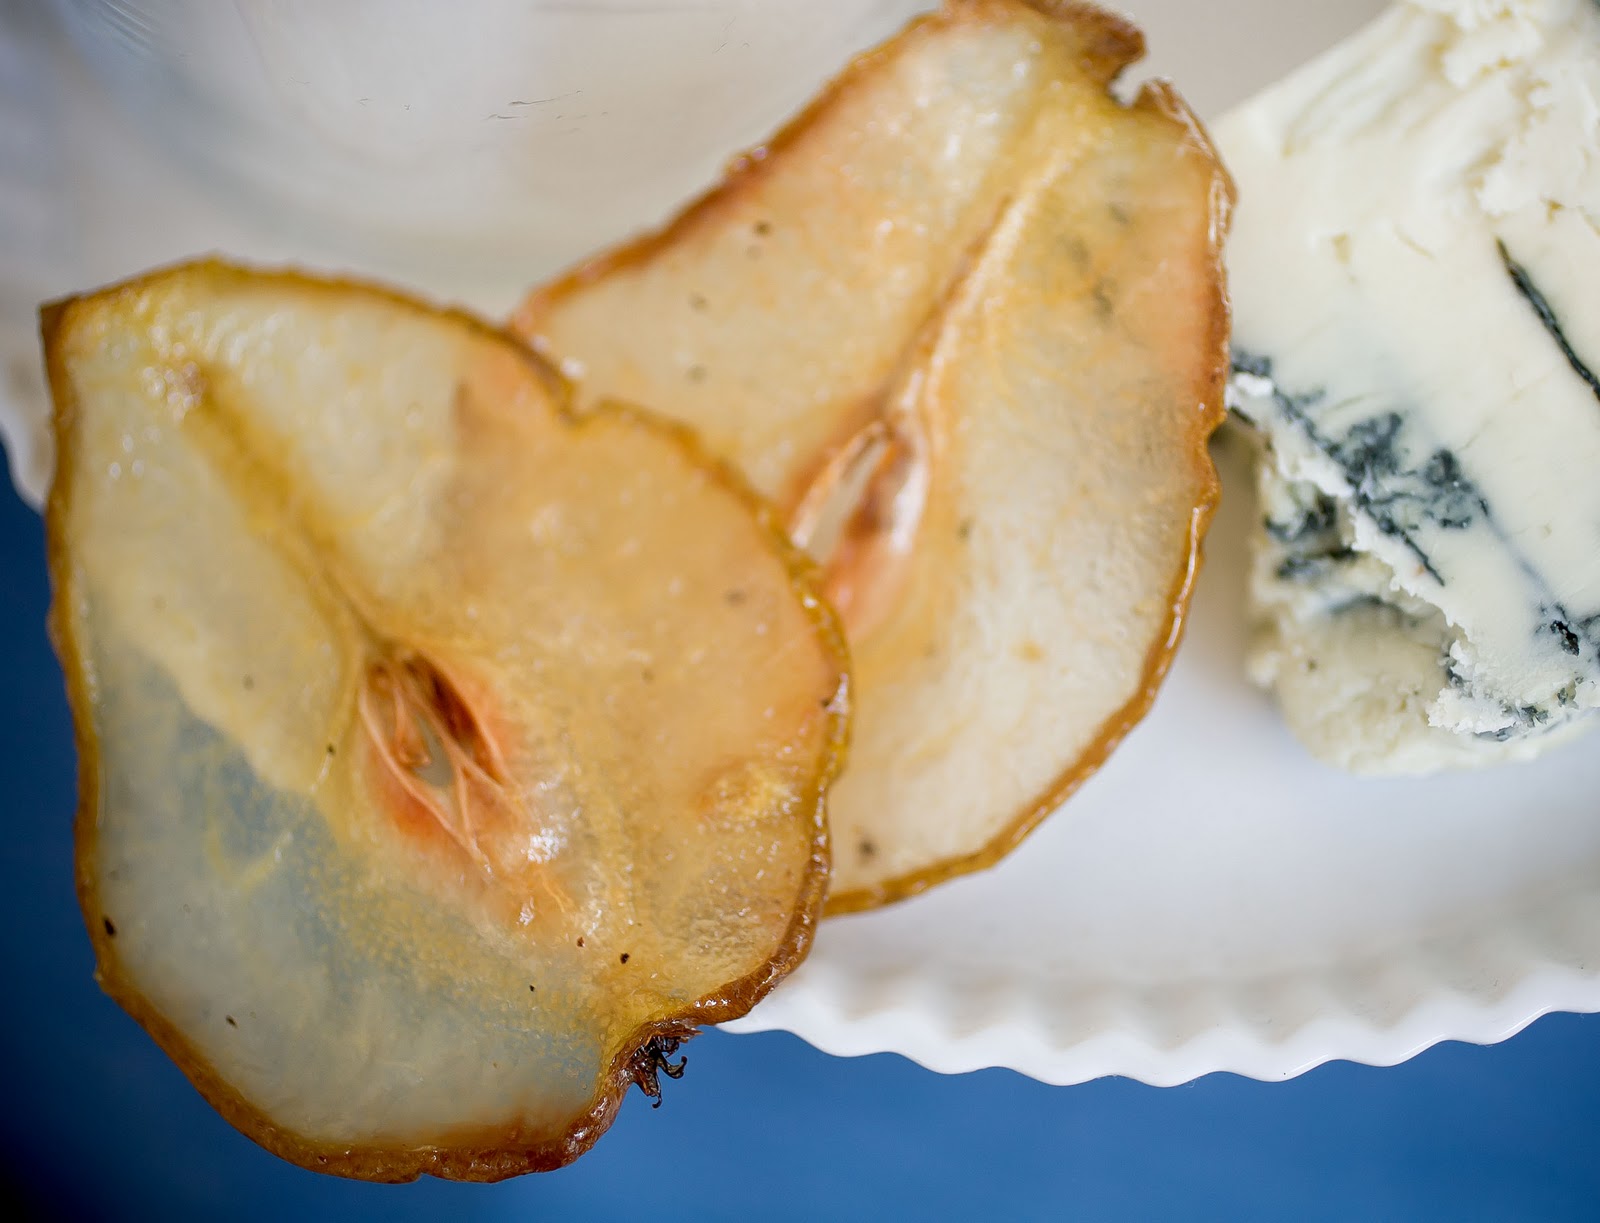
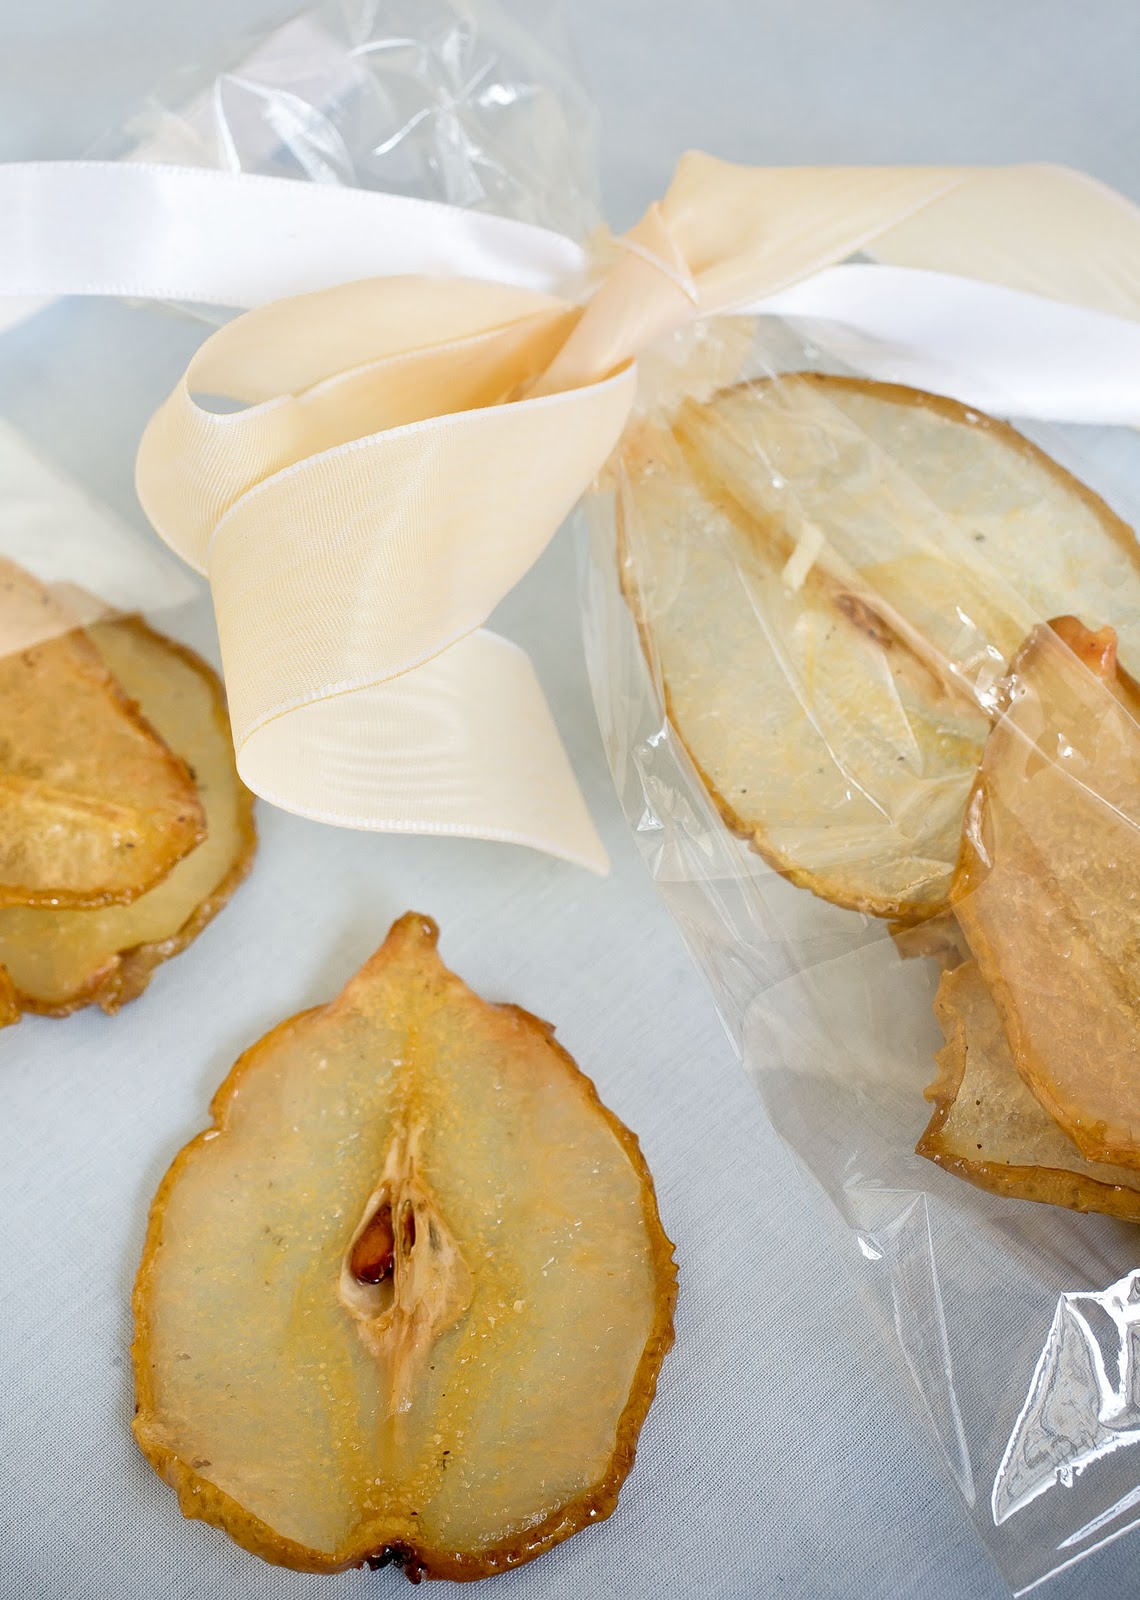
I’ve paired the pears here with some blue artisinal bleu cheese and toasted walnuts. A lovely gift is to put the trio into a package. But the pears are also great along with a chunk of high quality chocolate for a dessert plate. My friend Priscilla Martell, a cookbook writer, chef and all around exceptional person- shared with me a link to an artisanal cheese maker in Connecticut for Cato Corner Farm. She says, “One of those little local success stories.” If Priscilla recommend them I suggest you might give them a look see.
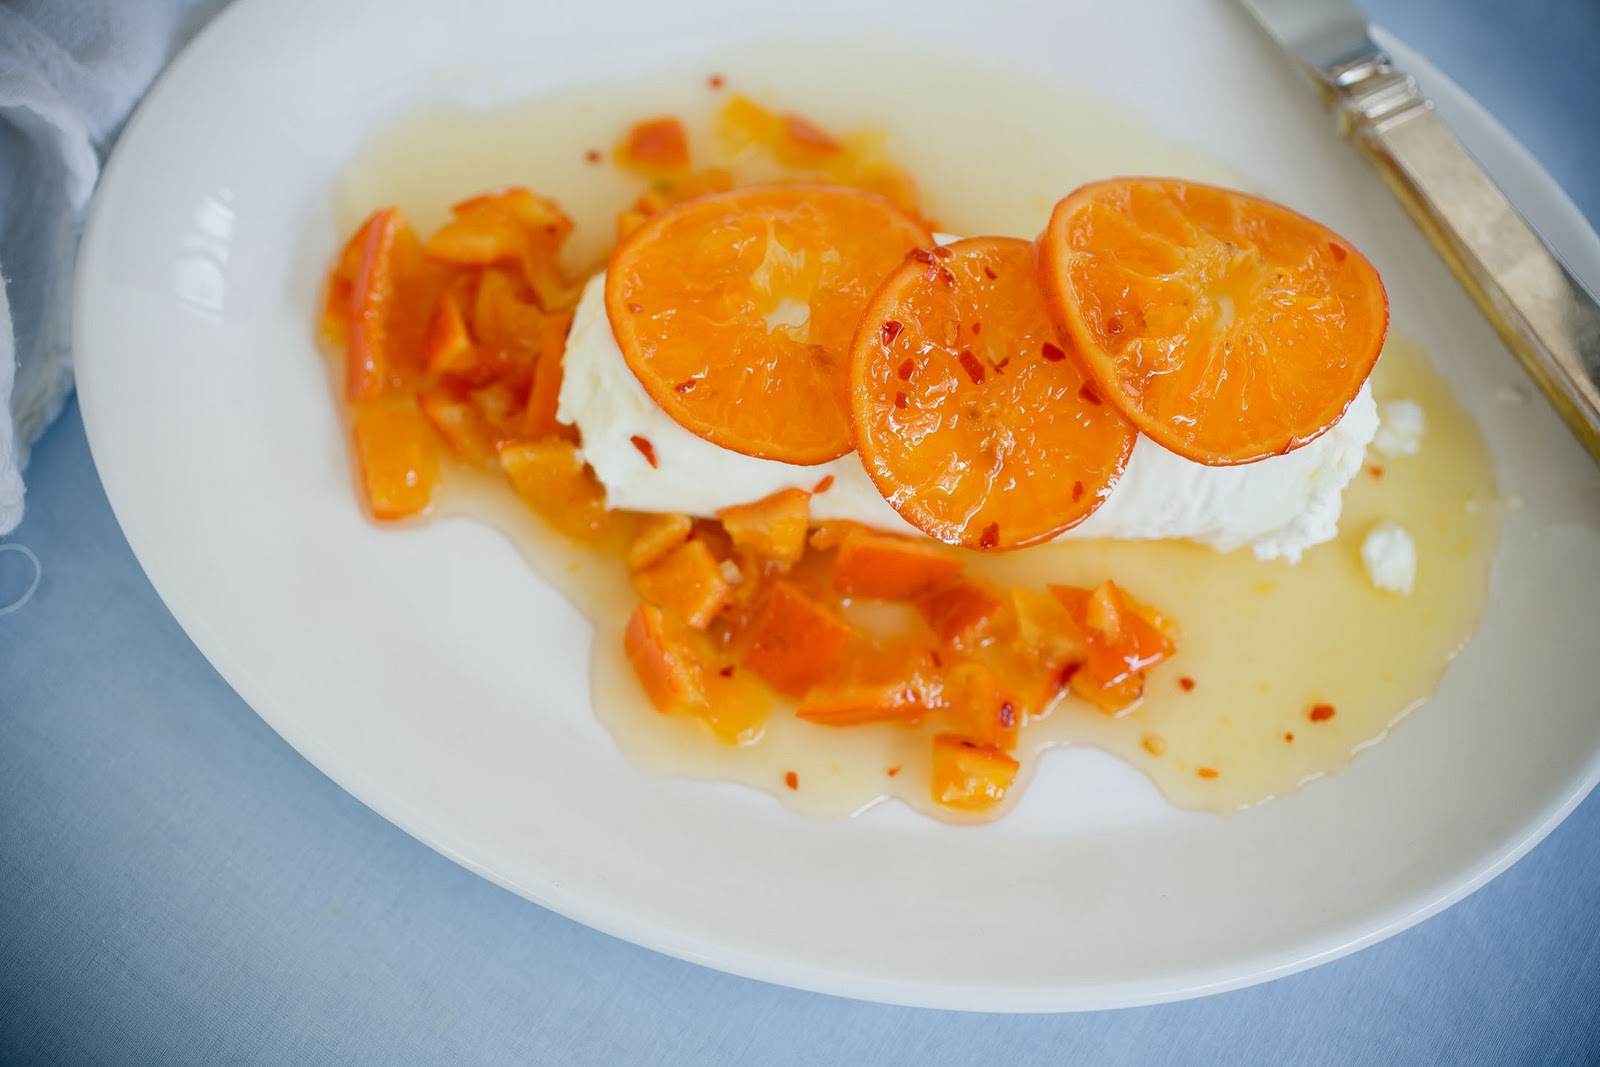
The tangerines are remarkable. I cannot begin to tell you how delectable they are. The sweet tangy orange is made bright with a hit of chili flakes. Shown here drizzled over a goat cheese log- but can I tell you? Set this up with some ice cream and your friends will get down on their knees and praise you.
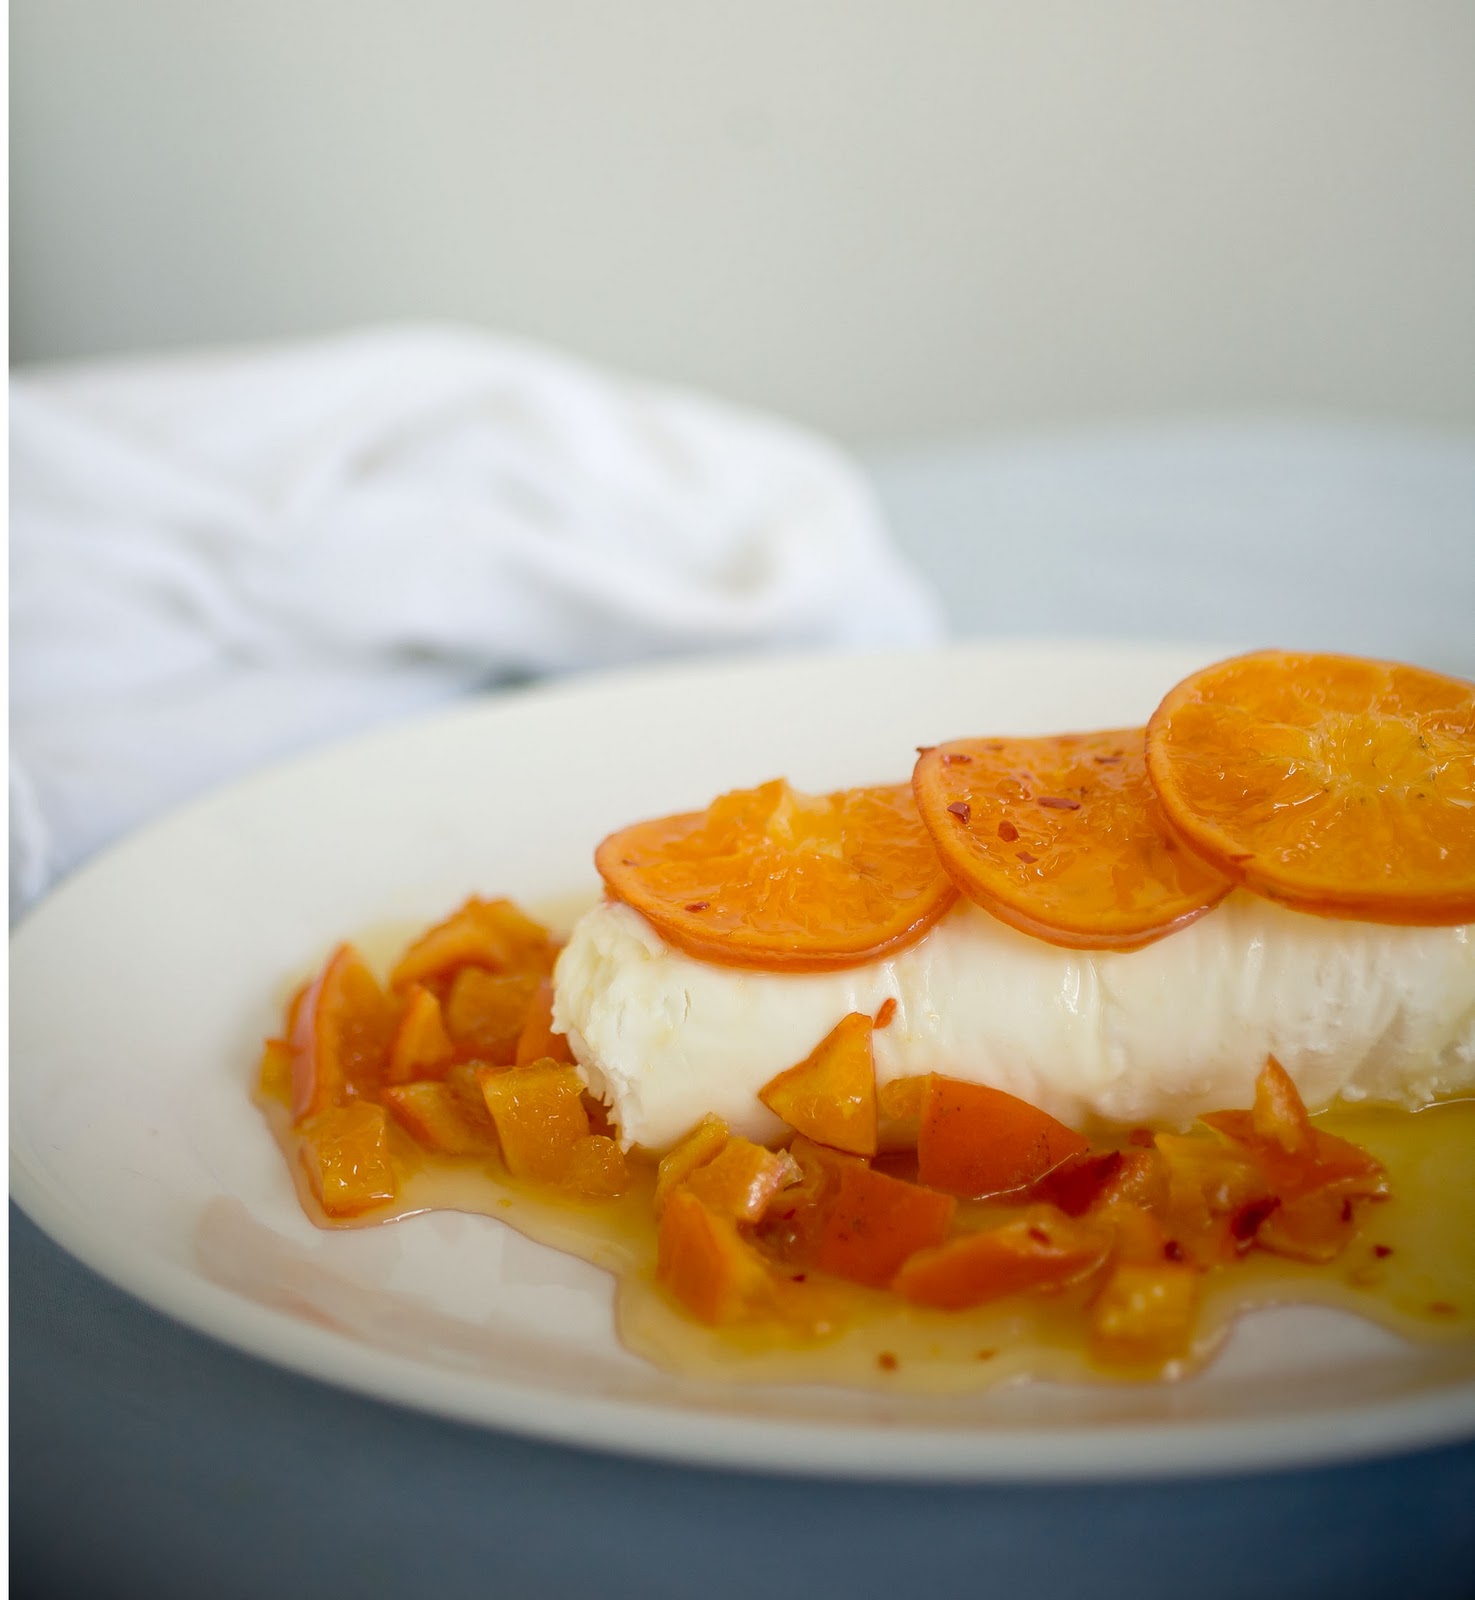
I recommend packing the Tangerines in a jar with the slices ringing the outside of the jar and then fill the middle with the chunky syrup. The presentation is show stopping.
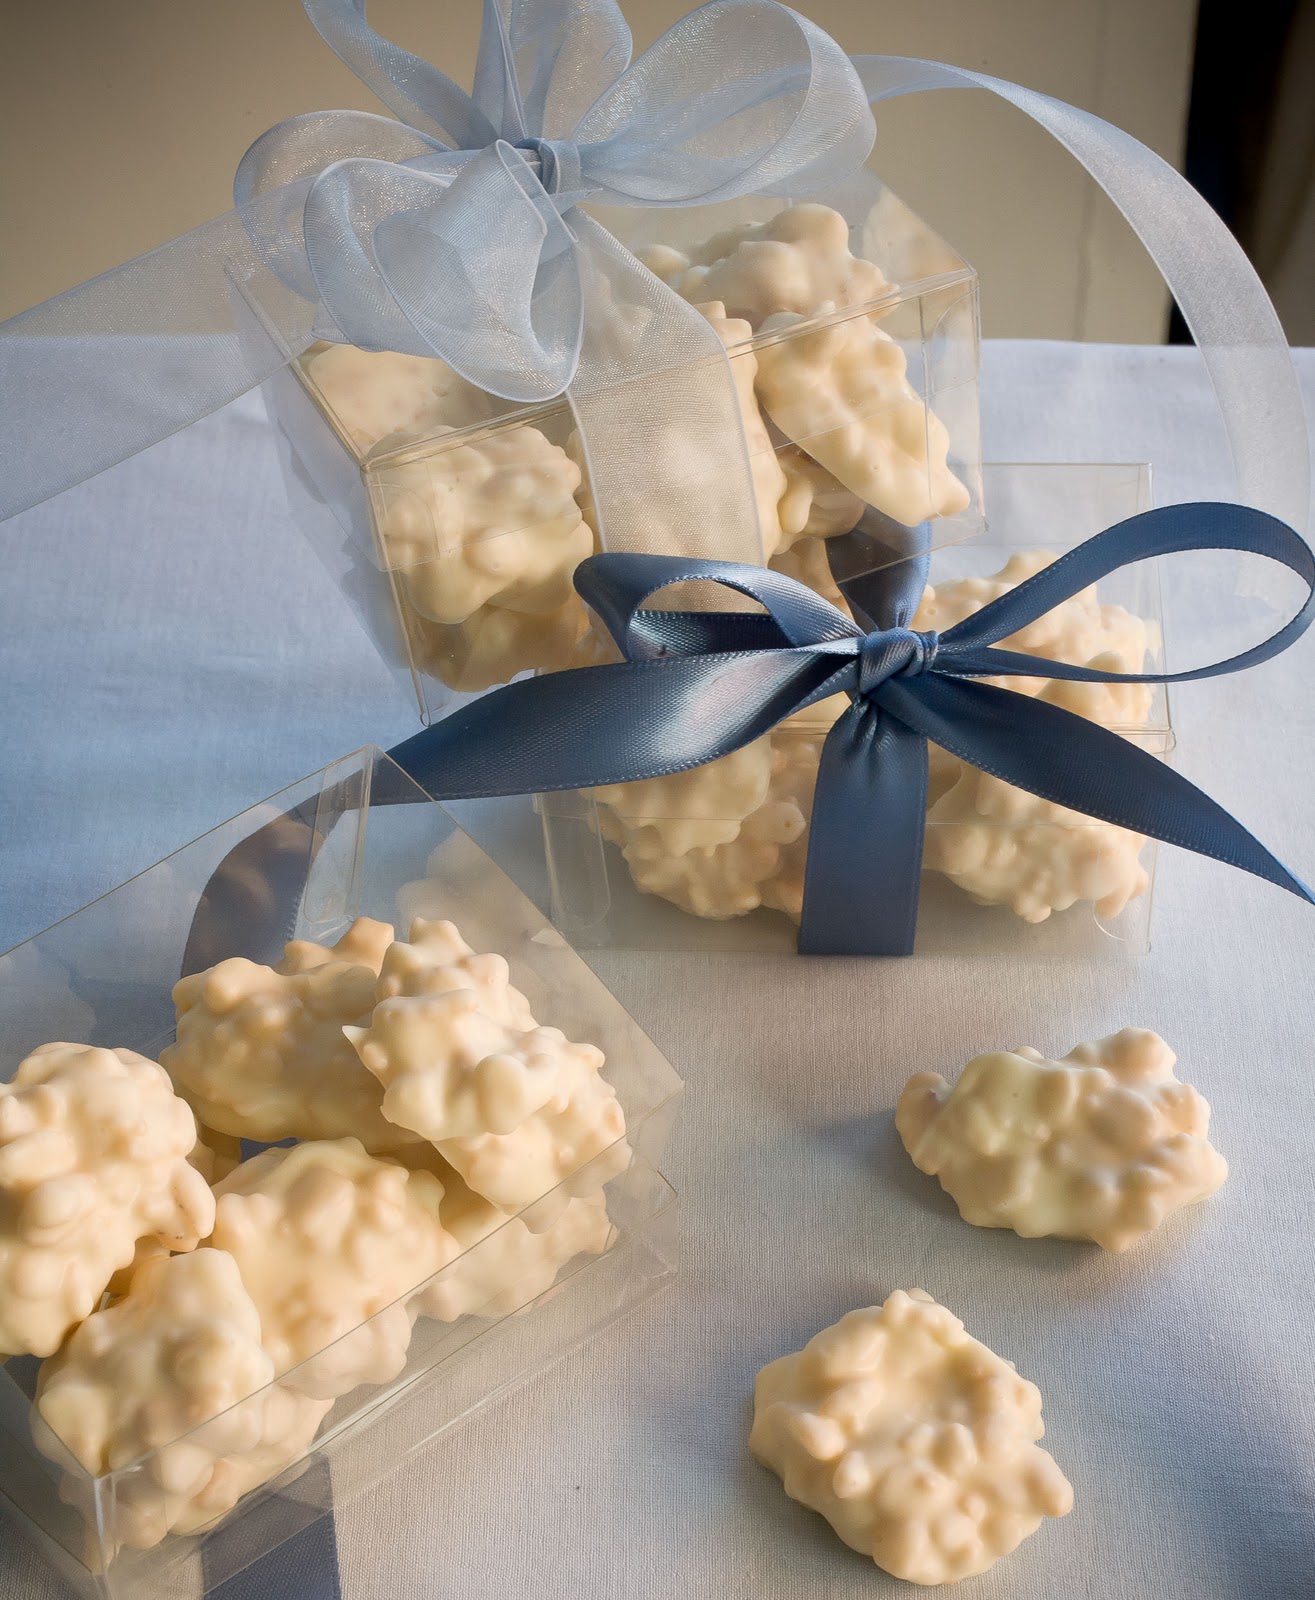
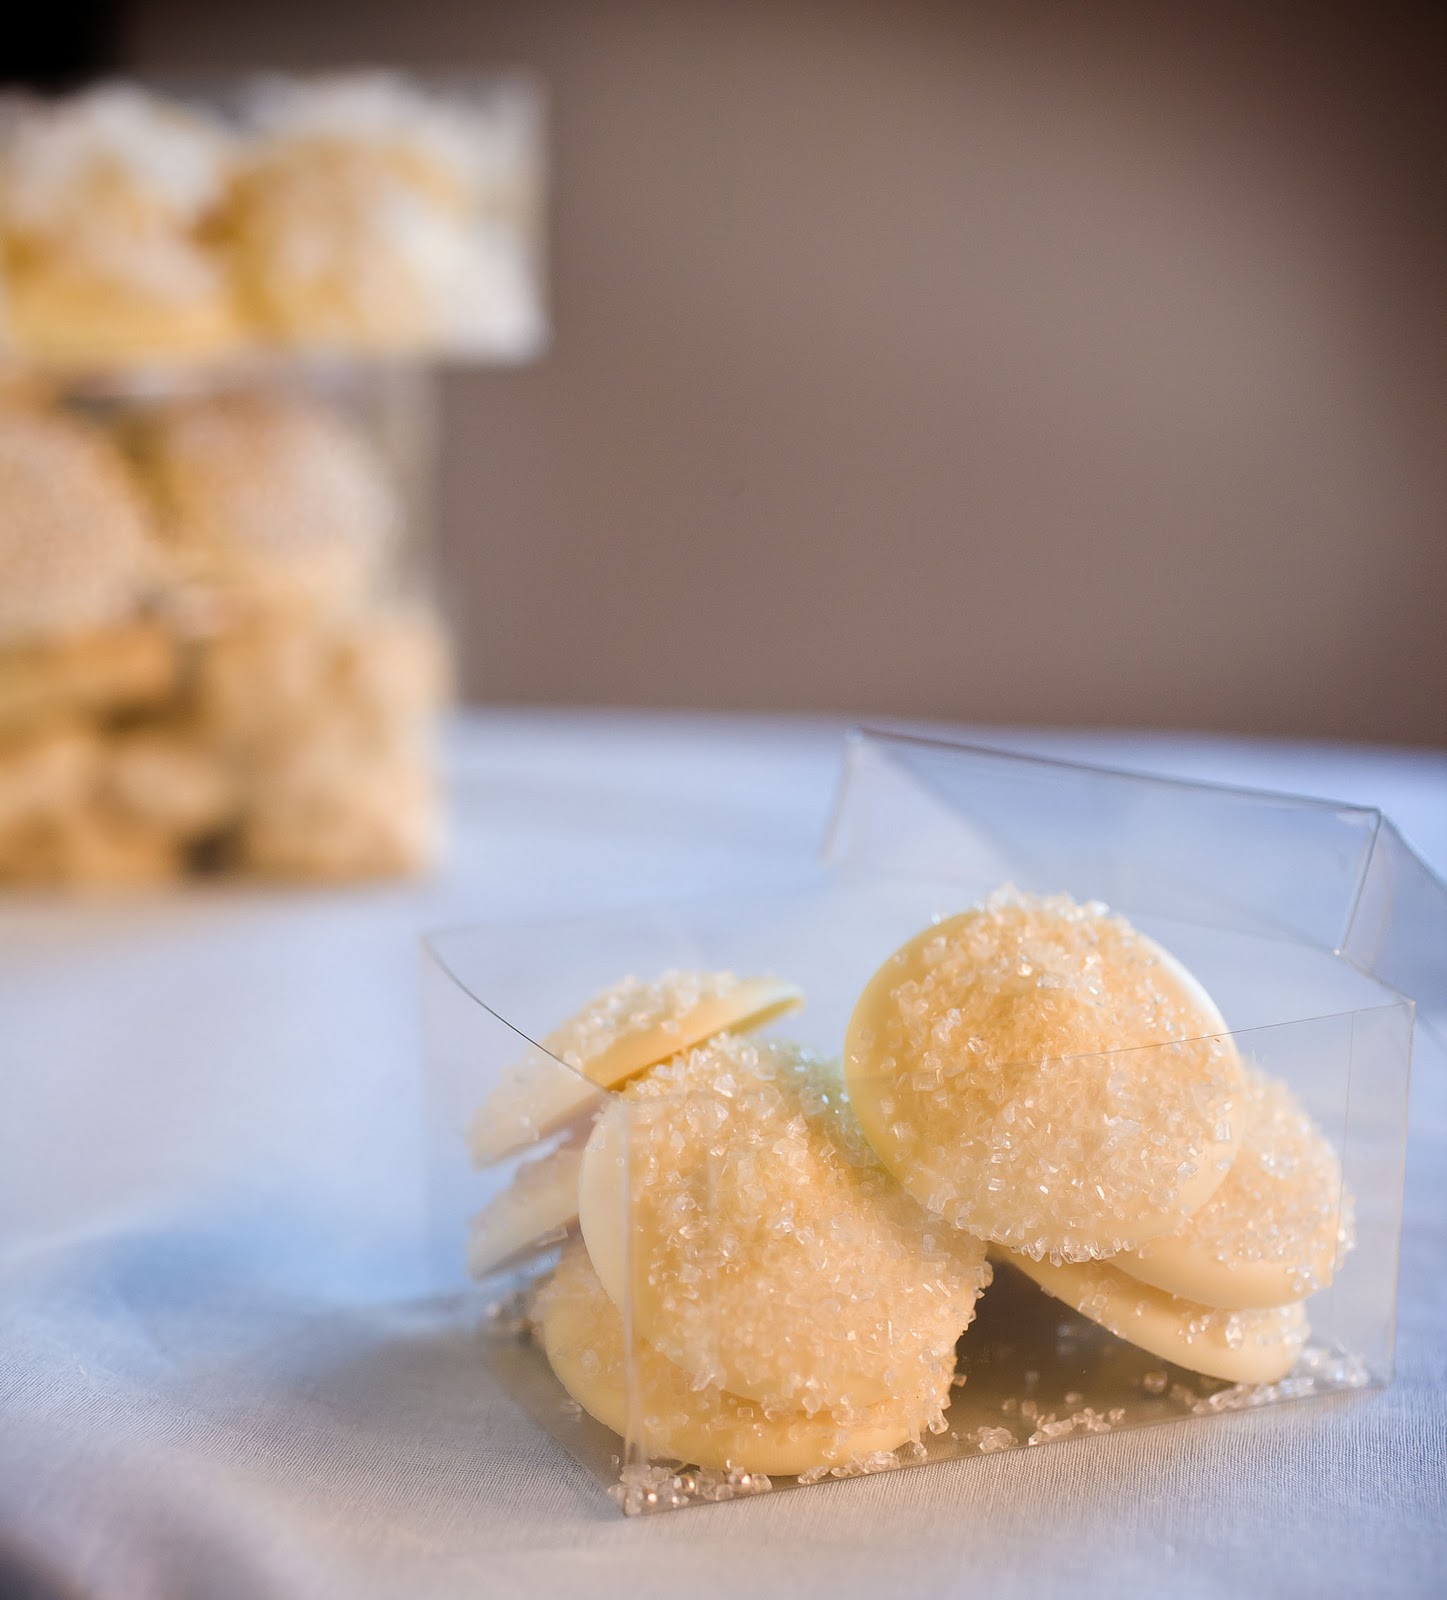
Packaging is always where it’s at and can transport the mundane into a delight. If you plan to put the pears into a bag I recommend using cellophane. This will prevent them from getting sticky, which is what happens when placed in plastic.
The same with the ginger. Though the ginger would be excellent in a jar as well.
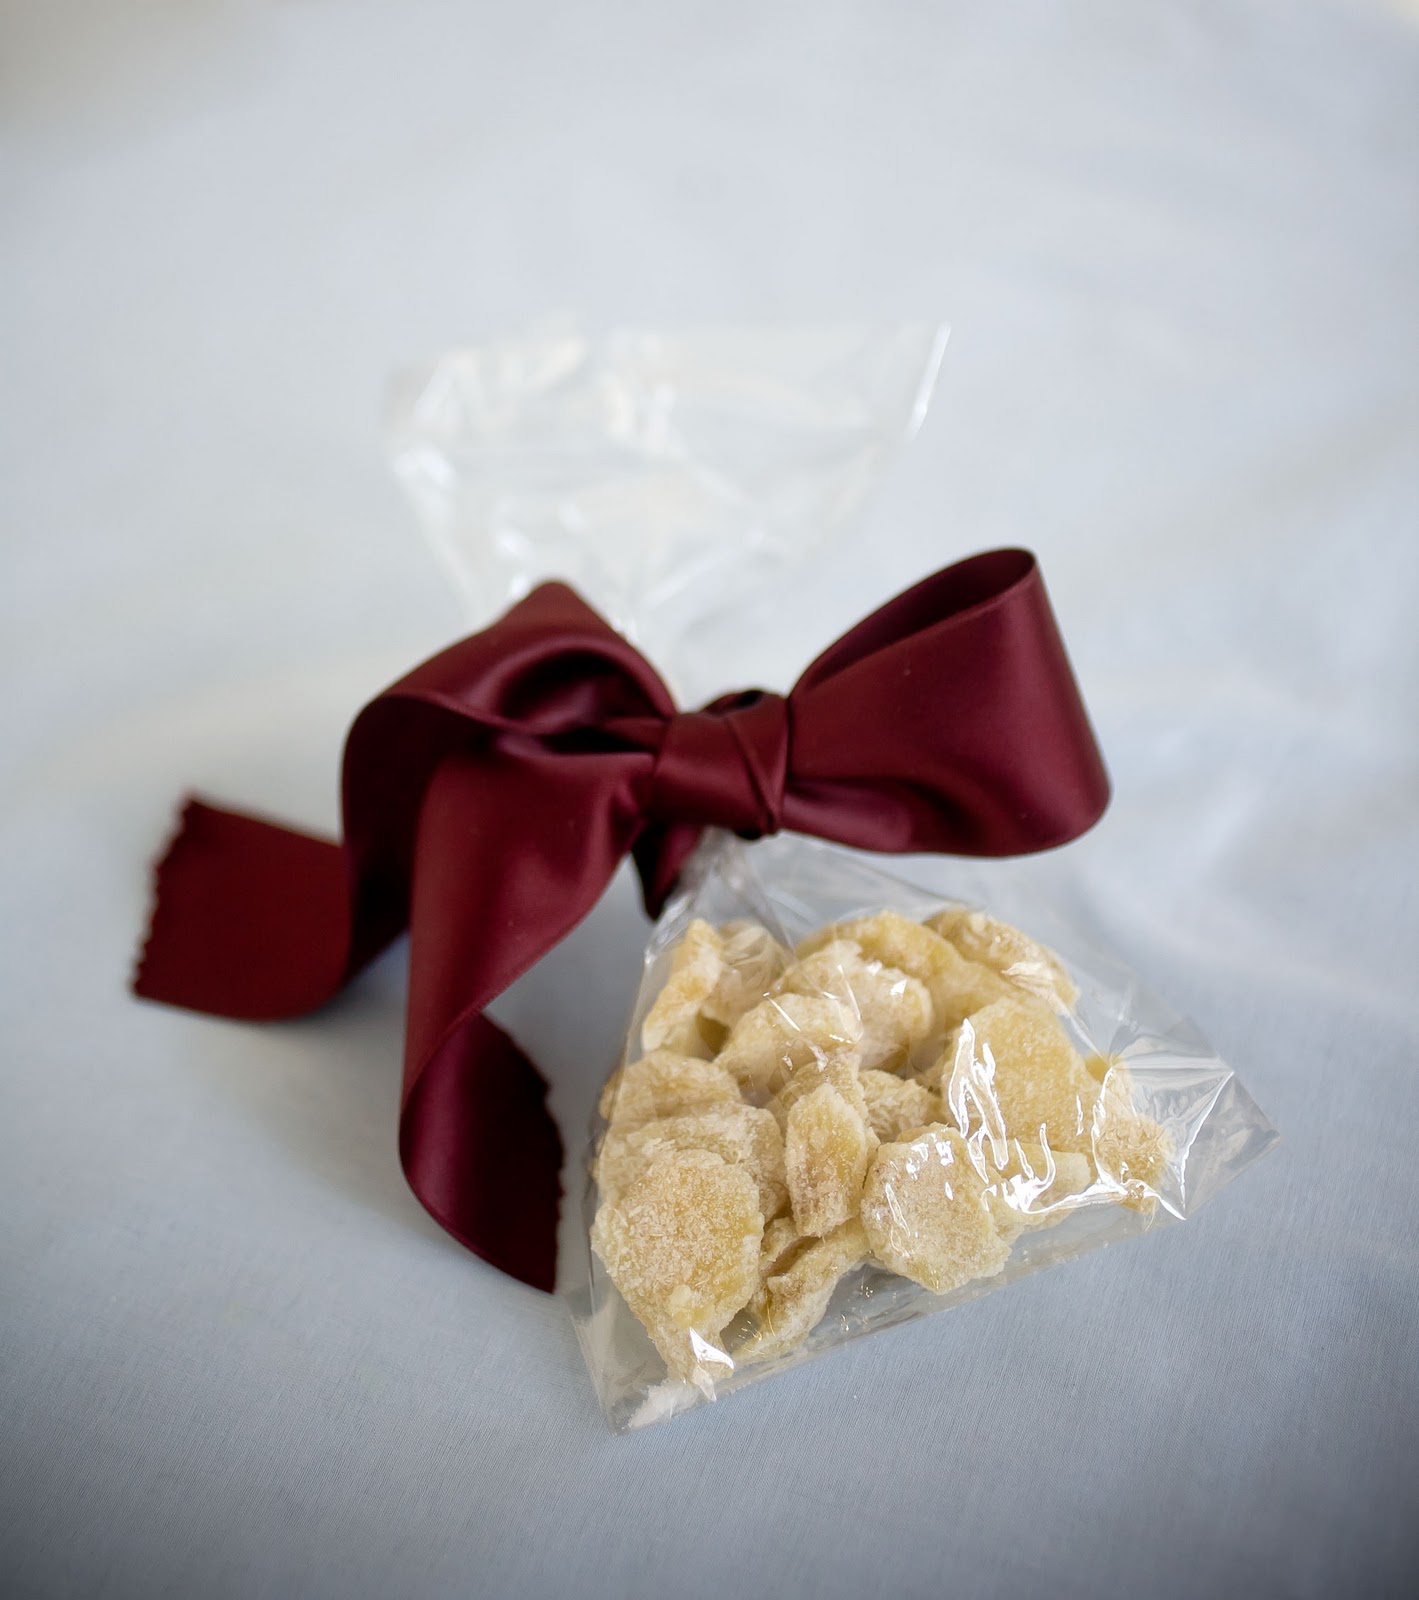
*Check the Holiday Resource page to find links to find bags, bows and jars*
Pear Slices
recipe taken from Donna Hay Magazine
 
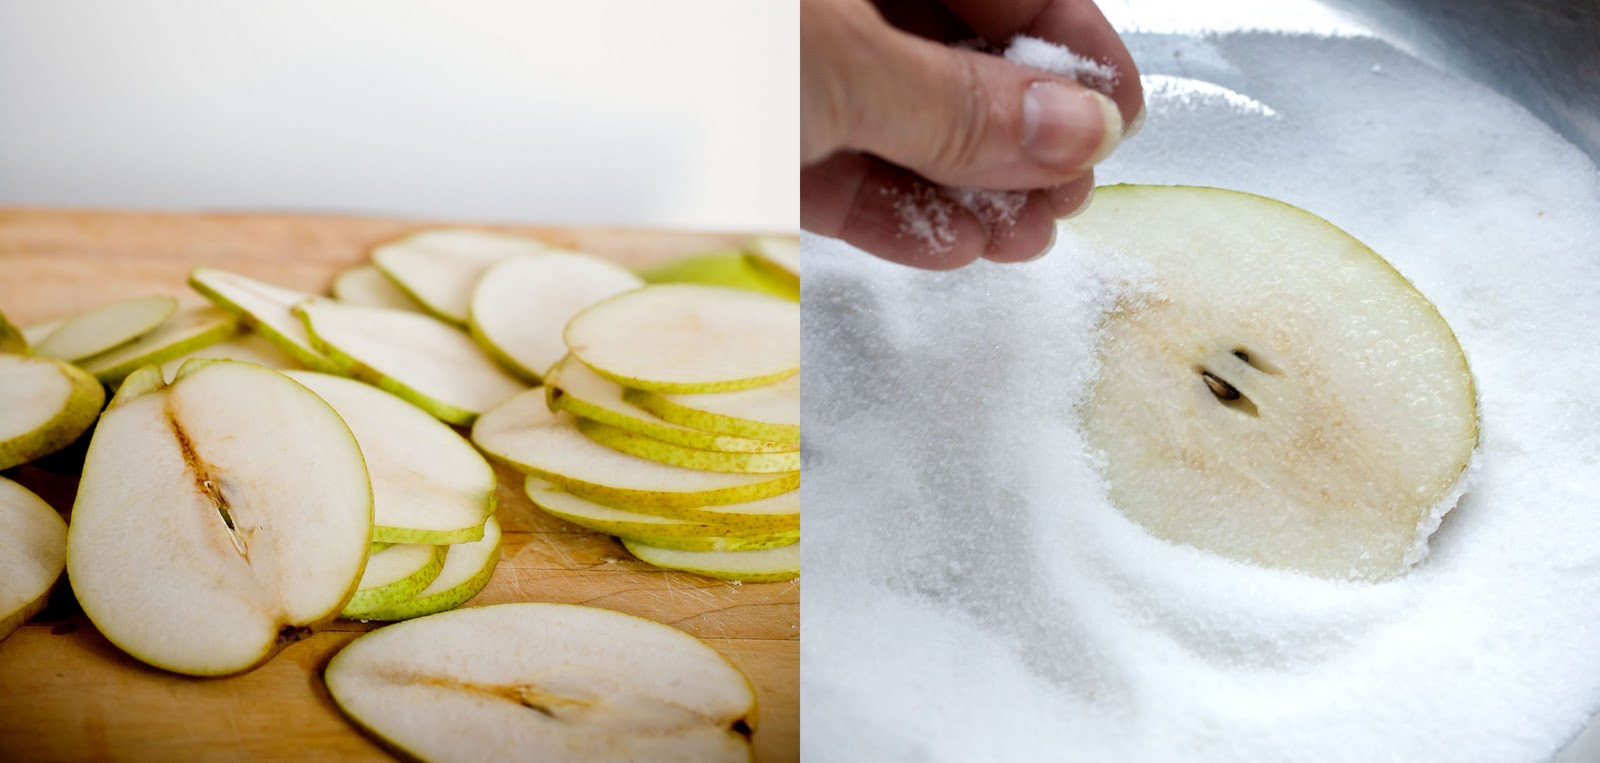
Slice pears on a mandoline or in even 1/8 inch slices.
 
Press each side into sugar and place onto a parchment lined baking sheet
 
Bake at 350˚ for 15 minutes~then flip the pears and bake another 15. Take care doing this since hot sugar can cause nasty burns
 
Once out of the oven carefully transfer the pears to a drying rack and allow the pears to fully dry. If you live in a humid place placing the rack in a turned off oven with a pilot light will do the trick.
 
 
Spicy Tangerine Sauce
a Gail Watson recipe
 
This recipe is in ratio, so you can make as little or great as you would like. I used 3 tangerines for the recipe shown
 
Slice top and bottom off of the tangerines and reserve. Make 1/8″ thin slices of half of the fruit and rough top the other half, including  the tops and bottoms.
 
Measure out the volume of fruit and place into a sauce pan.
 
Next add equal amounts of sugar and water to the pot- 
2c tangerines:2cups sugar:2cups water
 
Add a generous pinch of chili flakes and 3 star anise cloves to every 3 tangerines.
 
Bring all to a boil and then reduce to a low simmer. 
 
Simmer the fruit for 30 mins or until the rinds are soft and the slices are translucent.
 
Can properly into jars, or jar and keep in the fridge for 3 weeks.
 
Warm sauce over cheese is amazing.
 
 
Candied Ginger
 
This is another ratio recipe. Purchase ginger that is firm and thin skinned- which is spicier in the end. Older ginger is fine if that is all you can find, but nothing dried out and shriveled. The ginger shrinks as you cook it, so get triple the volume you will need.
 
Scrape the skins off the ginger using a teaspoon. This works remarkably well and preserves the most flesh. It’s also so much easier to work around the knobs and ends.
 
Slice the ginger into 1//8-1/4″ slices. I made coins, but you can do long strips etc.
 
As above, into a pan measure 1:1:1 ratio of ginger to water to sugar.
 
Simmer in pan on the stove until the ginger is tender. Mine took a good 30 minutes, but it will just depend on the thickness of your slices.
 
Strain the slices and RESERVE the syrup (I’ve got an great use of it in a future post)
 
Lay the slices on a drying rack and allow to dry to a tacky state. This is important. If you rush the sugaring process you can end up with a gooey mess, so be patient.
 
Once dry enough toss the ginger in some sugar and you’re good to go!
 
{btw-I used this gingered sugar for the pears- can’t say it really added anything, but it couldn’t hurt}
 
Keep the ginger in an airtight container so it doesn’t dry out. It will keep for 3 months if stored well.


Share this:

  • Click to share on Pinterest (Opens in new window)
  • Click to share on Twitter (Opens in new window)
  • Click to email a link to a friend (Opens in new window)
  • Click to share on Facebook (Opens in new window)
  • Click to print (Opens in new window)
  • Click to share on Tumblr (Opens in new window)

Filed Under: dessert, GF, gifts, gluten free Tagged With: candied fruit, dulce de leche, ginger, gluten free, pears, tangerines

{Day 1} White Chocolate Candies

December 2, 2011 by Gail Watson

Candy making is a true science. They say that about baking but truthfully there is sooome leeway in baking- candy making? not so much- but SO satisfying and your friends will be mega impressed.

Making chocolate candies like a pro requires tempering of the chocolate. This is a process of melting and cooling the chocolate that develops the cocoa crystals. The result is a glossy snappy chocolate that doesn’t streak or bloom. This can be a little on the fiddly side, but I promise, it absolutely is doable.

My best advice is to give yourself plenty of time and an uber clean work environment and then relax and enjoy. Water is an enemy of chocolate tempering, so if your melting your chocolate over a double boiler take extra care not to let any drips get into the bowl.

The method highlighted above is simple and direct. You can use an instant read thermometer like the one you stick in the Turkey bird. There is a specific glass chocolate thermometer with a narrow temperature range. Not an expensive investment, but not really necessary. Another word of advice- the greater the volume of chocolate the more stable it will be and temperature variables will be slower. The worst case? If you overheat the chocolate it will lose it’s temper, and like a sleep deprived 2 year old, there is no bringing it back to behave. Not a loss though, the chocolate is still delicious and can be used in baking, truffle fillings or icings.

When it comes to making chocolates, I use a chocolate tempering machine. I purchased my Revolation 2 about 15 years ago. I don’t do a ton of candy making or dipping, but man oh man, do I love this machine. If you can get your hands on one, or share one with a pal- it’s awesome. Remember, there are Valentines and Easter opportunities…

Tips on making Nonpareils:

These candies can be made with any color of chocolate but I just love the white on white for the holidays.

Make sure you get the smallest silver dragees possible. I used size 0- any larger and they are too crunchy to eat gracefully.

When decorating with the dragees let the chocolate set for a minute or two before sprinkling on the dragees. Because they are a little heavy they will sink into the chocolate when it is first poured. My method is to pipe out an entire tray and then decorate. Have all your goodies at the ready, cooling chocolate waits for no one.

When piping out chocolate use a CLEAN pastry bag or make a parchment cone. Any contamination in the chocolate makes it cranky.

Properly tempered chocolate that is left over can be melted and tempered again. Ain’t that a beautiful thing?

A word about chocolates- firstly, NO NOT use “coatings”. These are waxy substitutes for chocolate the way Velveeta pretends it’s cheese. Using quality chocolate is really worth the price and effort here. It’s best to buy chocolate in block form from a dealer and not buy bars at the supermarket. NY Cake and Baking supply sells in smaller and larger quantities and so do many other sources. If you plan on making chocolates for Valentines, investing in a slab, or 5 Kilo (11lb) block can be worth it as the cost is about half and it will keep. Just store in a cool place or wrap tightly and store in fridge- just keep the wrapping on when warming to room temperature. You don’t want to create any condensation on the chocolate (see above about water and chocolate).

Lastly- when adding things in to make clusters keep in mind the temperature of them. Whatever you use needs to be room temp otherwise it will throw off the temper. This goes for dipping cold centers since the chocolate that drips back into the bowl will be cooler. Watch the temperature level of the chocolate and keep it in range- my machine alerts me with a beep when the temp starts to slip out of range- so I just wait a minute until it brings the temp back on track (SEE why I love this thing so much?).

See the resource page at the top of the page for purchasing sources for all needs here.

White Chocolate Nonpareils
 
2# of chocolate- produced about 8 of these boxes
silver dragees, size 0
sanding sugar
sweetened coconut
Round piping tip size 10
Clean pastry bag- disposable plastic bags are the best
 
Prepare a flat area with parchment paper. If you’re planning on making a big batch lining a counter is fine. The chocolates set in a few minutes and unless you have a ton of baking sheets this is just fine. A granite counter is even better.
 
Prepare pastry bag and fit with the tip and line up your toppings
 
When all is at the ready then start tempering your chocolate. No walking away from melting chocolate and I do not recommend using the microwave for making candies. I know people do it, but it’s too loosey goosey when it comes to temperature control, and hot spots in the chocolate will make it lose temper.
 
When the chocolate is tempered time to fill the pastry bag.
 
Turn down the sides of the pastry bag and fold back the tip to prevent the chocolate from leaking out. You can set this up in a jar or glass for better control. Once filled twist the top of the pastry bag to prevent the chocolate from oozing out of the top.
 
You are ready start your piping. Do this as swiftly as possible but with grace. Hold your finger over the end of the tip to prevent the chocolate from leaking out between piping.
Squeeze the bag while holding the twisted part closed between thumb and finger. 
 
Try to make even sized rounds. I first measured my boxes to make sure my circles would fit nicely. However, no rules here- make ovals, squiggles, long bars, letters of the alphabet…
 
After a minute to allow the chocolate to juuust set- you can see the sides of the chocolates start to dull a little.
 
With a spoon sprinkle on the toppings. The dragees are best done on a baking sheet to capture stray beads which can be reused.
 
The coconut I “tucked” into the chocolate to make sure that there was a nice knot to bite into. To do this simply press the coconut gently down into the mound.
 
Allow the chocolates to cool and harden. Allowing them to slowly cool will create a greater sheen and a finer look. Putting them into the fridge is fine, but not my preference.
 
If your kitchen is very warm this can affect the process, so the cooler the room the better. Make chocolate on non baking days.
 
**if you’re finding your chocolates are just not setting up you can switch to “cold chocolates”  that you will just have to keep in the fridge. Not a bad thing- so remember that’s always a back up**
 
White Chocolate Rice Krispy Clusters
 
When I near the end of my candy making I like to use the remaining chocolate to make clusters. You can use a variety of things such as nuts, dried fruits or in this case, Rice Krispies- just remember, nothing wet like sliced berries…
 
There are no measurements here, just eyeball the additions. Factor a 1:1 ratio- there is really no right or wrong.
 
With a spoon drop mounds onto prepared parchment and allow to set as above. 
 
Personally I like tiny clusters- it’s a nice treat to take petite nibbles rather than indulge in a big puck of chocolate.
 
 
***************************************
 
Once the chocolates and set you can package them right up.
 
Store in a cool dry place.
 
Please see the Resource Page in the header bar for links to boxes and ribbon sources.


Share this:

  • Click to share on Pinterest (Opens in new window)
  • Click to share on Twitter (Opens in new window)
  • Click to email a link to a friend (Opens in new window)
  • Click to share on Facebook (Opens in new window)
  • Click to print (Opens in new window)
  • Click to share on Tumblr (Opens in new window)

Filed Under: chocolate, dessert, gifts, gluten free Tagged With: candies, candy, chocolate, Dessrt, gift candy, nonpareils, snowcaps, white chocolate

Dulce de Leche for Breakfast makes me think of Alberto

November 21, 2011 by Gail Watson

Not Valorie’s table- but a taste of heaven in my home.
In celebration of my recent birthday my dearest Pam and I trucked on down to New Orleans for the weekend. It was our first road trip with our new Mazda Miata- and let me tell you- two girls traveling in a car with a trunk the size of a Barbie suitcase has it’s challenges, but not without laughs and good times.
After a few days on our own enjoying a romantically fantastic and culinary time, we toddled over to my dear friends Valorie and Alberto’s house in the Irish Channel. Val and I go way back to our early years in the wedding business. She was an exceptional floral and event designer and we made instant friends when we met during a set up for a wedding in a big NYC loft.
She is now an even more exceptional interior designer in NoLa and you may know her as The Visual Vamp. Her blog is chocked with great thoughts, ideas, Val’s great writing and her sense of joy and life living. When you have a minute it is a must read. You may also know she and Alberto, her Argentine husband, as US National Tango champions and instructors. And let me tell you darlings- this is only a small scratch into Val’s fabulousness.
The last time we visited we woke to one of Val’s beautifully set breakfast tables. A small table tucked into the kitchen was covered in a beautiful linen cloth. Stack of china, silver, pots and plates of goodness and “objets” covered the table and made it too beautiful to think about making a crumb amongst. However Val’s tinkling laugh, ease and grace made this fantasy feel like we’ve always belonged here. So with napkins on laps and Cholo, their King Charles Spaniel, at our feet- we dove right in.
Amongst the delights was a luscious bowl of dulce de leche that had come from Alberto’s Argentina from their last trip there to Tango. Val toasted up some chewy sourdough bread and with the dulce de leche on top it was divine….. Sweet and creamy on top of crunchy chewy and the tang of the sourdough made it heaven. Such a simple thing elevated- such is the magic that is always Valorie.
Homemade Dulce de Leche
 
makes approx 1c
I dusted off my crockpot for this. The slow low temp cooking is perfect and no need to keep an eye on it.
 
Take 1 can of sweetened condensed milk and remove the label.
 
Submerge the can in water in your crockpot and set on low.
 
Leave to work it’s magic for 8 hrs. Cool before serving.
 
No fears about bursting cans but if it concerns you alternatively you can empty the contents of the can into a small heatproof bowl and cover with foil. Add water up the edge of the bowl and proceed as above.
 
If you don’t own a crockpot you can use the alternative method in a pan and place into a low oven- as low as it can go for 5-7 hrs.

Share this:

  • Click to share on Pinterest (Opens in new window)
  • Click to share on Twitter (Opens in new window)
  • Click to email a link to a friend (Opens in new window)
  • Click to share on Facebook (Opens in new window)
  • Click to print (Opens in new window)
  • Click to share on Tumblr (Opens in new window)

Filed Under: dessert, GF, gifts, gluten free Tagged With: argentina, breakfast, dulce de leche, dulce de leche recipe

« Previous Page
Next Page »

Primary Sidebar

Thank you so much for your LIKES!

Thank you so much for your LIKES!
The Inner Circle
Join the Inner Circle For Exclusive Content
No Worries. This is just between us.

Top Posts & Pages

The {Famous} NY Times- No Knead Bread
Red Curry Chicken with Gingered Black Rice
Chocolate Mousse {No Cream}
A Moist Dense Olive Oil Polenta Cake with Candied Kumquats
Your Copy of No Knead Bread Booklet
Country Pate {Pate de Campagne}
my healthy aperture gallery
Certified Yummly Recipes on Yummly.com
Homemade Hot Sauce Link~ HuffingtonPost

Copyright © 2026 · Genesis Framework · WordPress · Log in