• Skip to content
  • Skip to primary sidebar

A Stack of Dishes

Something good is cooking...

  • Home
  • About
  • Recipe Index
    • Bakery
    • Dessert
    • Chocolate
    • Appetizers
    • Healthy Recipes
    • Main Course
    • Small Meals
    • Breakfast
    • Gluten Free
    • Side Dishes
    • Cocktails
    • Condiments
    • Gifts
  • Delicious Links

gifts

8 Tips For Making Successful Caramels

December 18, 2012 by Gail Watson

Man do I love me some caramels. They are an awesome holiday food gift and easy to make, and they are also easy to not do well.

People often say to me that they can cook but not bake. Their reasoning is that baking is specific and scientific, whereas cooking is more forgiving. To certain degrees this statement is true, but when it comes to candy making it is hard fact.

Variations in degrees, humidity, ratios or handling can make or break a candy. Some you can get away with, but honestly, not really.

Here are a few best practices and tips for making candies in general and specifically caramels.

1. Thermometer– Pre-test your thermometer for accuracy. A degree or two off can make the difference to how your sugar hardens. To test take a pot of boiling water and completely submerge the thermometer into the water without touching the bottom of the pot. Boiling water is 212˚- no higher or lower. Make a note of where your thermometer lands. If it’s a degree or two off, make a note and adjust your recipe accordingly.

2. Cleanliness– Some recipes call for an absolute grease free environment. Before making candy I rewash all utensils- bowl, pot, spatula, thermometer, measuring instruments, etc.- in hot soapy water and dry with paper towels or air dry. I do NOT use a used kitchen rag.

3. Pure Ingredients– make sure that the sugars you are using are contaminant free. If you used a wet spoon and dipped into the sugar bin, or used a measuring cup that was previously used for flour, this can contaminate the sugar. You can get away with this with baking, but not with candy making.

4. Prepare– Making candy is about timing and readiness. Have all ingredients and utensils prepared and laid out before you begin. Sugar temperatures can change quickly sometimes and you don’t want to be caught unawares.

5. Patience– Don’t rush the sugar boiling stage. A better caramelization happens with a slow development over time. It will also serve you by inadvertently overshooting the temperature when your head was turned for just a moment.

6. Eyes on the Prize– Boiling sugar is it’s own animal. It can turn quickly, and it can also hurt you. Boiling sugar is about the most dangerous thing in the kitchen- boiling oil being second.  If you get splashed with molten sugar it sticks to the skin and can cause nasty burns. So especially with inexperienced kitchen helpers, you MUST stay vigilant.

7. Don’t Stir– This is a very common mistake for first time candy making. Stirring boiling sugar causes the crystals to become unstable and start to bind. The result is grainy, cloudy or lumpy candy. When it comes to making pralines this happens to be the effect you want, but with caramels, absolutely not.  You can stir in the very beginning to incorporate the ingredients, but once it gets boiling, hands off! It will be tempting, even if sugar crawls up the sides, just let it go. Promise me-  you’ll be glad you did.

8. Don’t Touch– It’s also very common to want to poke your fingers into the just finished candy. After all it looks SO beautiful- but it will hurt you. Admire your work- from afar, and give it twice as much time as you think to cool. Sugar is dense and holds its temperature very well, so please err on the side of caution.

I’ve used several different recipes over the years. Martha Stewart printed a recipe in the latest Living issue {December 2012, pg 99} that was a bit different. Typically the heavy cream is added into the hot syrup once it has reached temperature. This recipe added the cream at the start. I was skeptical but I tried it and it was great. Pouring cream into hot sugar is a bubbling, steaming, terrifying and dangerous thing, not to mention often messy with cream boiling over onto the stove (the WORST to clean up). Adding the cream at the start avoided all that. This will now be my method of choice.

Martha Stewart’s Salted Caramels
modified from the December 2012 Martha Stewart Living Magazine
makes approx 120 pieces
 
vegetable oil, for greasing baking sheet
2c heavy cream
2.25c sugar
6T unsalted butter, cut into pieces
1.25c light corn syrup
.5t coarse salt- I used Maldon flaked salt
.5t pure vanilla extract
 
wax paper or cellophane wrappers


Lightly brush bottom ans sides of a 9×13″ rimmed baking sheet with oil. Line with parchment, leaving an overhang, and oil that as well.
 
In a heavy 5qt saucepan, combine the cream, sugar, butter and corn syrup. Bring to a boil over medium heat, and continue to boil without stirring, until the thermometer reads 248˚. It took me about 25 mins.
 
The cream will be bubbly and high at first. It will calm down as it reaches temperature and turn a beautiful caramel color.
 
Remove the pan from the heat and stir in the salt and vanilla. Immediately pour into the prepared pan and do not scrape the bottom. Just let whatever pours out fall into the pan.
 
After 3 minutes, sprinkle the top with more salt to your taste.
 
Allow the caramel to rest, uncovered, overnight or at least 8 hrs.
 
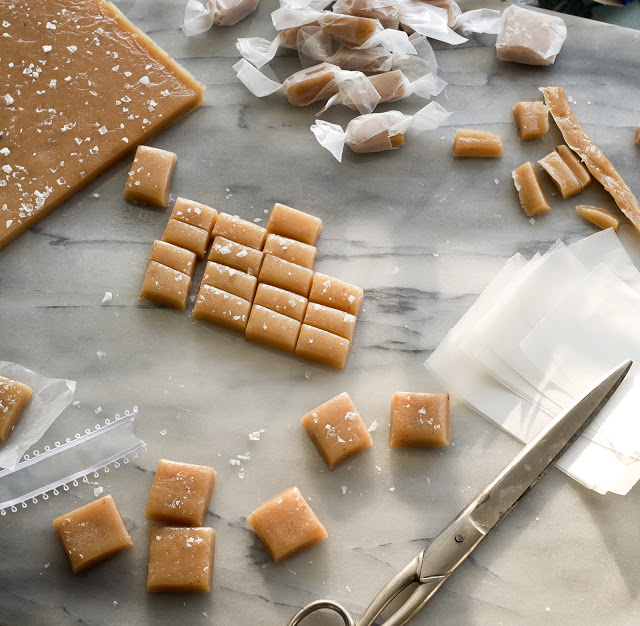
Remove the caramel from the pan and peel away the paper. With a sharp knife cut the caramels to the shape you want. .75″x 1.25″ is the size she made.
 
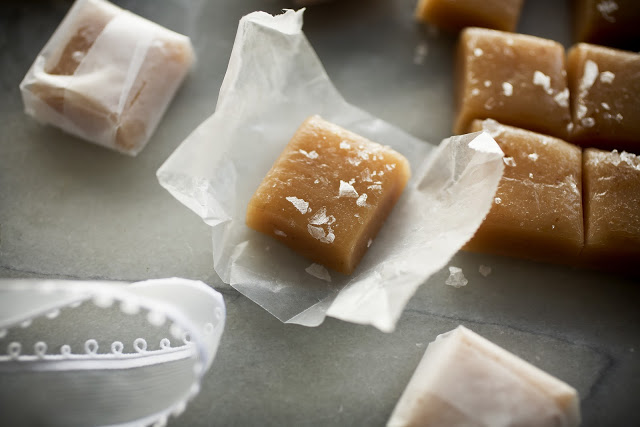
Immediately wrap in cellophane or wax paper. 

Enjoy, be safe and have fun. Your friends will love you for making these.

Share this:

  • Click to share on Pinterest (Opens in new window)
  • Click to share on Twitter (Opens in new window)
  • Click to email a link to a friend (Opens in new window)
  • Click to share on Facebook (Opens in new window)
  • Click to print (Opens in new window)
  • Click to share on Tumblr (Opens in new window)

Filed Under: GF, gifts, gluten free Tagged With: candy, caramels, gifts, gluten free, sweets

{Day 10} Homemade syrups: Fizzy Water Surprises

December 11, 2011 by Gail Watson

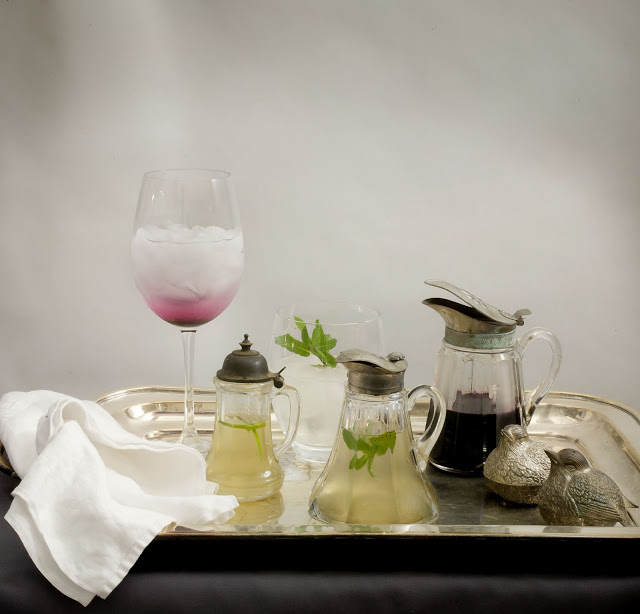
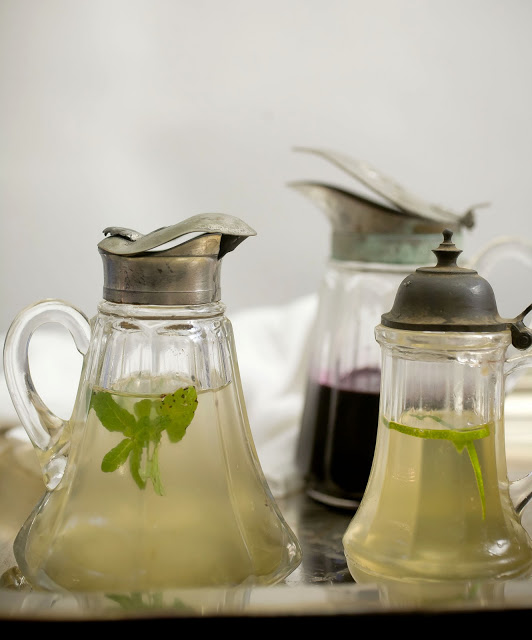
Homemade syrups for soda and cocktail making

As a birthday treat to myself this year I purchased a soda making device that has been a lovely addition to my life. Years ago I used to get old fashioned glass seltzer bottles delivered to my door once every two weeks. It was a bit decadent but I just loved that wooden box by the front door that held blue and clear glass bottles. The guy that ran the business was a bit of a character too, and it was always fun to hear about his past weeks antics. Those days, and the Seltzer Man are now past and gone- so now enter my newest toy.


I will admit that I am not a plain seltzer water gal. I like a little zip or somethin’ somethin’ with my bubbles, and a slice of lime is just not quite enough for me.
I love the notion of homemade ginger ale or root beer. Kinda makes me want to sit at a counter on a stool and drink from a straw while swinging my legs. The beauty of homemade syrups is that they are great for kids or the non drinkers in your life- I would have LOVED something interesting to sip when I was pregnant for instance.

The other beauty is that added to some booze flavored syrups also work for the imbibing crowd. A little splash of syrup over some chilled vodka can mean a Schmancy Martini in a flash. When entertaining I’ve made a row of several different types to syrups with suggestions and let my guests play around. A great conversation starter and more interesting than the usual.

The soda maker company sells syrups, but why not make your own? Fresh made syrups don’t last as long as the store bought ones, so unless you’re giving them away, make them in small batches and store in the fridge.
Blueberry Thyme Syrup
makes ~ 3 c
 
4c Blueberries, may use frozen berries
juice of 1 lemon
1 bunch of thyme
2.5c sugar
 
Wash and crush berries in a medium saucepan. Add lemon and thyme and simmer for 10 minutes
 
Strain juice from the solids through a seive pressing down on the berries to remove as much juice as possible.
 
Return the juice to the pot and add sugar.
 
Simmer for another 10 minutes.
 
I strain a second time through a paper filter to remove any seeds etc., cool before bottling.
 
Keep bottled syrup in the fridge
 
Ginger Ale Syrup
makes ~ 3c
 
.5c peeled and chopped fresh ginger
3 c sugar
3c water
 
Combine all in a heavy bottomed saucepan and simmer for 20 minutes.
 
Strain the ginger and cool before bottling.
 
Keep bottled syrup in the fridge
 
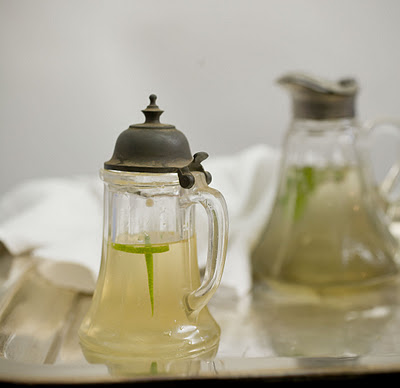
Fresh Mint Syrup
makes ~3 c
 
3c water
1 bunch fresh mint leaves rough chopped
3c sugar
 
Combine water and leaves in a saucepan.
 
Bring water to a boil then turn off heat. Allow leaves to steep until cool.
 
Strain leaves and return the tea to the pot. Add the sugar
 
Bring back to the boil for 2 minutes and remove from the heat.
 
Cool before bottling and store in the fridge.

Share this:

  • Click to share on Pinterest (Opens in new window)
  • Click to share on Twitter (Opens in new window)
  • Click to email a link to a friend (Opens in new window)
  • Click to share on Facebook (Opens in new window)
  • Click to print (Opens in new window)
  • Click to share on Tumblr (Opens in new window)

Filed Under: cocktails, gifts, gluten free Tagged With: food gifts, gifts, syrups

{Day 6} Flavored Oils

December 7, 2011 by Gail Watson

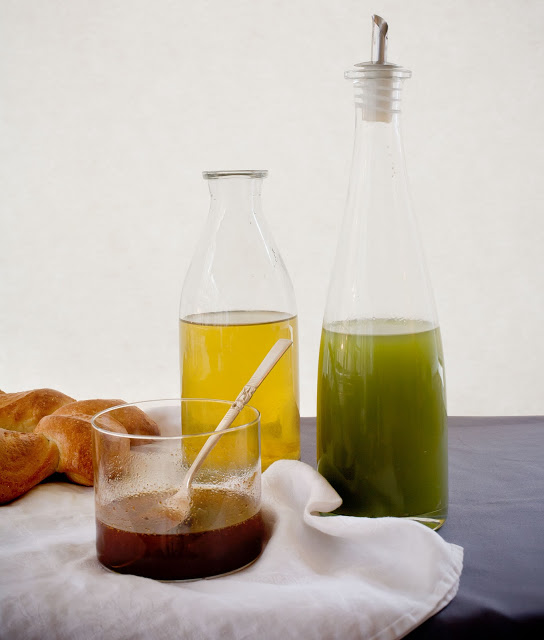
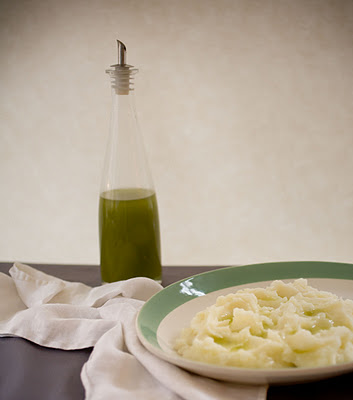
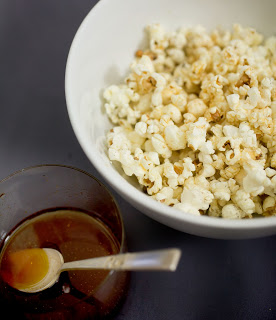
When the day has been long and that chicken in the fridge just looks so, well, geez- another chicken? A splash of flavored oil can make the simple sublime. Mashed potatoes get beautiful chartreusey green puddles of yum with basil oil, take a weeknight pasta and drizzle it with smoked paprika oil and the next time you feel like popcorn- make it the old fashioned way on the stove and use a lemon or rosemary oil to pop the corn and then splash some more on top instead of butter. Sensational in a snap. Love it.
The best part is that flavored oils not only are a great go-to, but easy to make and easily makes smiles when you give them away. Three versions here today, lemon, basil and smoked paprika. I know, sounds way too simple right? why not Thai basil with vanilla and chilis? Because these are the staples, like I said, the go-to’s, the good pals that are there when you need them. From here all things are possible and limitless, but feel free to be creative, I won’t mind. Take these oils as a base and feel free to add to them.
There are two methods to adding flavor to oil, both simple. The hot method: warm oil, add flavoring in the form of herbs or spices and allow to steep, then filter and bottle.  The cold diffusion method requires just adding the flavor to the oil and give it plenty of time to steep. I made the lemon oil this way which infused a brightness from the lemon that is just out of this world.
If you decide to leave leaves, or zests or especially garlic in your bottles- be sure that they be stored in the fridge. Weird things can start growing and that is just not a good thing.
I bottle mine in smaller bottles when giving them away. They can be tucked into bags with other treats, given as pairs or sets, and it doesn’t impose the receiver to give up too much fridge or counter space. Besides, little jewels are also so much more delightful, and who doesn’t like jewels?
Hot Oil Infusion Method
No quantities here, this is by your taste- but a good start is one bunch of fresh herbs to every quart of oil or 3T of spices. Use a mild olive oil over a plain vegetable oil.
Warm oil to 185˚ in a heavy duty saucepan.
Add bruised fresh herbs or combine all in a blender for more intense and faster results.
or add spices that have first been dry toasted in a pan stovetop. Toasting releases the oils and aromatics to get the party started.
Once cooled  and rested overnight, taste the oil for flavor balance. Add more oil to the batch if it’s strong or rewarm and add more flavoring. The flavors do take a few days to develop so don’t expect too much at first, by day 3 or 4 you are truly there.
Cold Oil Infusion Method
Take bottle, add herbs or spices, pour over oil. Done. Good. Mostly.
I made the lemon oil by whizzing a cup of oil with the zest of one lemon in a blender then added it into a quart of oil. All that beating and battering released more oils into the base and can I tell you? divine. It left the oil cloudy at first but a few days later- sparkling lemon flavor and a clear oil.
Bruise any fresh herbs first, let them steep in the oil in a bucket or large jar for at least 2 weeks and then strain. If you like the look you can put fresh pretty herbs and spices into the gift bottles for a nicer presentation.

Share this:

  • Click to share on Pinterest (Opens in new window)
  • Click to share on Twitter (Opens in new window)
  • Click to email a link to a friend (Opens in new window)
  • Click to share on Facebook (Opens in new window)
  • Click to print (Opens in new window)
  • Click to share on Tumblr (Opens in new window)

Filed Under: GF, gifts, gluten free Tagged With: basil, flavored oils, gifts, gluten free, holiday gifts, lemon, paprika

Next Page »

Primary Sidebar

Thank you so much for your LIKES!

Thank you so much for your LIKES!
The Inner Circle
Join the Inner Circle For Exclusive Content
No Worries. This is just between us.

Top Posts & Pages

The {Famous} NY Times- No Knead Bread
Sourdough Series: Part 1- Starter
Sorghum Salad
Dark Chocolate Popcorn with Sea Salt and Peanuts
Short Rib Tacos with Cilantro Lime Cream
Country Pate {Pate de Campagne}
my healthy aperture gallery
Certified Yummly Recipes on Yummly.com
Homemade Hot Sauce Link~ HuffingtonPost

Copyright © 2025 · Genesis Framework · WordPress · Log in