• Skip to content
  • Skip to primary sidebar

A Stack of Dishes

Something good is cooking...

  • Home
  • About
  • Recipe Index
    • Bakery
    • Dessert
    • Chocolate
    • Appetizers
    • Healthy Recipes
    • Main Course
    • Small Meals
    • Breakfast
    • Gluten Free
    • Side Dishes
    • Cocktails
    • Condiments
    • Gifts
  • Delicious Links

gluten free

Winter Jewels: Pan Roasted Pork with Ruby Cherry Berry Sauce

January 25, 2013 by Gail Watson


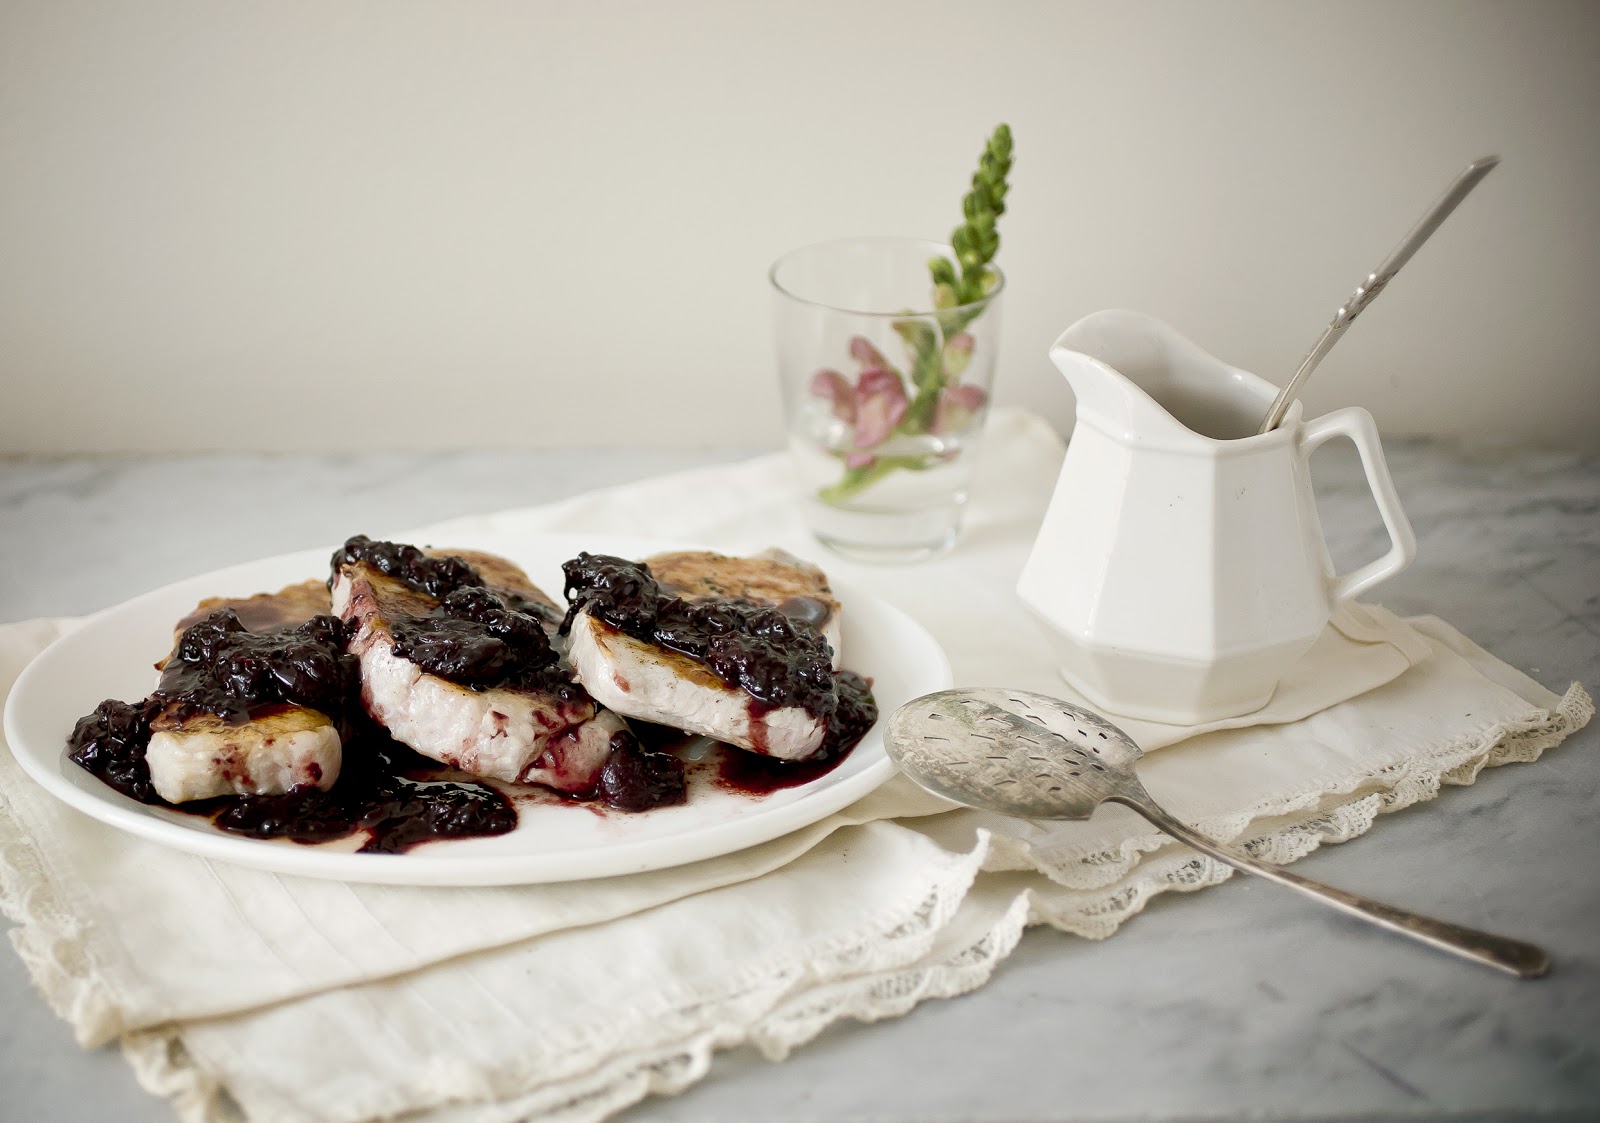
Jewel colored Cherry Berry Sauce magically turns simple pan roasted pork chops into a regal winter meal. I’ve become a devoted Downton Abbey fan {Am I the only one that converses in “Downton Abbey Speak” after viewing the show? ~”Why yes, I think I shaaall have another piece of toast. Thank you ever so much…”} I will admit that I had the show on my mind when I created this meal. With it’s rich color I could can easily imagine this dish coming straight out of Mrs. Patmore’s kitchen and onto the Lord’s table.

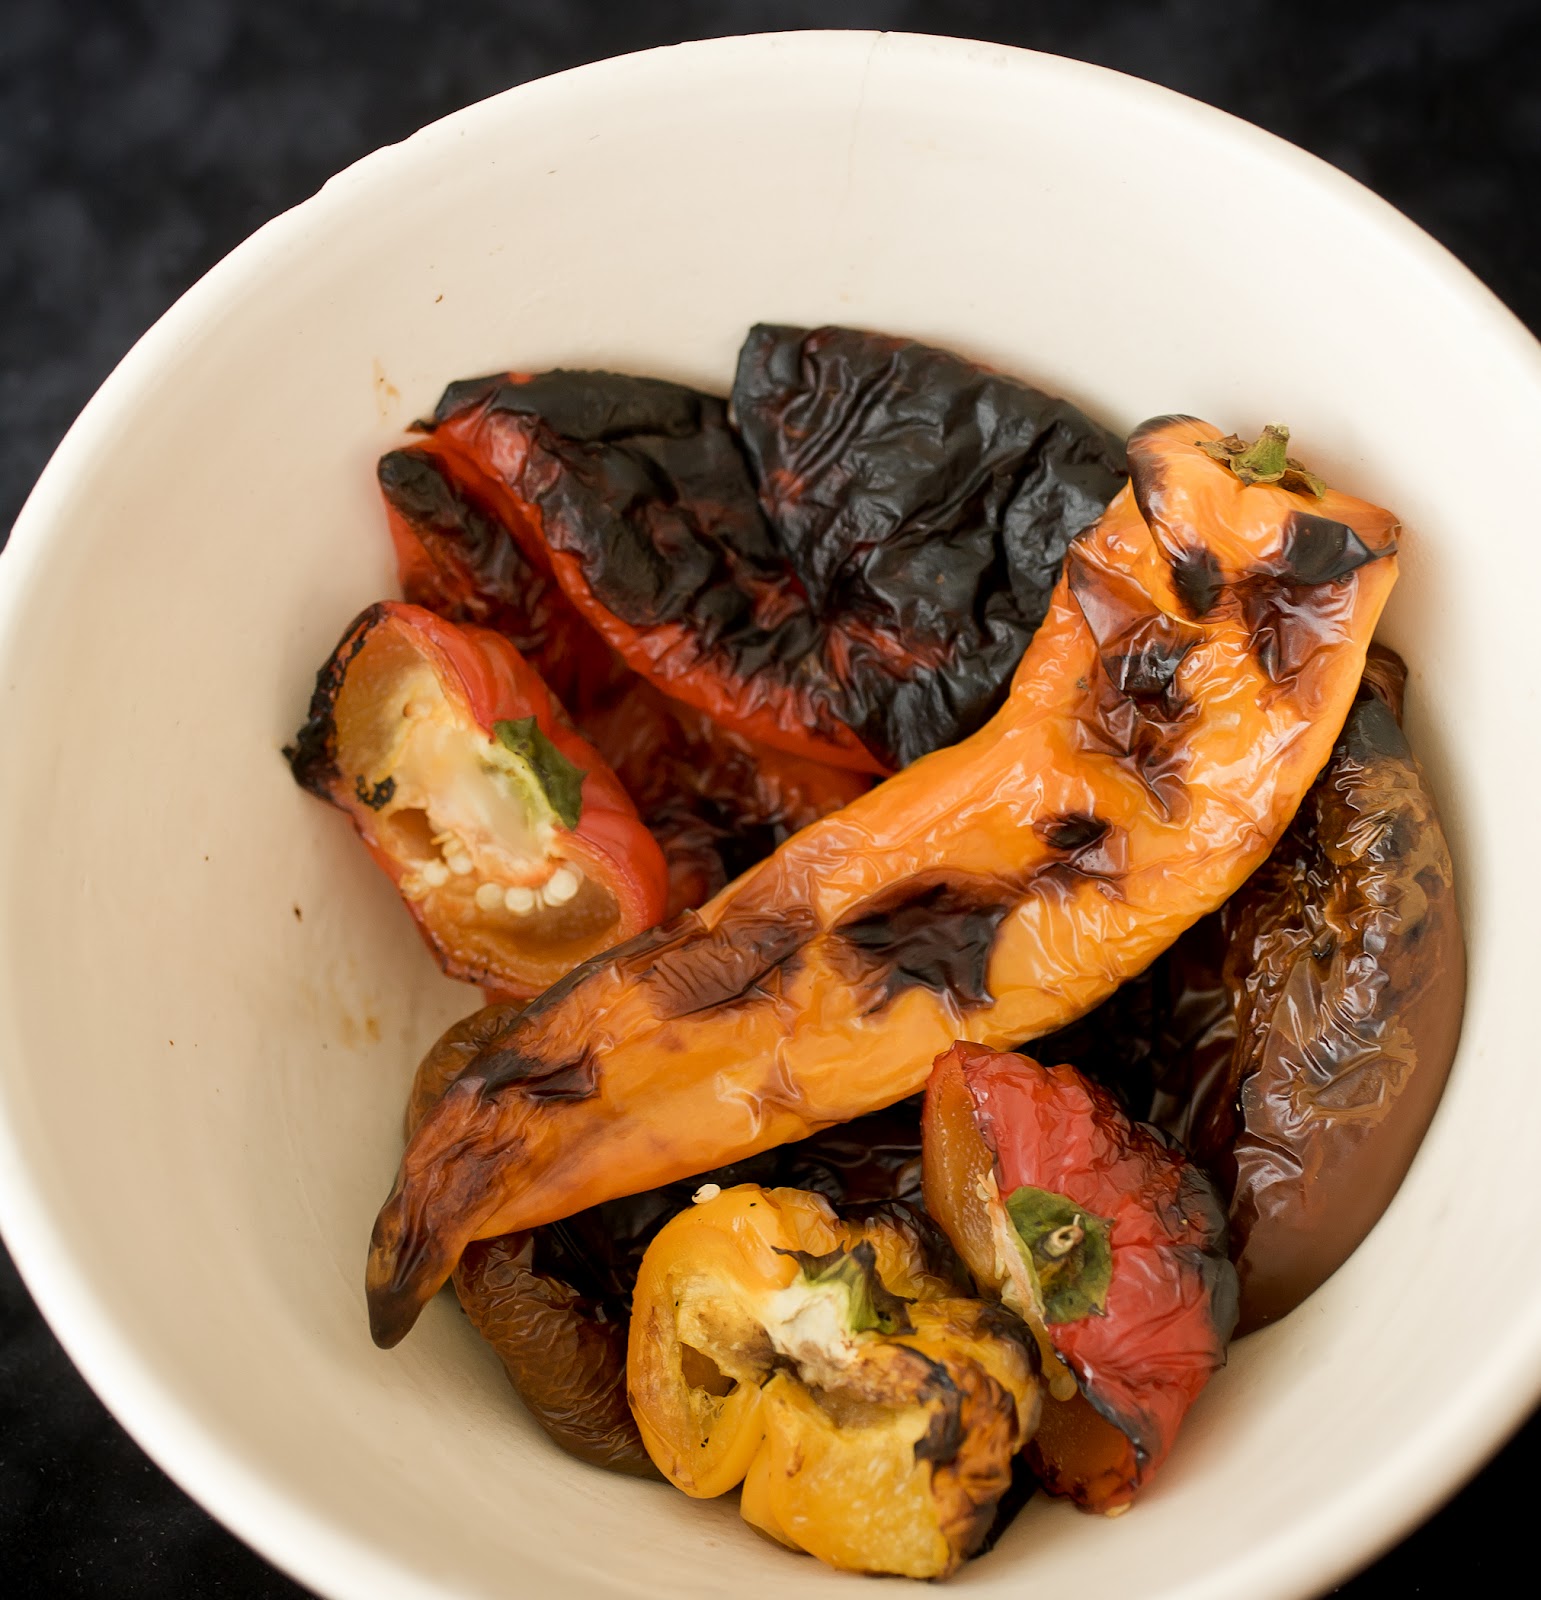
In addition to that, this time of year I’m always looking for ways to sneak more fruits into my diet. I can’t help but eye suspiciously at off season imported fruits from far away lands. Luckily I have no problem turning to a trove of frozen summer fruits. The winter can feel a bit bleak at times, and the beautiful color of this sauce is another good reason to make it.

I’ve never been a huge fan of pork chops. It was so deeply drilled into me as a young woman that to avoid the dreaded trichinosis that pork had to be cooked to within an inch of it’s dry life. It pains me to recall the terrible looks on my children’s faces when I set before them a lovely pork chop, that they had to saw at, with aggressive fervor, in order to get at a piece. Then there were the blinking stares as they had to chaw on, and eventually swallow, that tough bite. My poor dears, no wonder it was never a favorite.

Recently I did a little reading up on the subject. It turns out that things in the pork world have changed since my long ago days in Home-Ec. Back then we were instructed to bring the meat up to an internal temperature of 165˚- which, as my children experienced, is “hockey puck” temperature. Thanks to better raising techniques, and better understanding of food preparation safety, an internal temperature of 140˚ will kill off any unwanted “bugs”, and yield a delicious and juicier meal.

I also came across various cooking methods and feel like I’ve hit on a winner. Some were a bit complicated. This version does have two steps, but it’s well worth it, and I’m excited to share it with you.

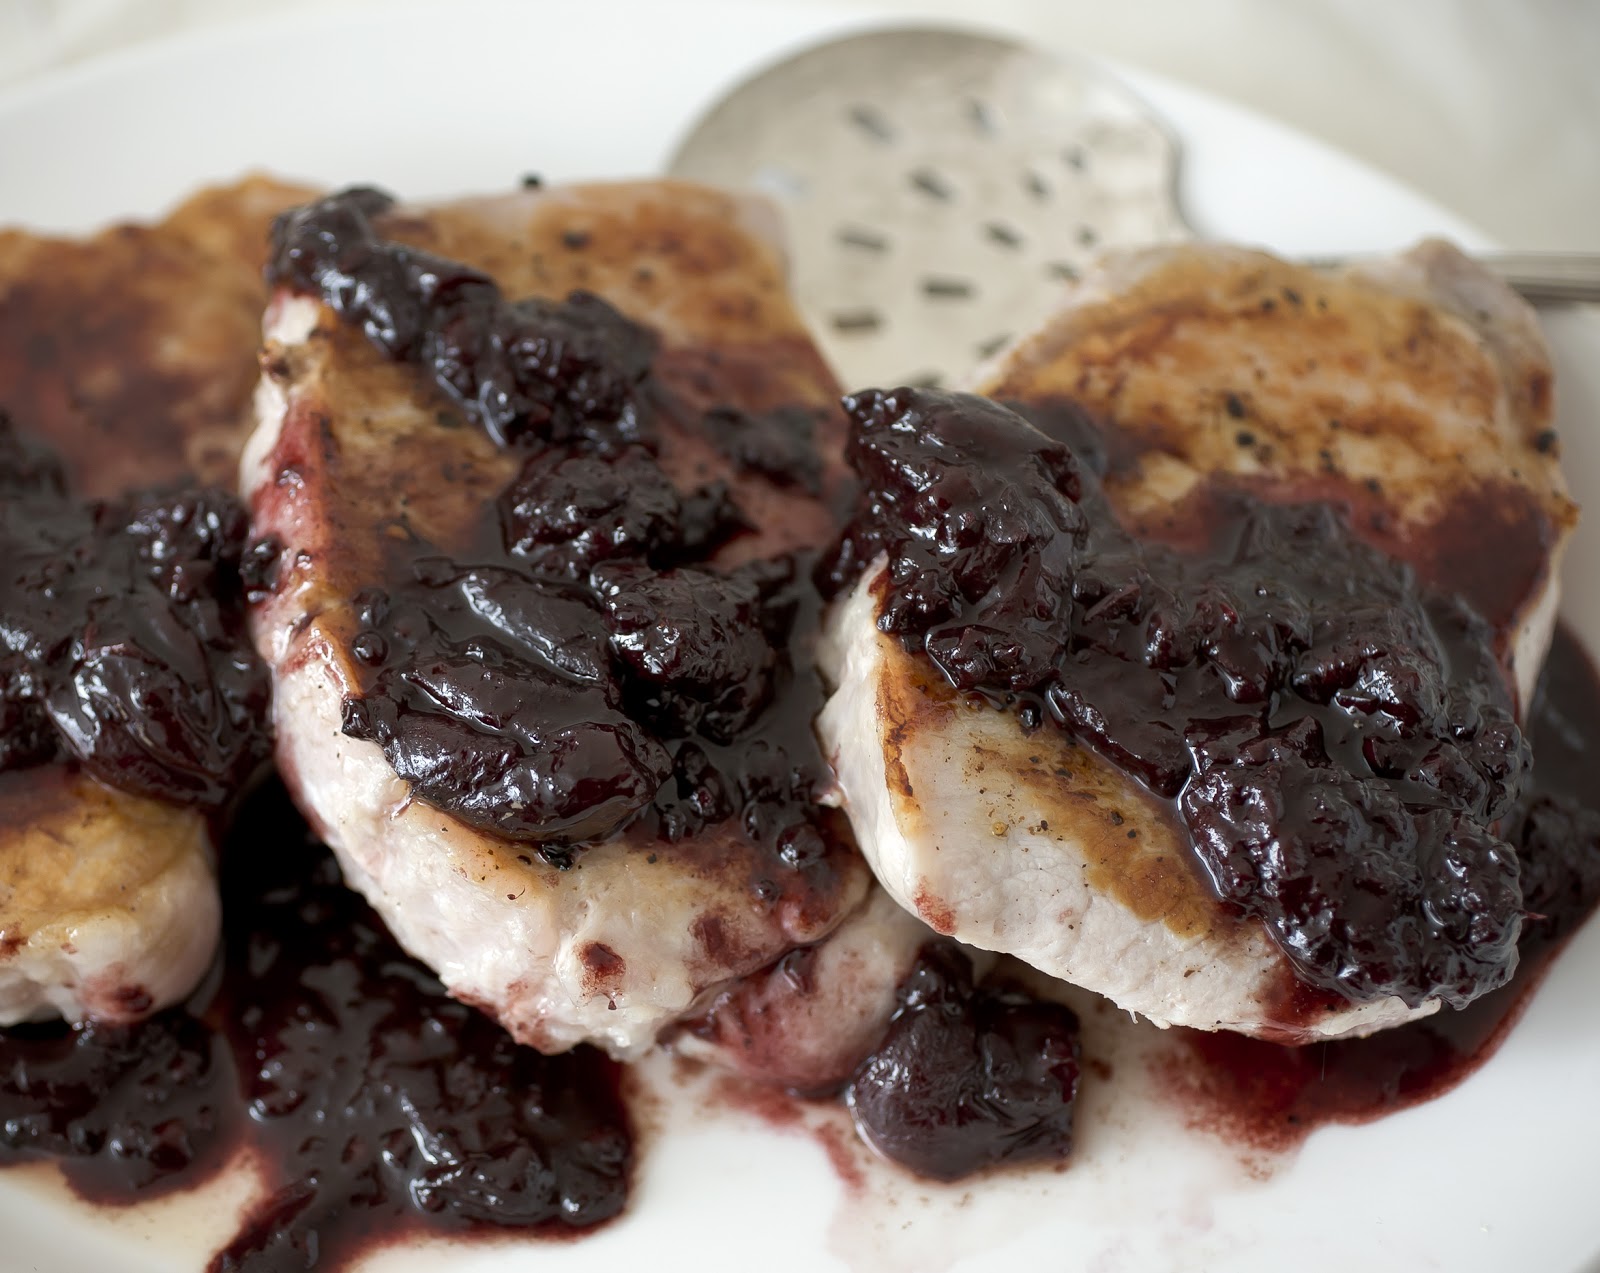
Pork meat is quite lean, with only fat running along the outside. Which makes it wonderfully healthy to eat, but not always the tastiest. To make a really juicy pork chop I first brined it for about 30 mins, which worked out perfectly as I used that time to prepare the sauce and side dishes. Then, using a medium low heat, I gently seared the meat, after which I tucked it into a moderate oven for finishing off. The result was a lovely golden sear on the outside, and juicy delicious meat on the inside.

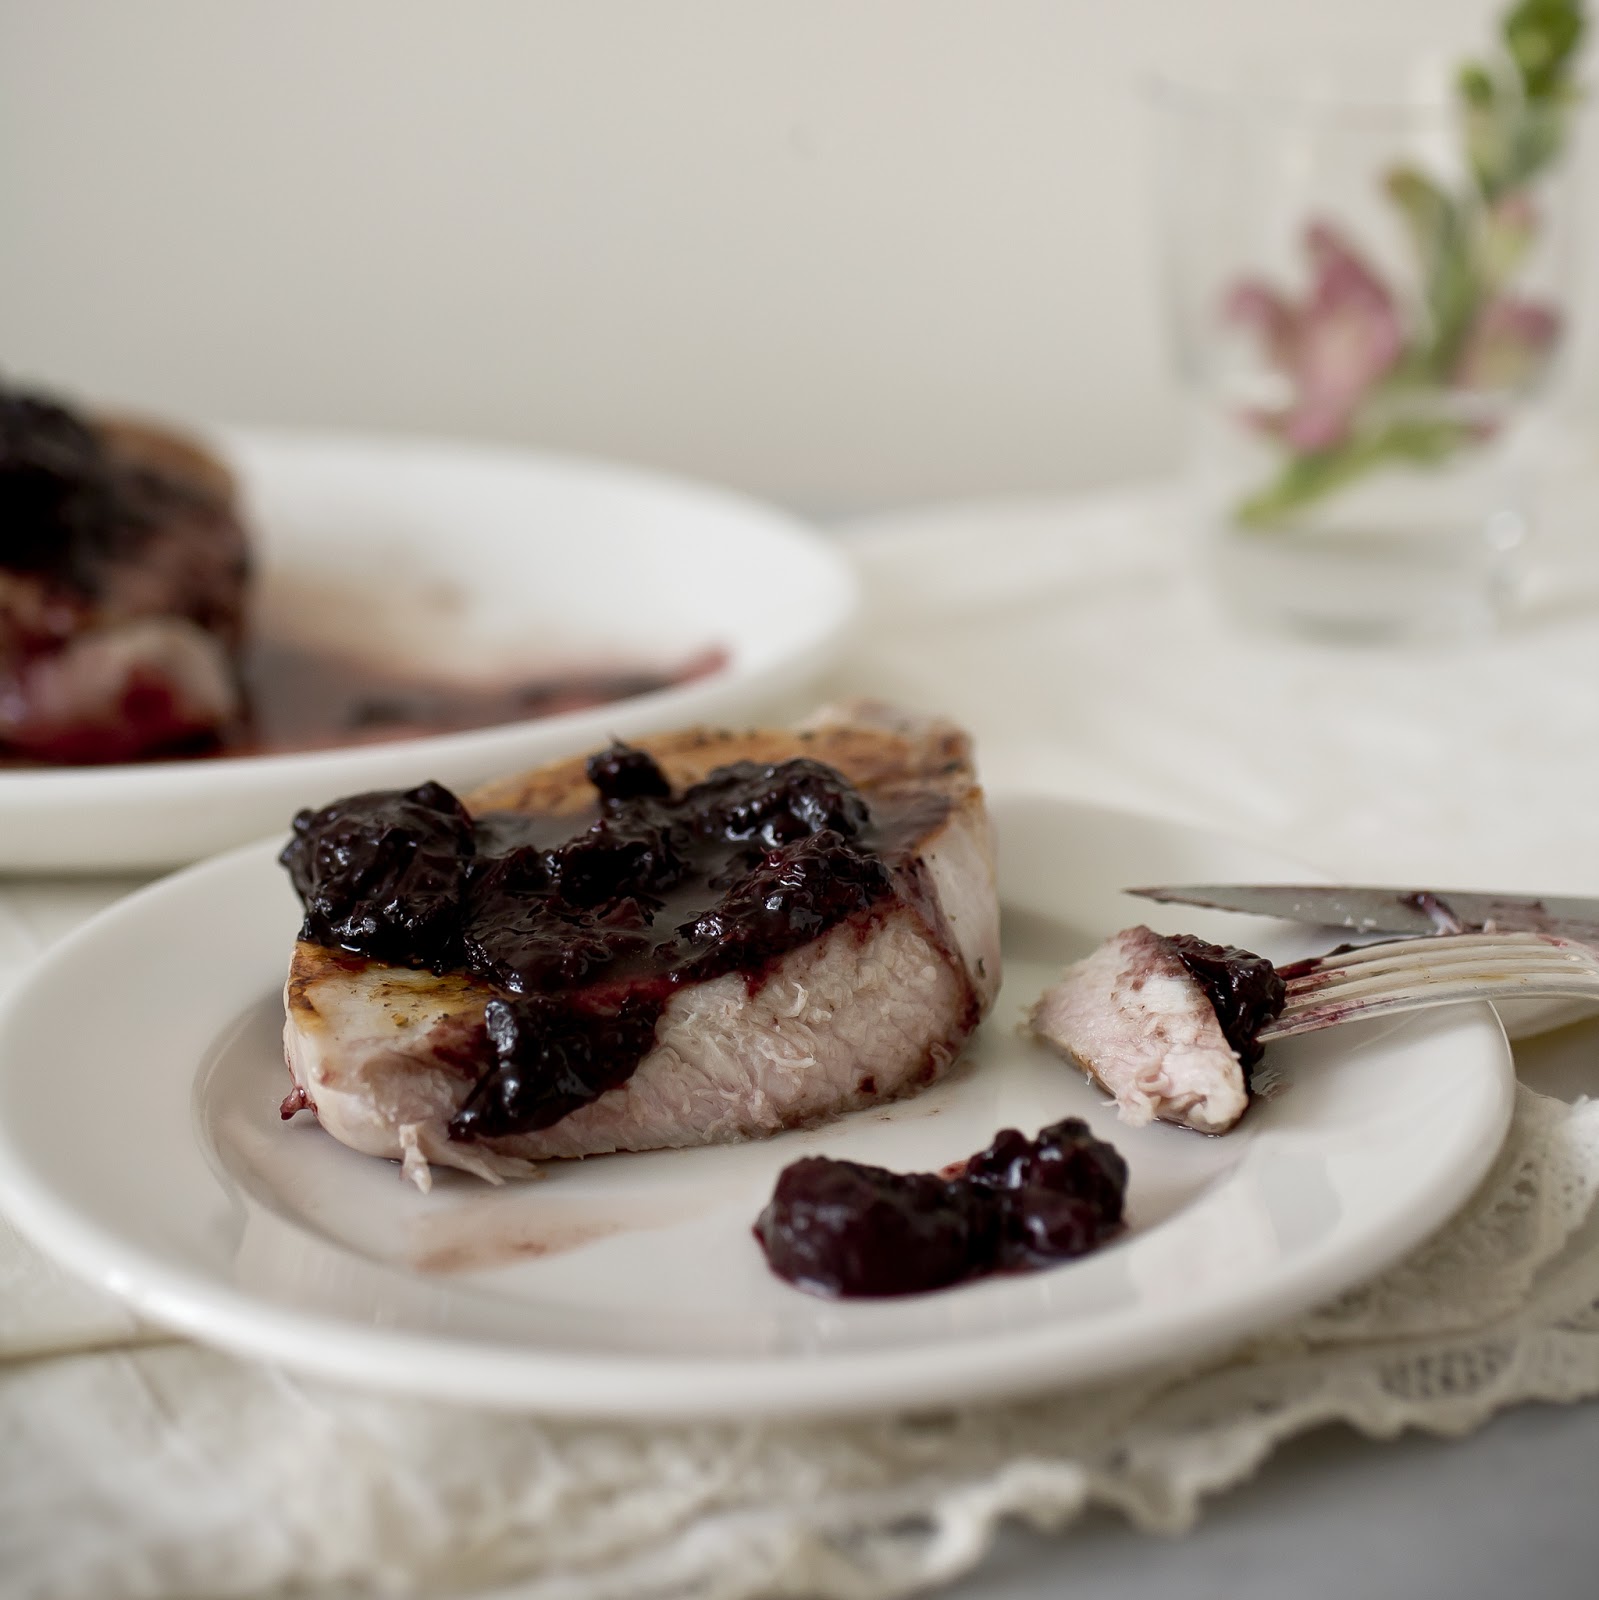
As you can see, the result is a pale pinkness to the meat and even some pale pink juices. According to the USDA, this is more than ok and healthy to eat. I know, I know… it’s hard to let go of those “laws” that we were forced to swallow, but it’s time to let all that go. I promise it won’t make you at all ill, and you’ll want to thank me {EVER so much}.

Pan Roasted Pork Chops with Ruby Cherry Berry Sauce
I used Port wine in the sauce, which you can switch with a fruity red wine, or substitute with cranberry juice. The butter in the sauce also adds a lovely roundness to the flavor, but switching to olive oil works perfectly if you prefer.
 
Serves 4
 
4 lean, center cut pork chops
.75c kosher salt
.75c sugar
4c cool water
 
1T butter
.25 c onion, finely minced
1 clove garlic, finely minced
.5c port wine
.25 c balsamic vinegar
2c frozen red cherries
2c frozen blackberries (or any other berry available)
Salt and Pepper to taste
 
 
In a large bowl, combine the water, sugar and salt- stir to dissolve. Add the pork chops and allow to sit for at least 30 mins.
 
In a small saucepan, melt the butter over medium heat. Add the garlic and onions and gently sauté to release the aromatics and soften.
 
Add the port and allow to gently simmer for 2 minutes. Then add the vinegar and fruits and reduce the heat to low.
 
Allow the sauce to simmer for 10-15 minutes until thickened and reduced. Add salt and pepper to your taste.
 
To prepare the pork:
 
Preheat the oven to 350˚. 
 
Remove the pork from the brine and pat dry. Discard the brine. Score the outside fat down to the flesh every 2″ to prevent curling in the pan.
 
In an ovenproof sauté pan, lightly coat pan with cooking spray and place over medium low heat. 
Add the pork chops and gently cook for 2-3 minutes on each side. Then place the entire pan directly into the middle of the oven.
 
Roast for an additional ~10 minutes, depending on the thickness of the meat. When poked, the meat should be springy but still yielding- what would be considered “well done” beef. 
 
Remove the pan from the oven, and remove the chops to a warmed plate. Allow the meat to rest for 5- 10 minutes before serving.
 
Pour the cherry berry sauce into the sauté pan which contains the pork chop drippings. Gently warm and stir to incorporate. You may omit this step to reduce fat content.
 
Serve the sauce warm over the pork chops.
 

Share this:

  • Click to share on Pinterest (Opens in new window)
  • Click to share on Twitter (Opens in new window)
  • Click to email a link to a friend (Opens in new window)
  • Click to share on Facebook (Opens in new window)
  • Click to print (Opens in new window)
  • Click to share on Tumblr (Opens in new window)

Filed Under: GF, gluten free, main, main course Tagged With: balsamic vinegar, cherry, gluten free, pan roasted, pan sauce, pork, pork chop, port wine

8 Tips For Making Successful Caramels

December 18, 2012 by Gail Watson

Man do I love me some caramels. They are an awesome holiday food gift and easy to make, and they are also easy to not do well.

People often say to me that they can cook but not bake. Their reasoning is that baking is specific and scientific, whereas cooking is more forgiving. To certain degrees this statement is true, but when it comes to candy making it is hard fact.

Variations in degrees, humidity, ratios or handling can make or break a candy. Some you can get away with, but honestly, not really.

Here are a few best practices and tips for making candies in general and specifically caramels.

1. Thermometer– Pre-test your thermometer for accuracy. A degree or two off can make the difference to how your sugar hardens. To test take a pot of boiling water and completely submerge the thermometer into the water without touching the bottom of the pot. Boiling water is 212˚- no higher or lower. Make a note of where your thermometer lands. If it’s a degree or two off, make a note and adjust your recipe accordingly.

2. Cleanliness– Some recipes call for an absolute grease free environment. Before making candy I rewash all utensils- bowl, pot, spatula, thermometer, measuring instruments, etc.- in hot soapy water and dry with paper towels or air dry. I do NOT use a used kitchen rag.

3. Pure Ingredients– make sure that the sugars you are using are contaminant free. If you used a wet spoon and dipped into the sugar bin, or used a measuring cup that was previously used for flour, this can contaminate the sugar. You can get away with this with baking, but not with candy making.

4. Prepare– Making candy is about timing and readiness. Have all ingredients and utensils prepared and laid out before you begin. Sugar temperatures can change quickly sometimes and you don’t want to be caught unawares.

5. Patience– Don’t rush the sugar boiling stage. A better caramelization happens with a slow development over time. It will also serve you by inadvertently overshooting the temperature when your head was turned for just a moment.

6. Eyes on the Prize– Boiling sugar is it’s own animal. It can turn quickly, and it can also hurt you. Boiling sugar is about the most dangerous thing in the kitchen- boiling oil being second.  If you get splashed with molten sugar it sticks to the skin and can cause nasty burns. So especially with inexperienced kitchen helpers, you MUST stay vigilant.

7. Don’t Stir– This is a very common mistake for first time candy making. Stirring boiling sugar causes the crystals to become unstable and start to bind. The result is grainy, cloudy or lumpy candy. When it comes to making pralines this happens to be the effect you want, but with caramels, absolutely not.  You can stir in the very beginning to incorporate the ingredients, but once it gets boiling, hands off! It will be tempting, even if sugar crawls up the sides, just let it go. Promise me-  you’ll be glad you did.

8. Don’t Touch– It’s also very common to want to poke your fingers into the just finished candy. After all it looks SO beautiful- but it will hurt you. Admire your work- from afar, and give it twice as much time as you think to cool. Sugar is dense and holds its temperature very well, so please err on the side of caution.

I’ve used several different recipes over the years. Martha Stewart printed a recipe in the latest Living issue {December 2012, pg 99} that was a bit different. Typically the heavy cream is added into the hot syrup once it has reached temperature. This recipe added the cream at the start. I was skeptical but I tried it and it was great. Pouring cream into hot sugar is a bubbling, steaming, terrifying and dangerous thing, not to mention often messy with cream boiling over onto the stove (the WORST to clean up). Adding the cream at the start avoided all that. This will now be my method of choice.

Martha Stewart’s Salted Caramels
modified from the December 2012 Martha Stewart Living Magazine
makes approx 120 pieces
 
vegetable oil, for greasing baking sheet
2c heavy cream
2.25c sugar
6T unsalted butter, cut into pieces
1.25c light corn syrup
.5t coarse salt- I used Maldon flaked salt
.5t pure vanilla extract
 
wax paper or cellophane wrappers


Lightly brush bottom ans sides of a 9×13″ rimmed baking sheet with oil. Line with parchment, leaving an overhang, and oil that as well.
 
In a heavy 5qt saucepan, combine the cream, sugar, butter and corn syrup. Bring to a boil over medium heat, and continue to boil without stirring, until the thermometer reads 248˚. It took me about 25 mins.
 
The cream will be bubbly and high at first. It will calm down as it reaches temperature and turn a beautiful caramel color.
 
Remove the pan from the heat and stir in the salt and vanilla. Immediately pour into the prepared pan and do not scrape the bottom. Just let whatever pours out fall into the pan.
 
After 3 minutes, sprinkle the top with more salt to your taste.
 
Allow the caramel to rest, uncovered, overnight or at least 8 hrs.
 
Remove the caramel from the pan and peel away the paper. With a sharp knife cut the caramels to the shape you want. .75″x 1.25″ is the size she made.
 
Immediately wrap in cellophane or wax paper. 

Enjoy, be safe and have fun. Your friends will love you for making these.

Share this:

  • Click to share on Pinterest (Opens in new window)
  • Click to share on Twitter (Opens in new window)
  • Click to email a link to a friend (Opens in new window)
  • Click to share on Facebook (Opens in new window)
  • Click to print (Opens in new window)
  • Click to share on Tumblr (Opens in new window)

Filed Under: GF, gifts, gluten free Tagged With: candy, caramels, gifts, gluten free, sweets

Heavenly Roasted Peppers with Artichoke Puree

September 26, 2012 by Gail Watson

Fall colored roasted peppers with a light green artichoke puree.

Taking the time to make fresh roasted peppers is well worth it in my book. Not only do I appreciate the better flavor, but I don’t drown them in oil either- which they simply DO NOT need! Peppers are packed in oil are to preserve them, but I eat mine right away. Instead of all that oil, I dress them with this fantastic artichoke spread, that will steal the show the next time you serve it.

Roasting peppers is a little time consuming, I won’t kid you. I usually throw mine into the oven when I’m in the midst of doing other things. If I can’t get to skinning them right away I’ll do it later- though between you and me- skin-on ain’t no bad thang either.

For company I’ll do them up right, but once a week I throw in a nice big tray of roasted peppers to keep them in the fridge for a great afternoon snack- or an addition to a sandwich.

This batch was a result of falling in love with all the colors at the farmer’s market. Seriously, how could I resist? I pulled them into my arms like I was arranging flowers. Once they were roasted I had a blast arranging them into a contemporary painting of colors on the platter.

I’m also really loving this artichoke dip. This was a bit of stroke of serendipity when I came up with this. At Fairway they sell lovely little jars of artichoke puree for a mere $9 each. On the other side of the aisle are the bins of pickles, olives and- artichokes. Do I need to explain my thinking?

The addition of the rosemary is just stellar. The pine flavor rosemary makes the artichokes sparkle and it compliments the peppers too. I make myself a good batch of this. It’s so good on so many things.  Rather than mayo I use this garlicky spread on my sandwiches. The flavor is amazing and it’s just as satisfying.

Strips of bright colored peppers with a nice addition of artichoke puree

So now you can add a brightly colored serving of delicious and healthy vegetables into your weekly menu.

Roasted Peppers with Garlicky Artichoke Puree
If you prefer to use pre-made peppers, that’s fine. Drain off the extra oil and reserve for salad dressing. The artichoke dip is also wonderful with other veggies too. You’ll fall in love, I promise.
 
serves 3 plus one cup of dip
 
6 peppers of varying types
1 can of artichoke hearts packed in water
1 small clove of garlic, crushed and rough chopped
2t fresh lemon juice
S & P
1T olive oil 
1T fresh rosemary
 
Preheat oven to 350˚ and line cookie sheets with foil
 
Slice peppers in half and deseed. Arrange top down on sheets. Roast until blistered and a bit shriveled. Abt 45 mins.
 
Allow the peppers to cool, then peel off skins. Slice into thin strips and arrange on a plate.
 
 
In a food processor combine drained artichokes, garlic, S&P and olive oil.
 
Puree until smooth. If necessary you can add a little water to reach desired consistency.
 
Spoon puree over the peppers and top with chopped fresh rosemary.
 
Store leftover puree in the fridge for up to a week.


Share this:

  • Click to share on Pinterest (Opens in new window)
  • Click to share on Twitter (Opens in new window)
  • Click to email a link to a friend (Opens in new window)
  • Click to share on Facebook (Opens in new window)
  • Click to print (Opens in new window)
  • Click to share on Tumblr (Opens in new window)

Filed Under: appetizer, GF, gluten free, Healthy Recipes, sides, Small Tagged With: appetizer, artichokes, gluten free, healthy, peppers

« Previous Page
Next Page »

Primary Sidebar

Thank you so much for your LIKES!

Thank you so much for your LIKES!
The Inner Circle
Join the Inner Circle For Exclusive Content
No Worries. This is just between us.

Top Posts & Pages

The {Famous} NY Times- No Knead Bread
Country Pate {Pate de Campagne}
Spaetzle: Delicate Dumplings
Red Curry Chicken with Gingered Black Rice
Grilled Steak with Tomatillo Salsa
Cantaloupe Slush Cocktail with Aperol
my healthy aperture gallery
Certified Yummly Recipes on Yummly.com
Homemade Hot Sauce Link~ HuffingtonPost

Copyright © 2025 · Genesis Framework · WordPress · Log in