• Skip to content
  • Skip to primary sidebar

A Stack of Dishes

Something good is cooking...

  • Home
  • About
  • Recipe Index
    • Bakery
    • Dessert
    • Chocolate
    • Appetizers
    • Healthy Recipes
    • Main Course
    • Small Meals
    • Breakfast
    • Gluten Free
    • Side Dishes
    • Cocktails
    • Condiments
    • Gifts
  • Delicious Links

gluten free

Tuna Tartare on Grilled Potato Slices

July 31, 2012 by Gail Watson

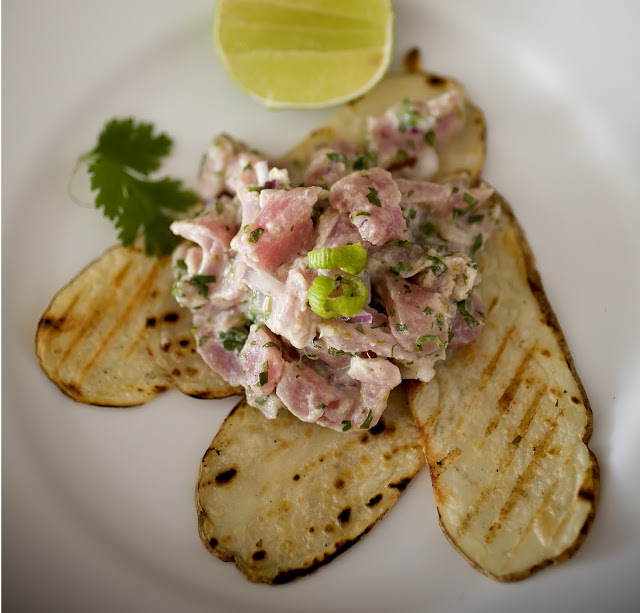
While I was downtown in Chinatown searching for langon fruits, I spied me some beautiful Tuna. Whenever I see really good quality Tuna I hate the thought of cooking it. It’s just to gorgeous for that. What the fish monger hated even more was my instruction of the exact piece that I wanted. I don’t like to be a pain….nah, not true, I can be a nudge. I figure Italian grandmothers can get away with it, why not a Latina/Irishwoman?? Trust me though, I let that guy know that I really appreciated his efforts. In the end everyone was happy.

While stumbling around I also came across some fresh, tight Thai Chilies. You may see them in the market as more stores are starting to carry them. They are small, slim and green, and pack a smart punch that can really sting if you’re not careful. I, as you know, love them. Feel free to switch out to jalepenos of a lesser quantity if your not a heat freak like me, or eliminate altogether. I would add a good grind of black pepper at least though…

So once back in my kitchen with the spoils of my excursion, I sliced up a few potatoes as thin as I could get them, oiled them, and threw them on my grill pan. While the potatoes softened and charred, I pulled together the tartare.

I think tartare should be made a la minute, meaning not in advance. Though perfectly good the next day, I prefer it fresh, before the lime juice has a chance to do too much work on that beautiful tuna, but if you’re making a batch for a get together, go ahead and make it beforehand- just keep it cold, cold, cold.

So here you have it. My late afternoon lunch.

I need to head downtown more often…

Tuna Tartare on Grilled Potato Slices
serves 4
 
4 potatoes, scrubbed and sliced by hand as thinly as possible
1.25# of fresh sushi grade tuna
3T toasted sesame oil
.25 c cilantro
1 juicy thai chili, minced finely
zest and juice from 3 limes
3T minced red onion
pinch of salt
 
Heat grill pan to high. Brush potato slices with oil and grill on one side until translucent  then flip to second side. Cook in batches until all are done and arrange on plates.
 
In medium size bowl combine all the ingredients except the tuna. Taste for acid and chili balance. 
 
I tossed my tuna into the freezer as I was starting the potatoes so that I can get neater slices from the cold fish. Do no freeze completely though.
 
Dice the tuna into small pieces, then toss the lot into the dressing. Give it all a thorough coating and let rest for just a minute or two. I taste again for flavor balance. 
 
Divide the tuna between the plates and enjoy!

Share this:

  • Click to share on Pinterest (Opens in new window)
  • Click to share on Twitter (Opens in new window)
  • Click to email a link to a friend (Opens in new window)
  • Click to share on Facebook (Opens in new window)
  • Click to print (Opens in new window)
  • Click to share on Tumblr (Opens in new window)

Filed Under: appetizer, GF, gluten free, Healthy Recipes, main, Small Tagged With: fish, gluten free, lunch, tuna, tuna tartare

Chicken Crusted with Wasabi Peas and Slaw with Thai Peanut Dressing

July 9, 2012 by Gail Watson

The flavors here in Thailand are a symphony compared to a song. It is not unusual to take a bite and have so many taste sensations going on at once that it can be staggering: sweet, sour, spicy, deep umami and texture.

On my first trip to Chaing Mai everything was a delight (ok, the beans on the ice cream I could have done without), but this trip I am learning more of the nuances and quality of Thai food. There are cooks and chefs, and it’s apparent that it’s not the ingredients that separates the two, it’s the finesse, the grace and the balance.

What I can tell you is that the comparable ingredients that are available to me in NYC are not exactly the same as here. The limes I find sweeter here, and the tamarind more sour than tart- but don’t let that dissuade you.  Preparing Thai food is not difficult and the results are fantastic.

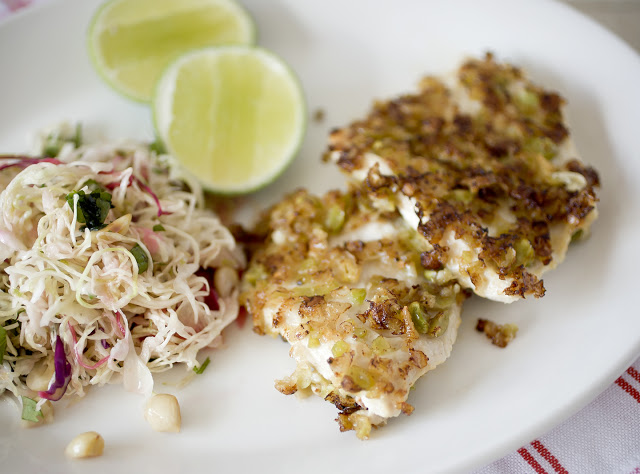
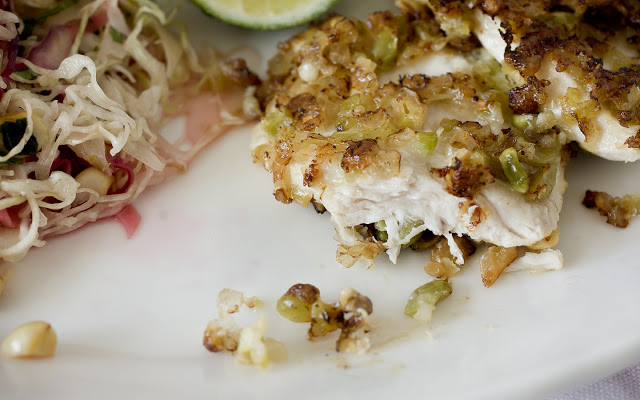
I love making this dish with the wasabi peas. The texture is fantastic and the bite of wasabi is not terrifically sharp when balanced with the chicken. My advice is the slice your chicken into thin pieces, or pound out thinly- otherwise the peas can burn before the chicken cooks through. An alternative is you can bake large pieces of chicken, such as breasts on the bone, and that would be fine.

The Thai dressing on the slaw will make you new friends. It’s so simple and so delicious that I invite you to make a batch and pour it over everything you can get your hands on. A great alternative on tomatoes and cucumbers out of the summer garden for instance.

I’ve never been a huge fan of mayonnaise rich cole slaw, nor of it’s picnic cousins potato and macaroni salad- but raw cabbage is delicious and tremendously healthy. I love this dressing on shredded cabbage. The red cabbage when mixed with the acid of the lemon juice draws out the color to a bright pretty pink. Both pretty and yummy- make more than you think- it goes fast.

Chicken Crusted with Wasabi Peas
serves 4
 
2# skinless chicken breasts sliced very thin
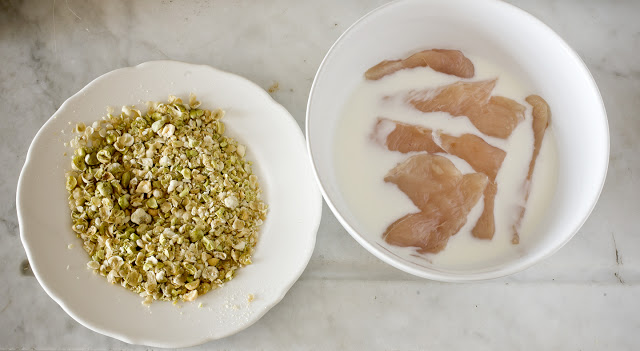
2c wasabi peas, roughly crushed
1c buttermilk
1 clove garlic crushed
grand pinch of salt
oil for frying pan
 
Note on frying: get our that honkin’ heavy cast iron frying pan and use it. As time goes by I am less and less a fan of nonstick pans. A well seasoned and loved cast iron pan can be a girl’s best friend. I used little oil for this recipe-less than I would in a nonstick- and my chicken cooked beautifully. Buffed biceps are a bonus.
 
combine garlic, salt and buttermilk in a bowl and allow to sit for a few minutes to flavor the buttermilk.
 
Meanwhile prepare the peas and place on a flat plate or low shallow bowl.
 
Preheat cast iron pan over medium heat with just enough oil to cover the bottom.
 
slip all the chicken into the buttermilk to coat and soak.
 
Press each fillet into the peas, pressing hard to get good adherence.
 
Cook the chicken on each side about 2-3 minutes or until cooked through.
 
serve immediately.
 
 
Cabbage Slaw with Thai Peanut Dressing
serves 4
 
4-6c finely shredded cabbage
 
1T toasted sesame oil
2T sugar
2T brown sugar
2T fresh lemon juice
2T fresh lime juice
2T chopped fresh mint
1 small thai chili finely chopped, or 2t jalapeno (optional)
3/4 c roasted, chopped, unsalted peanuts
 
Combine dressing ingredients into large bowl and stir to combine and melt sugars.
 
Toss in the slaw and allow to sit for 15 mins before serving.


___________________________
 
 
My partner and I are planning on organizing Thai Food cooking trips in the future. We have connections to some of the best Thai chefs. My partner is fluent in Thai and lived here for many years. The next trip will probably be in January to Northern Thailand. I would love to know if there is interest. Drop me a note if you would like to be placed on the mailing list for more information.
 
Sawaadii Khaa!
 

Share this:

  • Click to share on Pinterest (Opens in new window)
  • Click to share on Twitter (Opens in new window)
  • Click to email a link to a friend (Opens in new window)
  • Click to share on Facebook (Opens in new window)
  • Click to print (Opens in new window)
  • Click to share on Tumblr (Opens in new window)

Filed Under: GF, gluten free, Healthy Recipes, main, main course Tagged With: chicken, gluten free, main course, peanut dressing, spicy, thai, vegetables

{Day 6} Flavored Oils

December 7, 2011 by Gail Watson

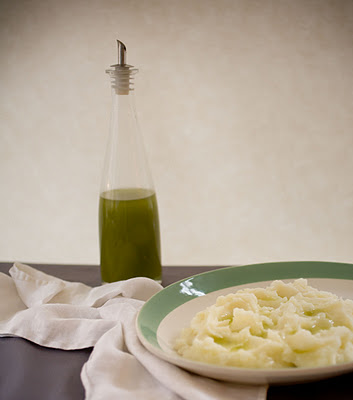
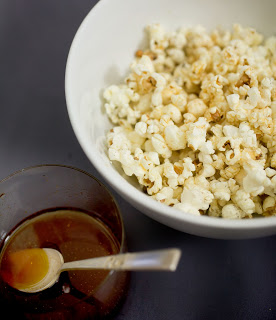
When the day has been long and that chicken in the fridge just looks so, well, geez- another chicken? A splash of flavored oil can make the simple sublime. Mashed potatoes get beautiful chartreusey green puddles of yum with basil oil, take a weeknight pasta and drizzle it with smoked paprika oil and the next time you feel like popcorn- make it the old fashioned way on the stove and use a lemon or rosemary oil to pop the corn and then splash some more on top instead of butter. Sensational in a snap. Love it.
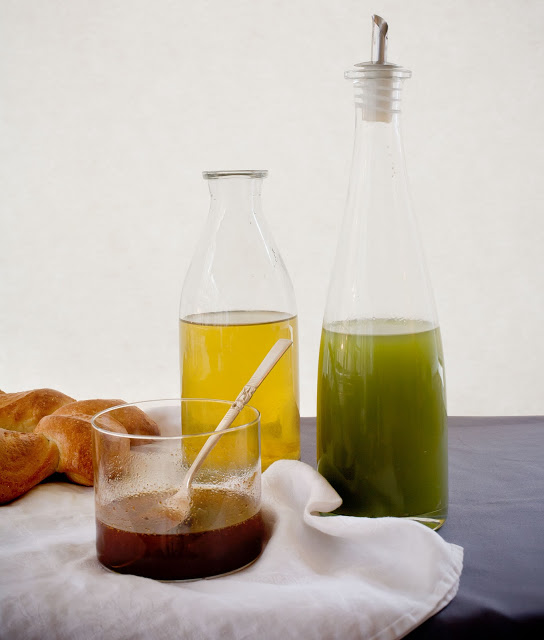
The best part is that flavored oils not only are a great go-to, but easy to make and easily makes smiles when you give them away. Three versions here today, lemon, basil and smoked paprika. I know, sounds way too simple right? why not Thai basil with vanilla and chilis? Because these are the staples, like I said, the go-to’s, the good pals that are there when you need them. From here all things are possible and limitless, but feel free to be creative, I won’t mind. Take these oils as a base and feel free to add to them.
There are two methods to adding flavor to oil, both simple. The hot method: warm oil, add flavoring in the form of herbs or spices and allow to steep, then filter and bottle.  The cold diffusion method requires just adding the flavor to the oil and give it plenty of time to steep. I made the lemon oil this way which infused a brightness from the lemon that is just out of this world.
If you decide to leave leaves, or zests or especially garlic in your bottles- be sure that they be stored in the fridge. Weird things can start growing and that is just not a good thing.
I bottle mine in smaller bottles when giving them away. They can be tucked into bags with other treats, given as pairs or sets, and it doesn’t impose the receiver to give up too much fridge or counter space. Besides, little jewels are also so much more delightful, and who doesn’t like jewels?
Hot Oil Infusion Method
No quantities here, this is by your taste- but a good start is one bunch of fresh herbs to every quart of oil or 3T of spices. Use a mild olive oil over a plain vegetable oil.
Warm oil to 185˚ in a heavy duty saucepan.
Add bruised fresh herbs or combine all in a blender for more intense and faster results.
or add spices that have first been dry toasted in a pan stovetop. Toasting releases the oils and aromatics to get the party started.
Once cooled  and rested overnight, taste the oil for flavor balance. Add more oil to the batch if it’s strong or rewarm and add more flavoring. The flavors do take a few days to develop so don’t expect too much at first, by day 3 or 4 you are truly there.
Cold Oil Infusion Method
Take bottle, add herbs or spices, pour over oil. Done. Good. Mostly.
I made the lemon oil by whizzing a cup of oil with the zest of one lemon in a blender then added it into a quart of oil. All that beating and battering released more oils into the base and can I tell you? divine. It left the oil cloudy at first but a few days later- sparkling lemon flavor and a clear oil.
Bruise any fresh herbs first, let them steep in the oil in a bucket or large jar for at least 2 weeks and then strain. If you like the look you can put fresh pretty herbs and spices into the gift bottles for a nicer presentation.

Share this:

  • Click to share on Pinterest (Opens in new window)
  • Click to share on Twitter (Opens in new window)
  • Click to email a link to a friend (Opens in new window)
  • Click to share on Facebook (Opens in new window)
  • Click to print (Opens in new window)
  • Click to share on Tumblr (Opens in new window)

Filed Under: GF, gifts, gluten free Tagged With: basil, flavored oils, gifts, gluten free, holiday gifts, lemon, paprika

« Previous Page
Next Page »

Primary Sidebar

Thank you so much for your LIKES!

Thank you so much for your LIKES!
The Inner Circle
Join the Inner Circle For Exclusive Content
No Worries. This is just between us.

Top Posts & Pages

The {Famous} NY Times- No Knead Bread
Country Pate {Pate de Campagne}
Power Packed Oat Scones: One healthy, the other healthier
Lentil and Kale Salad with Carmelized Parsnips
Spaetzle: Delicate Dumplings
Red Curry Chicken with Gingered Black Rice
my healthy aperture gallery
Certified Yummly Recipes on Yummly.com
Homemade Hot Sauce Link~ HuffingtonPost

Copyright © 2025 · Genesis Framework · WordPress · Log in